
除了介紹使用Yanki外掛形成克漏字筆記外,也介紹共享牌組「可输入答案的填空模板」達成美觀、方便的克漏字筆記作法,最後再透過Templater Hotkey腳本以快捷鍵快速組成克漏字的填空欄位。
◎ 範例
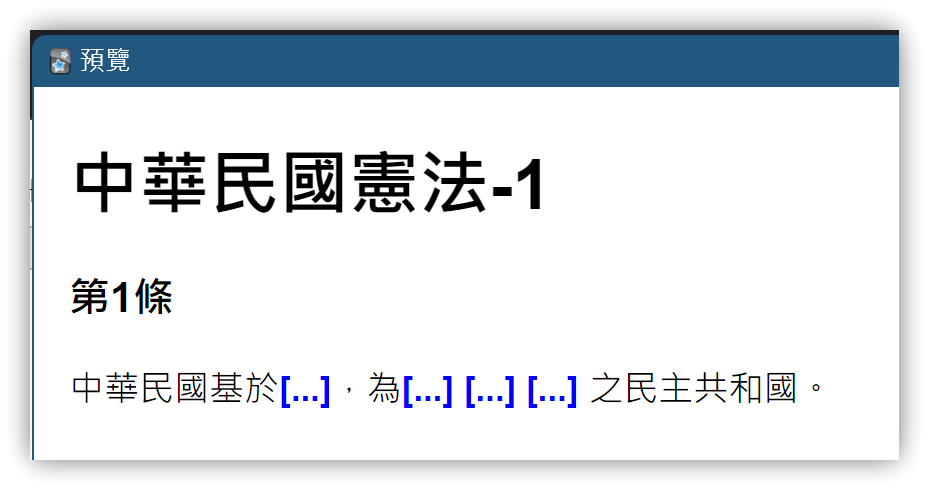
中華民國憲法 第1條
中華民國基於三民主義,為民有民治民享之民主共和國。
中華民國基於{{三民主義}},為{{c1::民有}} {{c2::民治}} {{c3::民享}} 之民主共和國。
1. Yanki Cloze
- 用兩個波浪號夾住填空資料
- 依序將波浪號匯出成
{{c序號::資料}}格式,序號由 1 遞增
中華民國憲法 第1條
中華民國基於~~三民主義~~,為~~民有~~ ~~民治~~ ~~民享~~ 之民主共和國。
- 同步後Anki的正面:
中華民國憲法 第1條
中華民國基於{{c1::三民主義}},為{{c2::民有}} {{c3::民治}} {{c4::民享}} 之民主共和國。
- 幾個填空就產生幾張卡片
1.1. 筆記類型樣式修改
- 功能表 【工具】→【管理筆記類型】,選用 【Yanki - Cloze】→【卡片】
- 【模板】→【樣式】
.card: 用text-aligh: left將內容靠左.cloze: 將填空資料改為粗體藍字
.card {
    font-family: arial;
    font-size: 20px;
    text-align: left;
    color: black;
    background-color: white;
}

.cloze {
 font-weight: bold;
 color: blue;
}
1.2. 同組Cloze
- 目前Yanki無法設置同一組的克漏字,即
{{c2::到{{c4::皆以{{c1::設置為同一組:
中華民國基於~~三民主義~~,為{{c1::民有}} {{c1::民治}} {{c1::民享}}之民主共和國。
2. 共享牌組:可输入答案的填空模板
- 瀏覽共享牌組:可输入答案的填空模板 - 翏央 / chehil - AnkiWeb
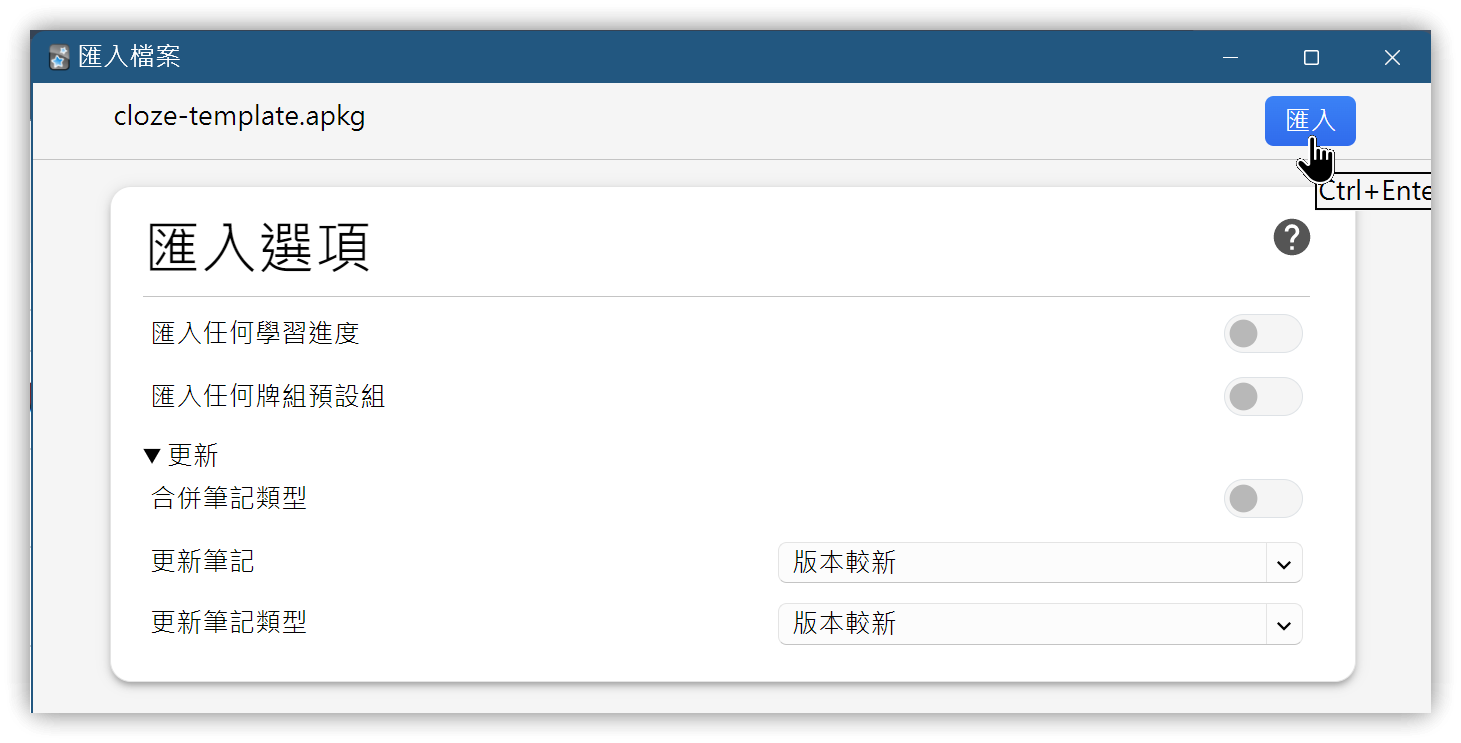
- 將下載的 .apkg 檔案存入本地
- Anki 【牌組】→【匯入檔案】,選用下載的 .apkg 檔→【匯入】,完成後關閉匯入檔案視窗
- 匯入的牌組名稱:
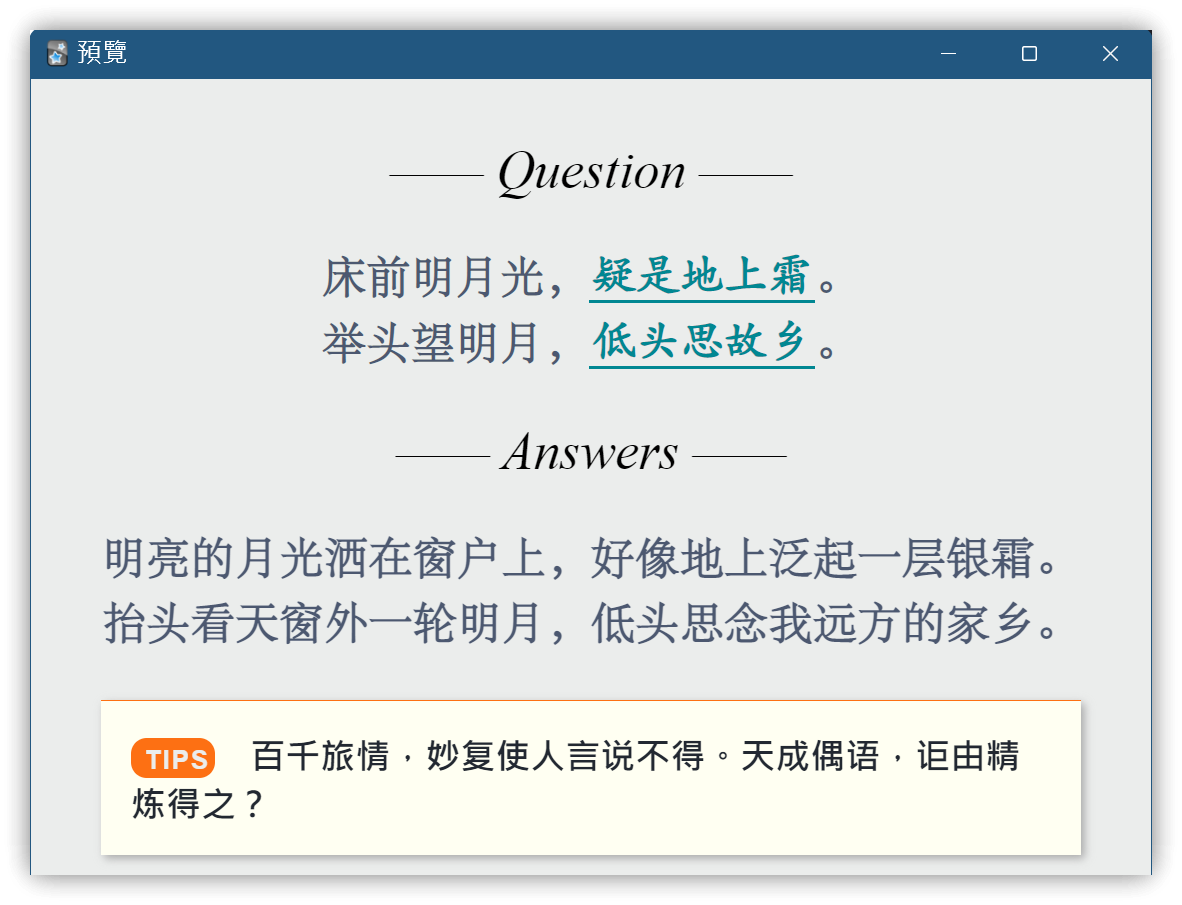
*可输入答案的填空模板,瀏覽匯入的筆記卡片 - QUESTION欄位內容:
床前明月光,{{疑是地上霜}}。
举头望明月,{{低头思故乡}}。
- 瀏覽卡片正面時,筆記類型裡的~~{1}JavaScript~~腳本會特別制兩個大括號內的文字
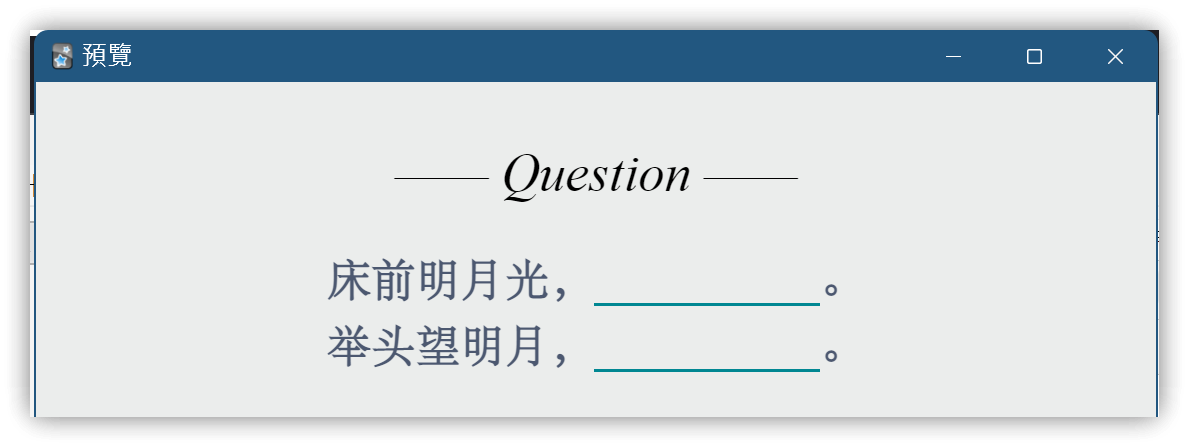
- 填空位置可輸入答案於背面比對是否正確。背面:
2.1. 筆記類型:Type Cloze @翏央chehil
- 正面模板
<div class=slide>
  <div class=qu>—— Question ——</div>
  <p></p>
  <div class=question>{{QUESTION}}</div>
</div>

<script>
  TYPE = '1';
  function toggle(cloze) {
    var key = cloze.getElementsByClassName("key")[0];
    var entry = cloze.getElementsByClassName("entry")[0];
    if (entry.style.display == "none") {
      if (TYPE) {
        key.style.display = "none";
        entry.style.display = "inline";
        if (entry.contentEditable == "true") {
          entry.focus();
          entry.onblur = function() {
            answer = entry.textContent.trim()
            if (answer == key.textContent.trim()) {
              entry.style.color = "green";
              entry.innerHTML = answer + '✔';
            } else {
              entry.style.color = "red";
              entry.innerHTML = answer + '✘';
            }
            key.style.opacity = 1;
            entry.contentEditable = false;
          }
        }
      } else {
        key.style.opacity = 1 - key.style.opacity;
      }
    } else {
      entry.style.display = "none";
      key.style.display = "inline";
    }
  }

  [].forEach.call(document.querySelectorAll('.question'),
    function(V0) {
      V0.innerHTML = V0.innerHTML.replace(/\{\{((?:.|\r?\n)+?)\}\}/g,
        '<span class="cloze" onclick="toggle(this)">' +
        '  <span class="key" style="opacity:0">$1</span>' +
        '  <span class="entry" style="display:none;" contenteditable="true"></span>' +
        '</span>')
    });
</script>
- 背面模板
 : 全形空白
<div class=qu>—— Question ——</div>
<p></p>
<div class=question>{{QUESTION}}</div>
<hr color=#ebedec>
<div class=slide>
<div class=an>—— Answers ——</div>
<div class=hr3></div>
<div class=hr4></div>
<p></p>
<div class=answer>{{ANSWER}}</div>
<p></p>
{{#TIPS}}
<div class=Tips><ti>TIPS</ti> {{TIPS}}</div>
{{/TIPS}}
</div>
<script>
TYPE = '1';
function toggle(cloze) {
var key = cloze.getElementsByClassName("key")[0];
var entry = cloze.getElementsByClassName("entry")[0];
if (entry.style.display == "none") {
if (TYPE) {
key.style.display = "none";
entry.style.display = "inline";
if (entry.contentEditable == "true") {
entry.focus();
entry.onblur = function() {
answer = entry.textContent.trim()
if (answer == key.textContent.trim()) {
entry.style.color = "green";
entry.innerHTML = answer + '✔';
} else {
entry.style.color = "red";
entry.innerHTML = answer + '✘';
}
key.style.opacity = 1;
entry.contentEditable = false;
}
}
} else {
key.style.opacity = 1 - key.style.opacity;
}
} else {
entry.style.display = "none";
key.style.display = "inline";
}
}
[].forEach.call(document.querySelectorAll('.question'),
function(V0) {
V0.innerHTML = V0.innerHTML.replace(/\{\{(.+?)\}\}/g,
'<span class="cloze" onclick="toggle(this)">' +
' <span class="key" style="opacity:0">$1</span>' +
' <span class="entry" style="display:none;" contenteditable="true"></span>' +
'</span>')
});
[].forEach.call(document.querySelectorAll('.key'),
function(key) {
key.style.opacity = 1
key.style.display = "inline";
});
[].forEach.call(document.querySelectorAll('.entry'),
function(entry) {
entry.style.display = "none";
});
</script>
- 樣式
@font-face { font-family: STsong; src: url('_STsong.TTF'); }
@font-face { font-family: STfangsong; src: url('_STfangsong.TTF'); }
@font-face { font-family: kt; src: url('_kt.ttf'); }

.card {
 	padding: 15px 20px;
	font-family:STsong, Arial, serif;
	font-size: 25px;
 	color: #000;
 	background: #ebedec;
}

.qu {
 	font: 30px Times;
 	font-style: oblique;
 	text-align: center;
}

.an {
 	font: 30px Times;
 	font-style: oblique;
 	text-align: center;
}

.question {
	color: #4c5870;
	font-weight: bolder;
	letter-spacing: 0.016em;
	line-height: 150%;
	text-align: justify
}

.answer {
	color: #4c5870;
	font-weight: bolder;
	letter-spacing: 0.016em;
	line-height: 150%;
	text-align: justify
}

ti{
	border-radius: 9px;
	padding: 4px 3px 2px 8px;
 	font: bold 15px Arial;
	text-align: left;
	letter-spacing: 1px;
	color: #ebedec;
	background: #FD7013;
}

.Tips{
 	min-height: 24px;
 	border-top: 1px solid #FD7013;
 	padding: 17px;
	font-size: 20px;
	font-family:仿宋;
	font-weight: bold;
 	text-align: left;
	color: #222831;
	background:#FFFFF2;
	box-shadow: 2px 2px 5px #aaaaaa;
}

.slide {
	position:relative;
	-webkit-animation:slide 2s 0s;
	-webkit-animation-fill-mode:forwards; }

@-webkit-keyframes slide {
	0%		{ opacity: 0;     top: 40px; }
	100%		{ opacity: 1;     top: 0px; }
}

.card.nightMode {
	color: #ebedec;
	background: #121212;
}

.nightMode .question {
	color: #9ba6b2;
}

.nightMode .answer {
	color: #9ba6b2;
}

.nightMode ti {
	color: #121212;
	background: #f9a825;
}

.nightMode .Tips {
	border-top: 1px solid #f9a825;
	color: #ebedec;
	background:#1e1e1e;
	box-shadow: 2px 2px 5px #000000;
}

.cloze {
	color: #008792;
	padding:0 2px;
	border-bottom: solid;
	font-family:kt;
	font-weight:bold;
	letter-spacing:0.002em
}

.nightMode .cloze {
	color: #65bd7b
}
2.2. Yanki - Basic使用翏央填空模板
- 將模板內的
{{QUESTION}}改成{{Front}} - 將模板內的
{{ANSWER}}改成{{Back}} - 移除
{{TIPS}}相關內容 - 插入樣式
3. Anki內建欄位語法
- {{#欄位A}} 如果名為「欄位A」的欄位內容是空的,則
{{#欄位A}}到{{/欄位A}}之間的資料不會被顯示- 上列背面模板中,若TIPS欄位沒有內容,則
{{#TIPS}}到{{/TIPS}}之間的內容就不會被顯示
- 上列背面模板中,若TIPS欄位沒有內容,則
- {{^欄位A}} 如果名為「欄位A」的欄位內容是空的,
{{^欄位A}}到{{/欄位A}}之間的內容會被顯示 {{type:欄位名}}在正面與背面都必須放才有用。輸入框功能。輸入框樣式:
input#typeans {
  text-align: center;
  margin: 6px 0;
  margin-left: -14px;
  font-size: 22px;
  padding: 6px 12px;
  outline-style: none;
  color: #18577F;
}
- 克漏字
{{cloze:欄位名}}輸入:{{type:cloze:欄位名}}
4. 快速插入克漏字符號:使用Templater Hotkey
- 選取好要填空的文字後,按下按鍵快速插入需要的符號
| 按鍵 | 功能 | 檔名 | prefix |
|---|---|---|---|
| Alt+` | 插入翏央填空的兩個大括號 {{文字}} |
Cmd-anki-cloze.md | {{ |
| Alt+1 | 插入Anki第一個填空欄位 {{c1::文字}} |
Cmd-anki-cloze-c1.md | {{c1:: |
| Alt+2 | 插入Anki第一個填空欄位 {{c2::文字}} |
Cmd-anki-cloze-c2.md | {{c2:: |
| 以此類推... |
4.1. 步驟
- 建立需要的.md檔,貼入Templater腳本內容
- Templater選項設定,添加各.md檔
- 快速鍵設定設置對應按鍵
▼ Cmd-anki-cloze-c1.md (將小於改成半形小於符號,prefix變數改成對應的文字)
小於%*
let selObj = window.getSelection();
let text = selObj.toString();
let prefix = "{{c1::";  // 變更前綴
let isClozed = false;
if (text.startsWith(prefix)) {
  isClozed = true;
  text = text.substring(prefix.length)
}
if (text.endsWith("}}")) {
  isClozed = true;
  text = text.substring(0, text.length-2)
}
if (!isClozed) {
  text = prefix + text + "}}";
}
return text;
-%>
5. 💡 相關鏈接
💡 解說文章: https://jdev.tw/blog/8477/
💡Explanation article(English): https://quaily.com/jdevtw-en/p/obs163-yanki-anki-cloze-flashcard-techniques
💡解説記事(日本語): https://quaily.com/jdevtw-jp/p/obs163-yanki-anki-cloze-flashcard-techniques
✅Yanki: https://github.com/kitschpatrol/yanki-obsidian
✅ 可输入答案的填空模板 - 翏央: https://ankiweb.net/shared/info/356679663
6. 教學影片
##