Filmora is an easy-to-use, feature-rich video editing program that allows people with only basic video editing knowledge to easily create professional and eye-catching videos or thumbnails.
This Filmora tutorial series will focus on various editing highlights and techniques specifically for making tutorial videos. If you need to create tutorial videos, I hope this series can help you get started and become proficient more quickly.
This guide uses multiple text examples to help viewers fully understand Filmora's text design techniques. By demonstrating text attributes through examples, you can more easily master various text variations.
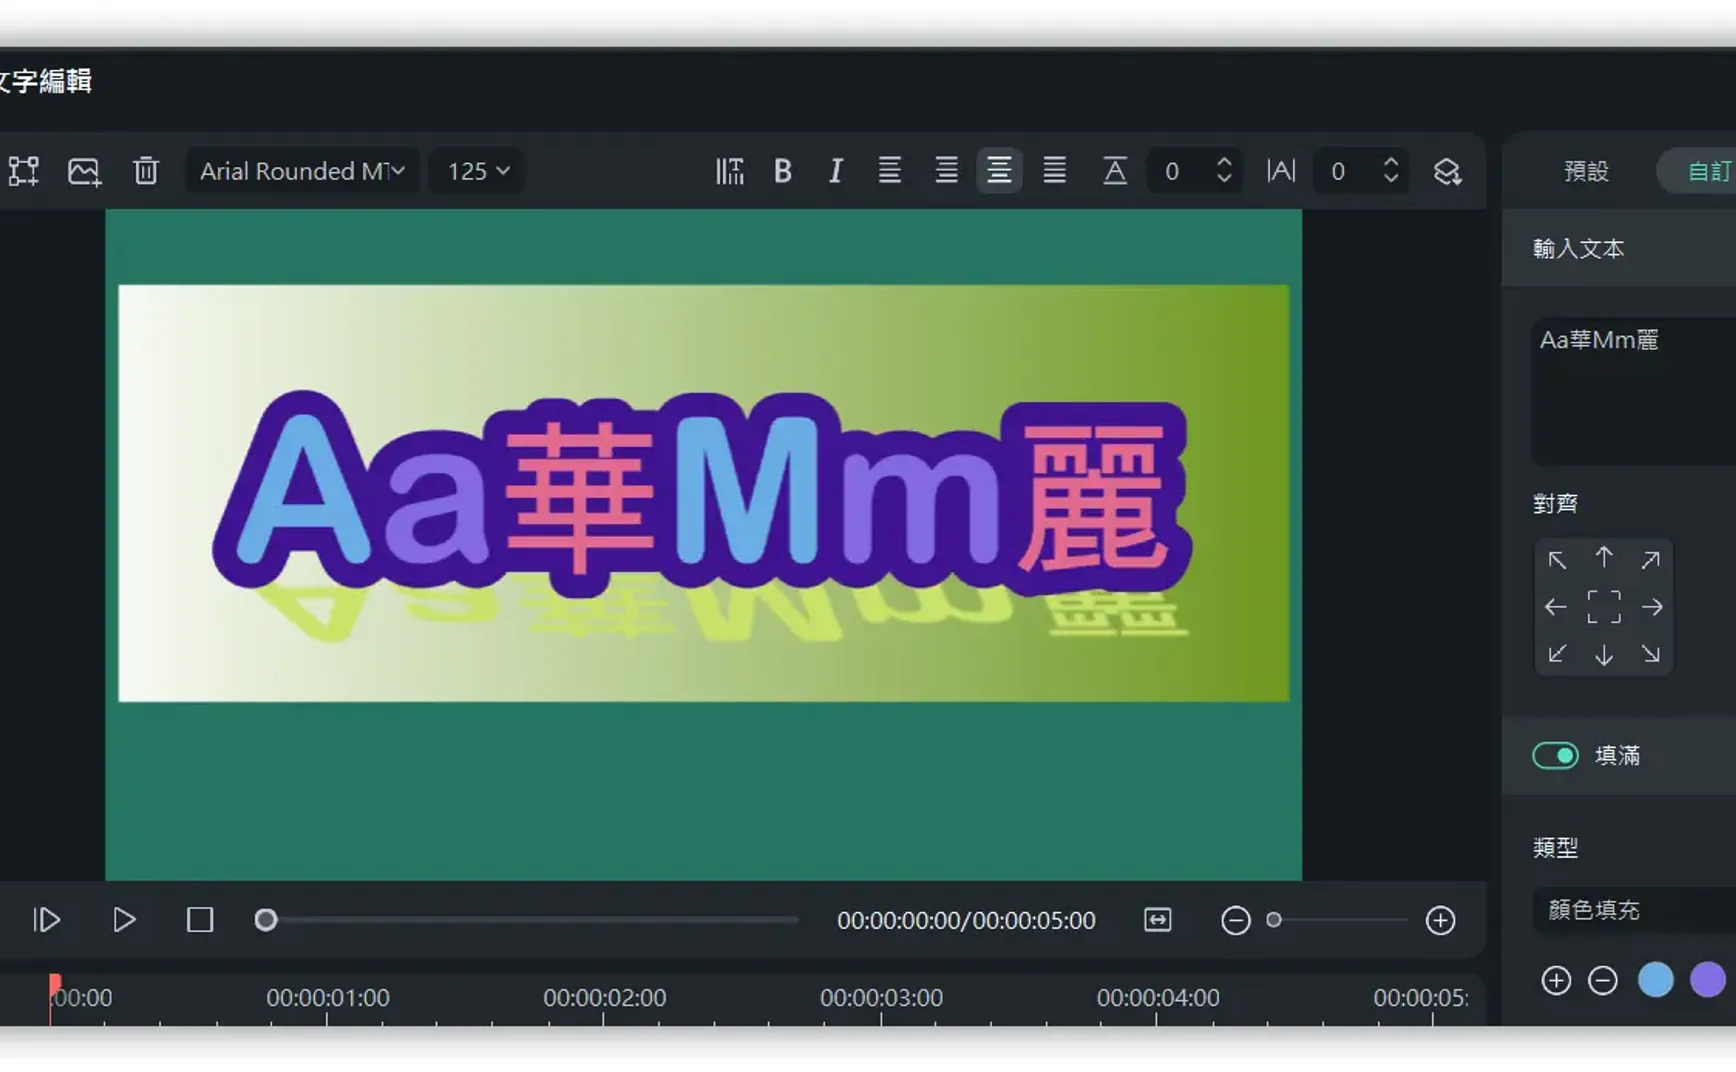
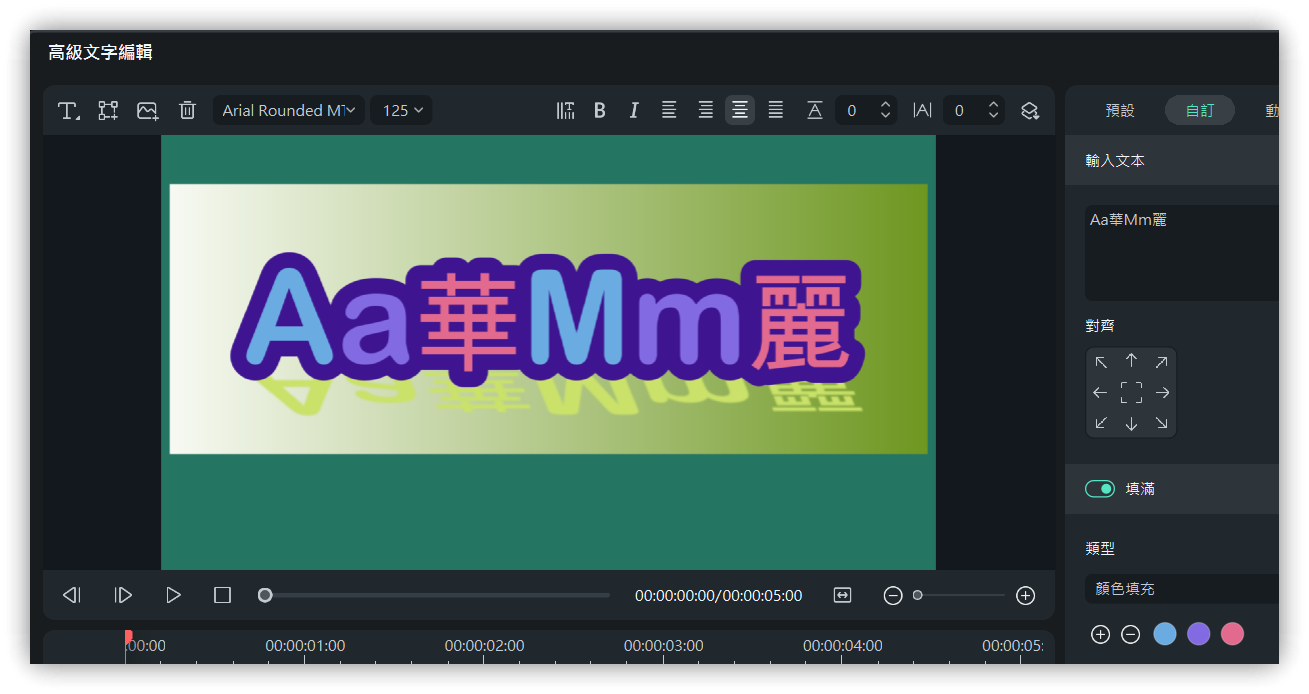
1. One Color Per Character
- Fill: Enabled
- Type: Color Fill
- Color: Increase to three colors
2. Outline Text

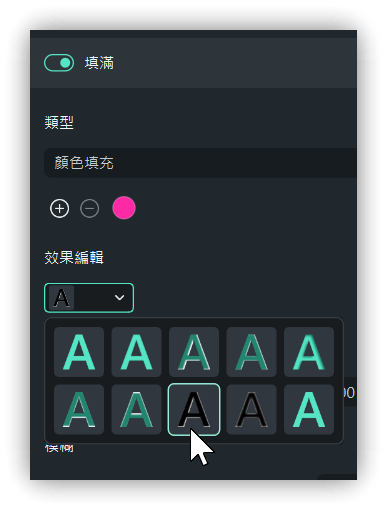
- Another method: Fill with the same color as the background
- Another method: Fill → Opacity select 0
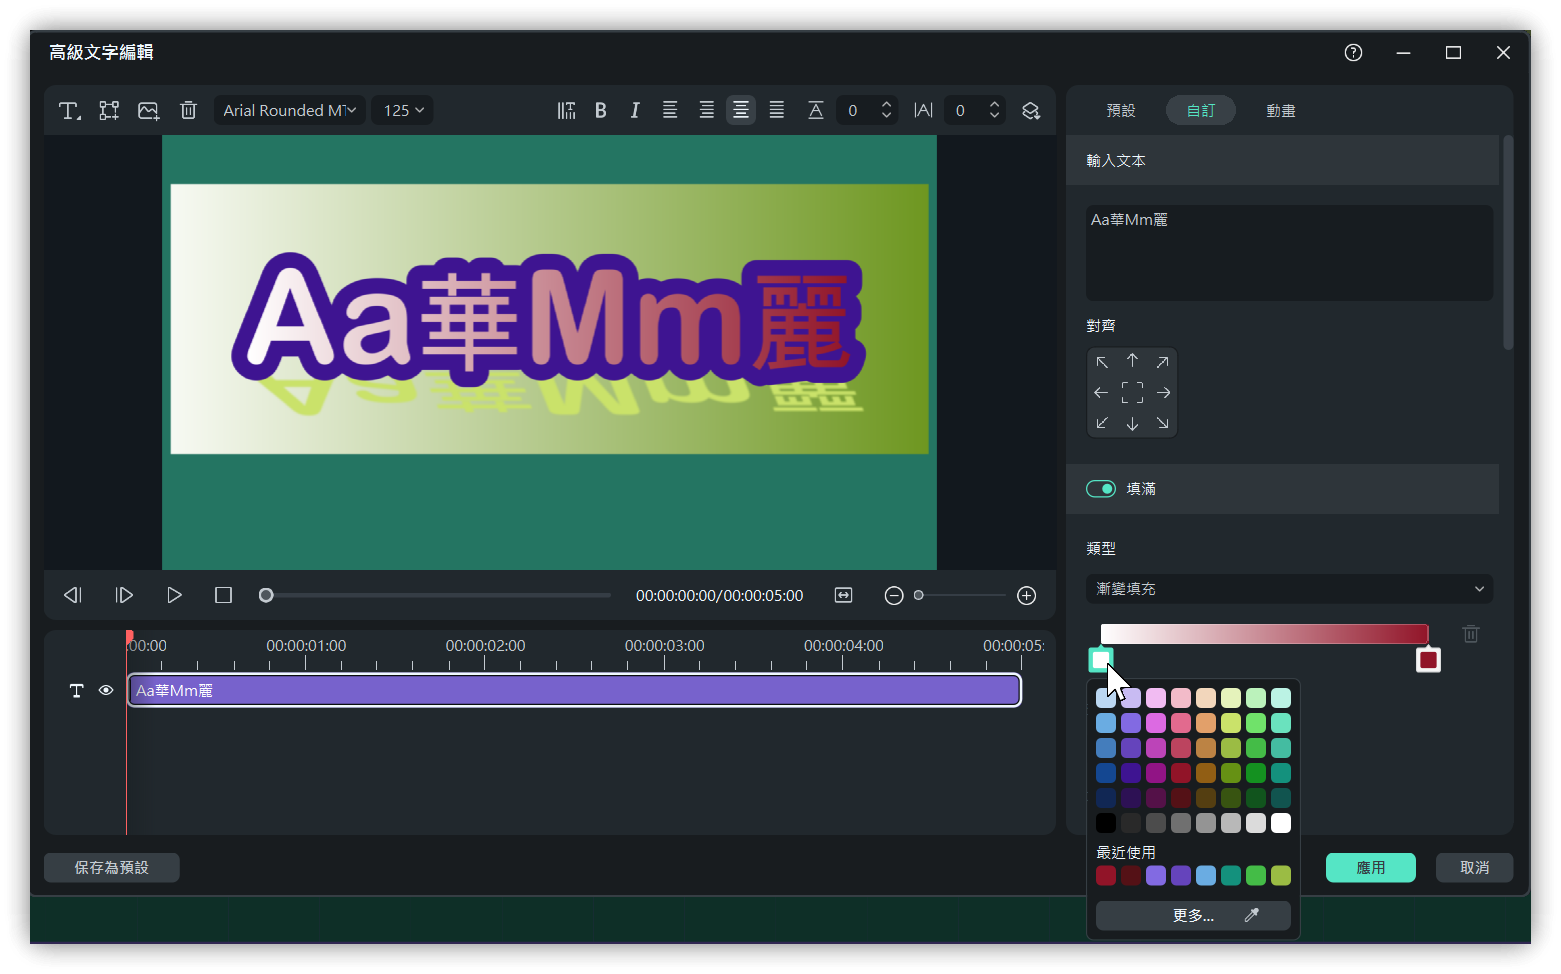
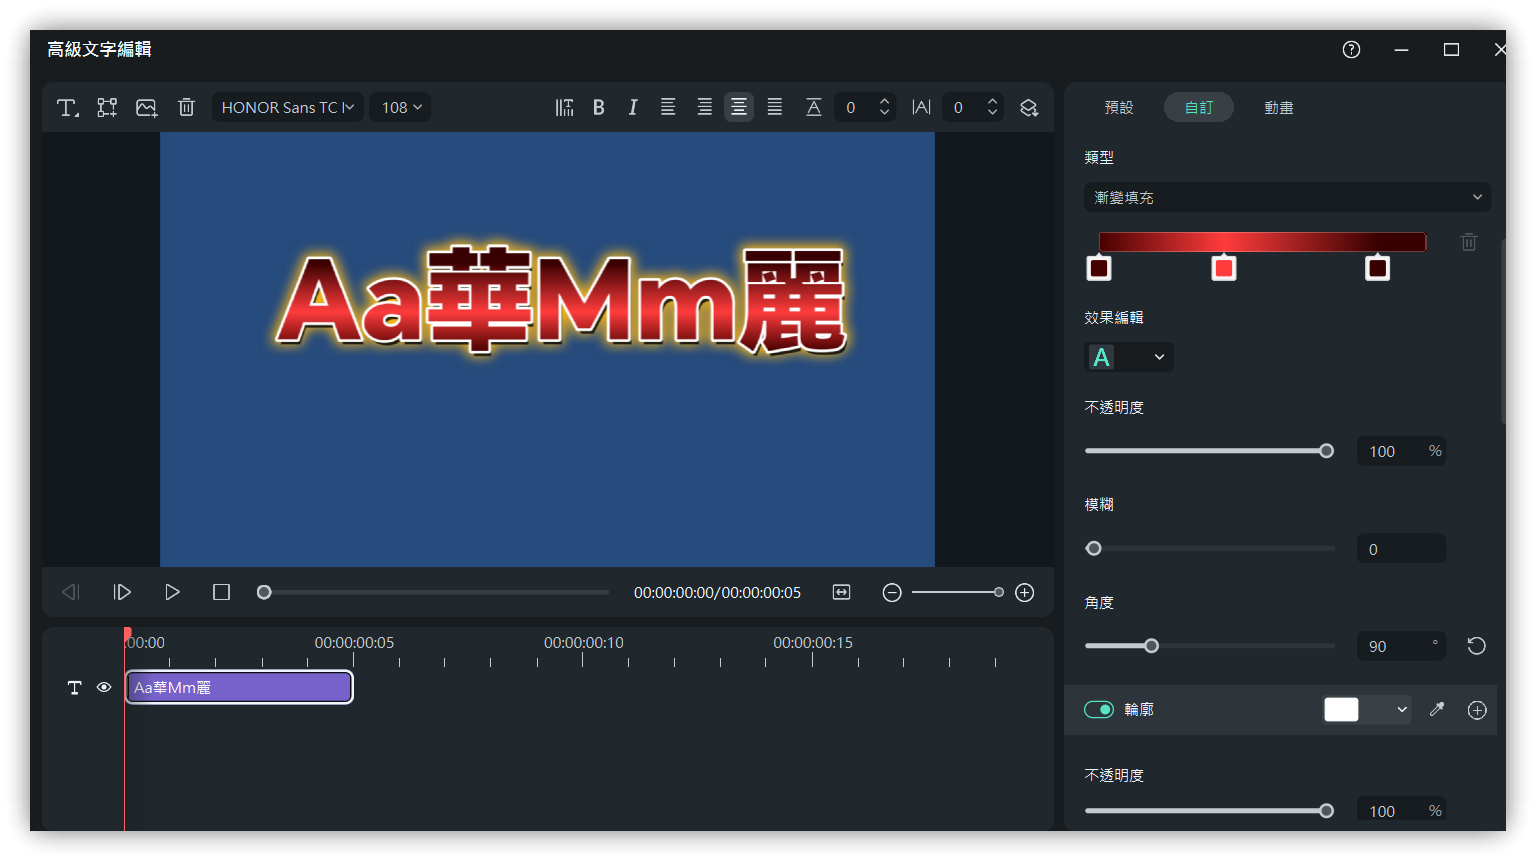
3. Gradient
- Fill: Enabled
- Type: Gradient Fill
- Color: Specify start and end colors
- Double-click the small color square to open the color picker window.
- Single-click a small color square to drag and change its position.
- Double-click the gradient color bar to add a third or more colors.
- Press and hold the third color and drag it outwards to delete it.
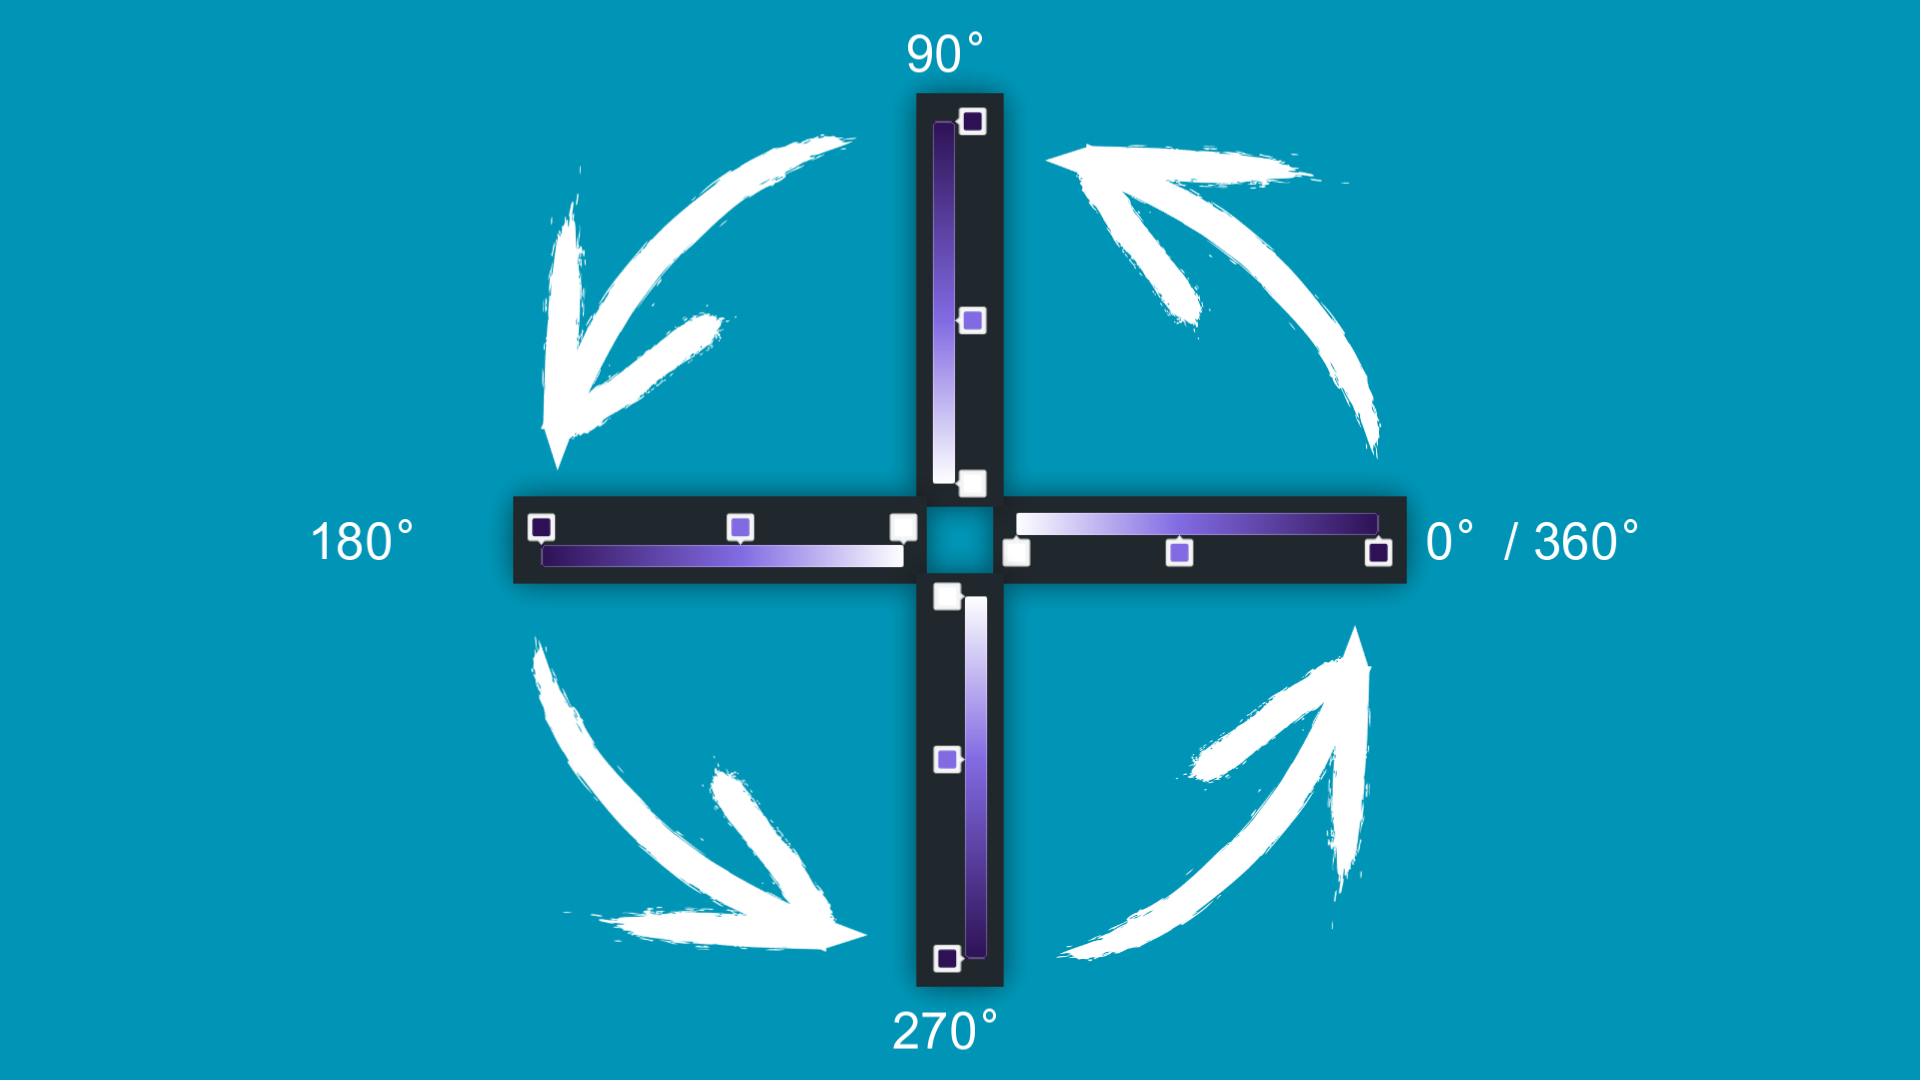
3.1. Gradient Angle

3.2. Horizontal Center Highlight
- Fill: Enabled
- Type: Gradient Fill
- Color: Specify start and end colors
- Darker on the left and right, brighter in the middle
- Angle: 90 degrees
4. Fill with Image

5. Partial Text Variation
Select part of the text and apply custom changes.
6. Related Links
- YouTube Video Practice 02: Using Keyframes in Filmora 11 to Zoom In Locally on the Screen
- YouTube Video Practice 03: Several Methods for Creating Subscription Promotion Animations in Filmora 11
- Filmora 12 Practice 04 | YouTuber Must-Watch! Variety Text Production Techniques to Make Your Videos More Exciting and Unique!