Most newsletters are based on email. Email is great; it's old and a decentralized, asynchronous communication method.
However, some readers prefer convenient and consistent experiences, so connecting Quaily with your Discord Server, Telegram Channel, or LINE Official Account is an excellent choice.
After completing the connection, your new articles will be pushed to Discord, Telegram, and LINE.

Connecting with Discord
To set up Discord integration with Quaily, first enable Developer Mode in Discord: Go to Discord settings, find "Advanced," and toggle "Developer Mode."

Next, right-click the desired Discord channel and select "Copy ID" to get the channel's unique identifier.

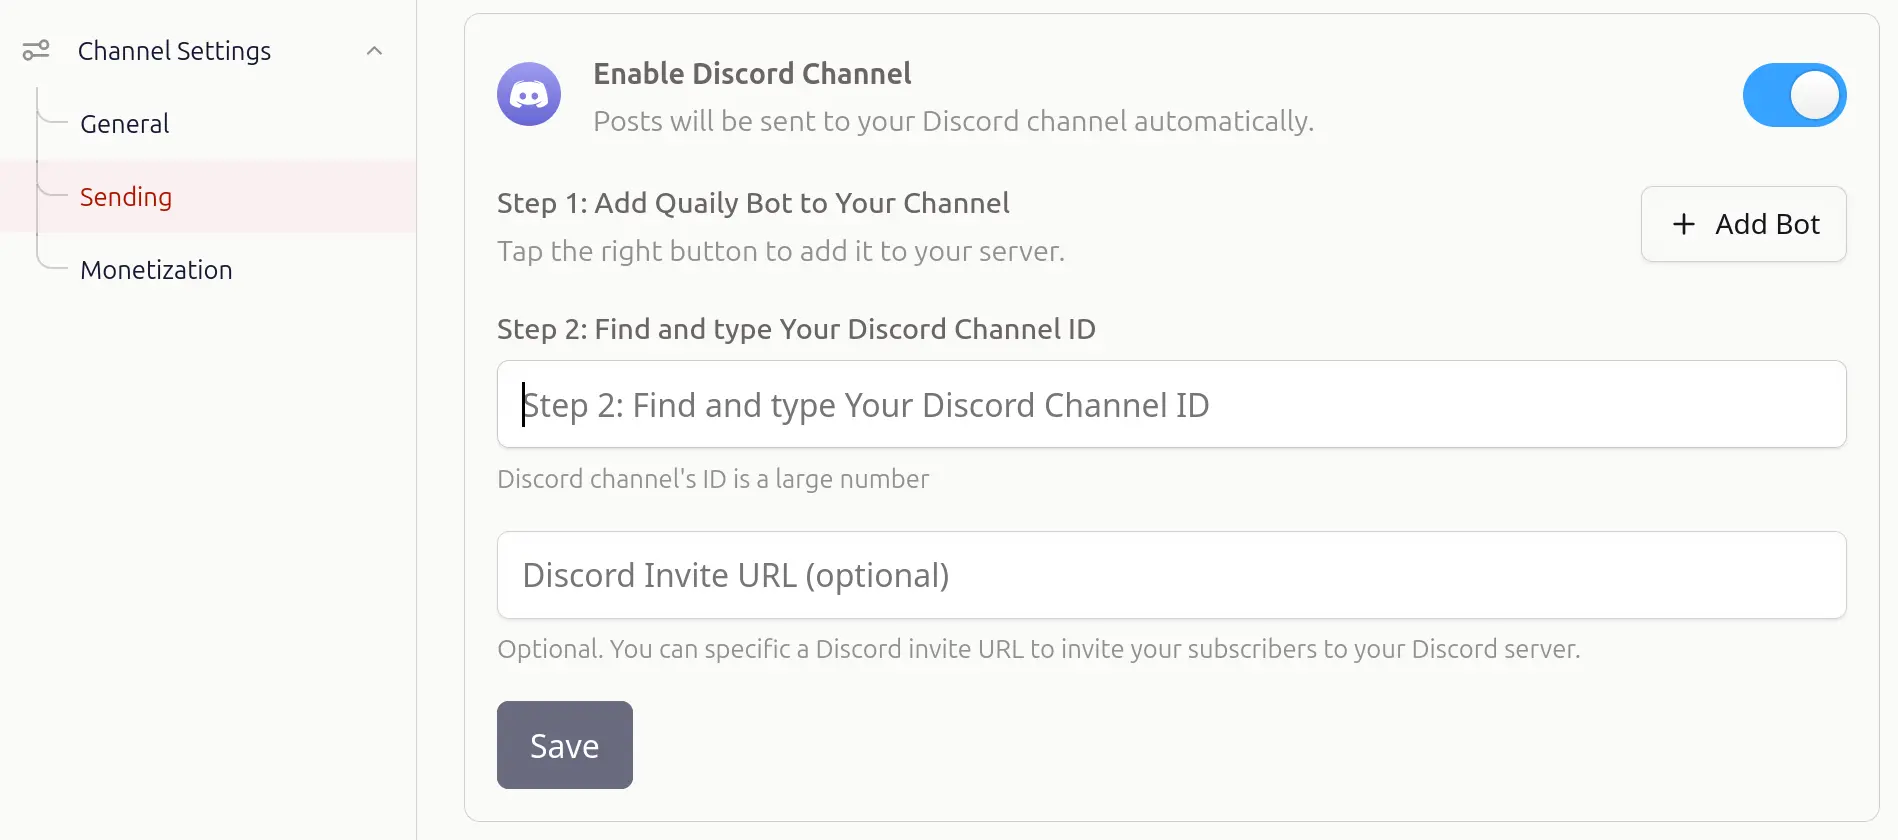
In the Quaily backend's "Channel Settings - Push Settings," follow these steps:
- Enable Discord integration
- Add Quaily Bot to the channel, or visit this installation link and follow the instructions to add the bot
- Enter the ID you just copied
- If your Discord has an invitation link, you can choose to add it to make it easier for new subscribers to join the Discord community
- Finally, save the settings
Connecting with Telegram
Creating a Telegram Channel
The first step is to create a Telegram channel. Follow these instructions to create a channel:
- iPhone: In the chat list, start a new message (tap the icon in the top right corner), then select "New Channel."
- Android: In the chat list, tap the circular pencil icon, then select "New Channel."
After creating the channel, set it to public so everyone can join. Public channels will have the following link: https://t.me/your_channel_name, and the channel ID is @your_channel_name.
Adding Quaily's Bot to the Channel
Search for @QuailSenderBot in Telegram, then add it to the channel as an administrator, ensuring the bot has permission to send messages to the channel.
Connecting Quaily to Telegram
The remaining steps are very simple. Just visit the Quaily Dashboard, fill in the Telegram settings, and save.

Bonus 1: Setting Up a Discussion Area for the Channel
If you want to add a discussion area to your channel, follow these steps:
- Log in to your Telegram channel and open the channel profile.
- Then go to "Discussion"
- Choose an existing group or click "Create a New Group" to create a new group for the channel, and confirm linking the group to the channel.
After completing these steps, if Telegram has updated and comments are activated on the Telegram channel, you can see the comments section below articles in that channel. This section is marked as "Comments" and displays the text "Leave a Comment." You can easily place comments under this article.
Bonus 2: Using Your Own Telegram Bot
The advantage of using your own Telegram bot is that you can customize the bot's avatar, name, and more.
Creating a Telegram Bot
The first step is to create a Telegram bot. You can follow the official guide to create a bot.
After creating the bot, you'll receive a token:
- Send
/mybotsto@BotFather - Select the bot you just created
- Choose
API Token - Copy the token
Please keep it safe; we'll use it later.
Modifying Bot Configuration
The next step is to add the bot to the channel and grant it permissions. First, let's modify the bot's settings:
- Send
/mybotsto@BotFather - Select the bot you just created
- Choose
Bot Settings - Select
Allow Groups - Choose
Turn on
Then add the bot to the channel, modify the bot token and Channel in Quaily's push settings, and save.
Connecting with LINE
Quaily supports sending articles to LINE channels.
Before starting, make sure you have created a LINE channel in the LINE Developer Dashboard: you need to create a Provider, then create a Messaging API Channel under that provider.
- Visit the Quaily Dashboard, select the channel you want to connect, then click "Channel Settings" in the sidebar.
- You'll see the "Push Settings" section; enable the LINE channel
- For first-time use, you need to create a key pair for the channel; click the
Createbutton. You'll then see the public key. Copy the public key for the next step. - Visit the LINE Developer Dashboard, select the channel you want to connect, find Assertion Signing Key under Basic Settings, click the Register a public key button, paste the public key you just copied, then click the Register button.
- Copy the Assertion Signing Key and paste it into the channel settings page.
- Then fill in the Channel ID and Channel Secret. You can find them under Basic Settings.
- Optional: Fill in the Basic ID; a LINE icon with an invitation URL will be added to the subscription form. You can find it under Messaging API Settings.
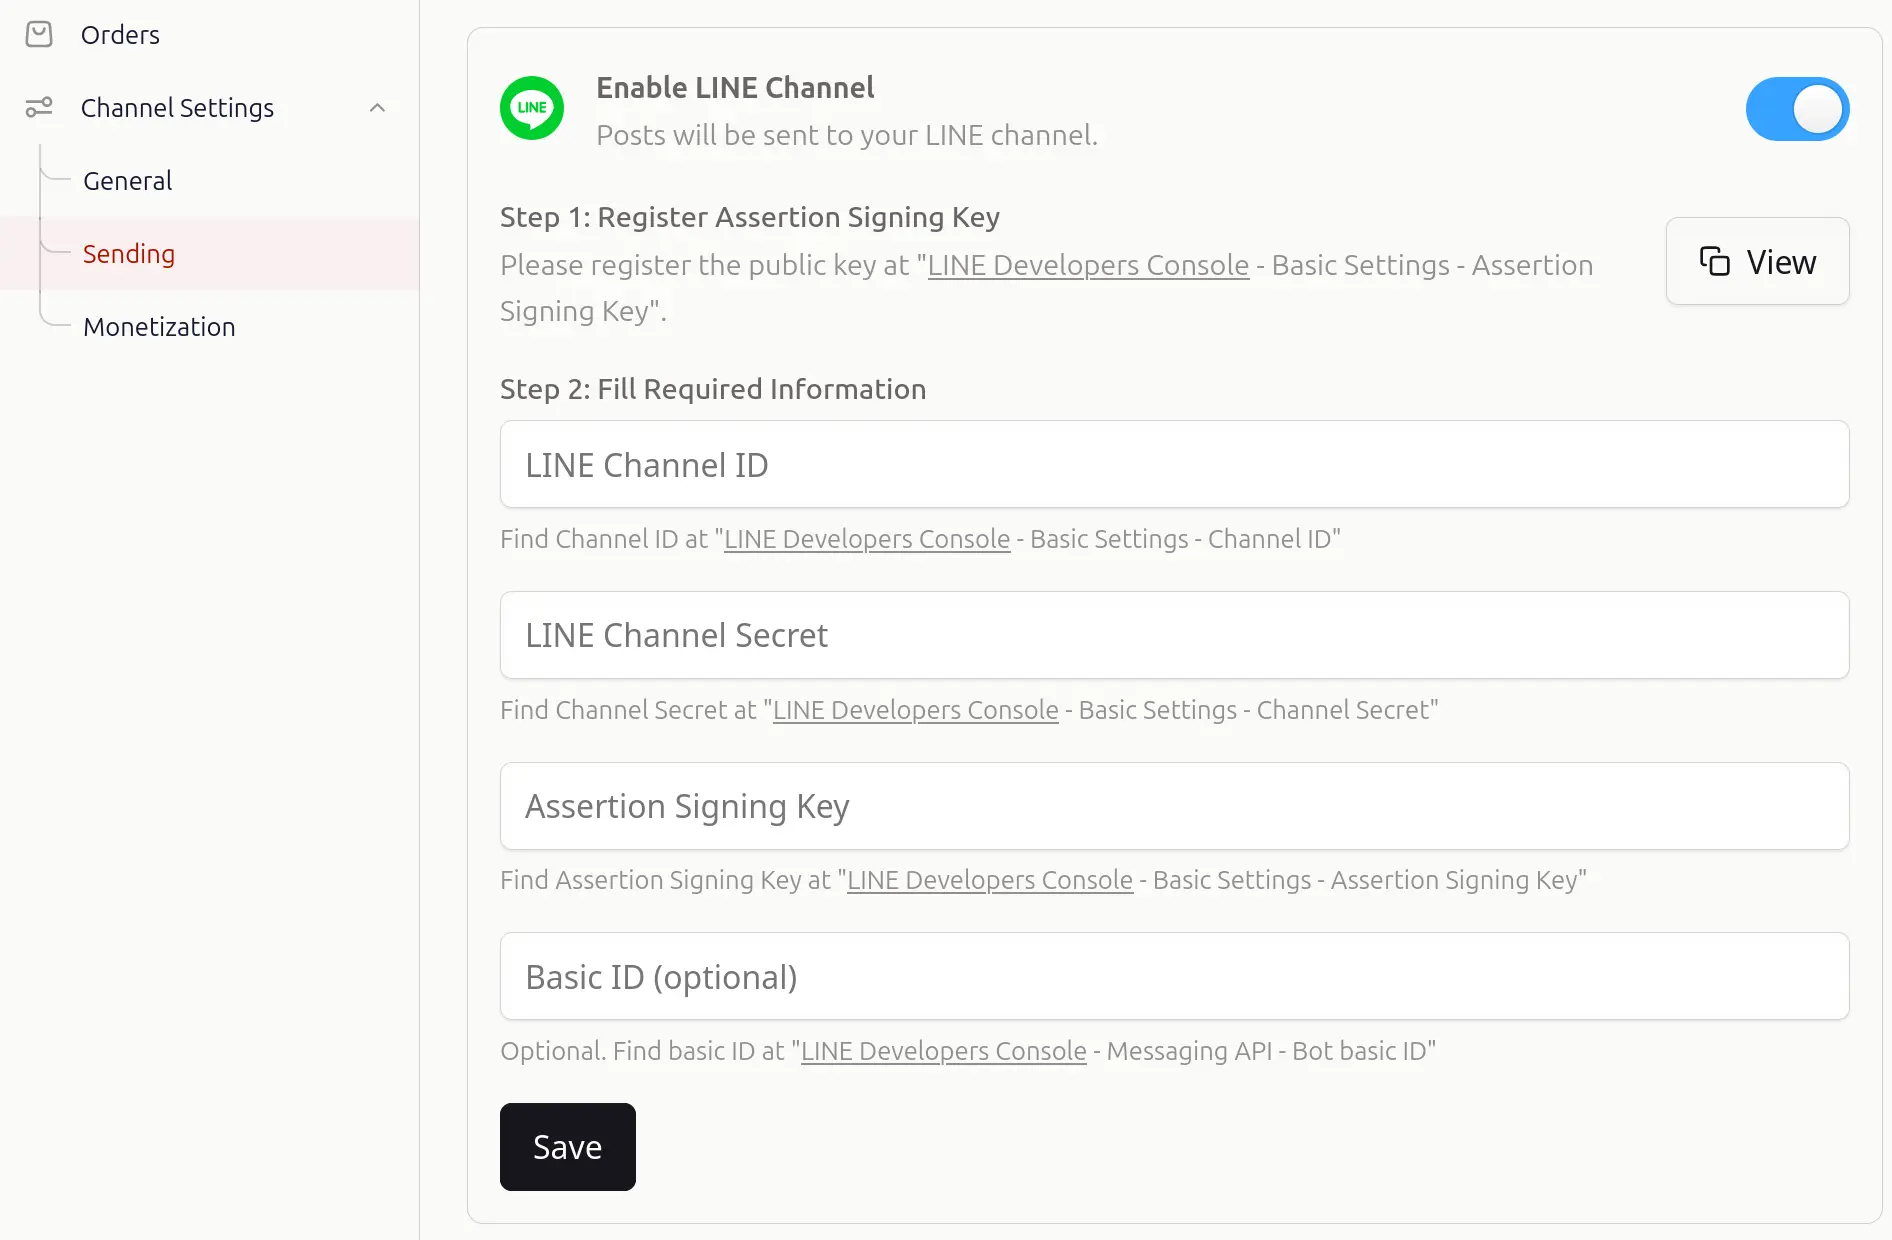
That's it. Now you can save the settings. Newly published articles will also be sent to the LINE channel.
These are the methods for linking Quaily to Discord, Telegram, and LINE. If there's anything you don't understand, you can also join our Discord community or contact us directly for consultation.