
I have been using Dropbox to synchronize Obsidian notes, but due to device limitations with the Dropbox Basic plan, I use the DropSync App on Android to sync note files. However, seeing that the Obsidian Git plugin is now stable, and mobile devices (Android, iOS, and iPad) can access Git repositories directly without installing Git locally, I've started changing storage from cloud drives to Git clients. Here are the operation steps for different usage scenarios:
- Starting from scratch: Setting up Git and Obsidian systems and repositories in a sandbox
- Adding Git environment to existing note repositories for syncing to GitHub
- Installing Obsidian with Git plugin on mobile devices
- Other Git operations, such as adding folders or files to .gitignore for non-synchronization
GitHub is used as the remote repository.
When using the Git plugin on mobile devices: The remote URL's communication protocol must use HTTPS, not SSH
1. Starting from Scratch
1.1. GitHub Setup
- Create a GitHub account
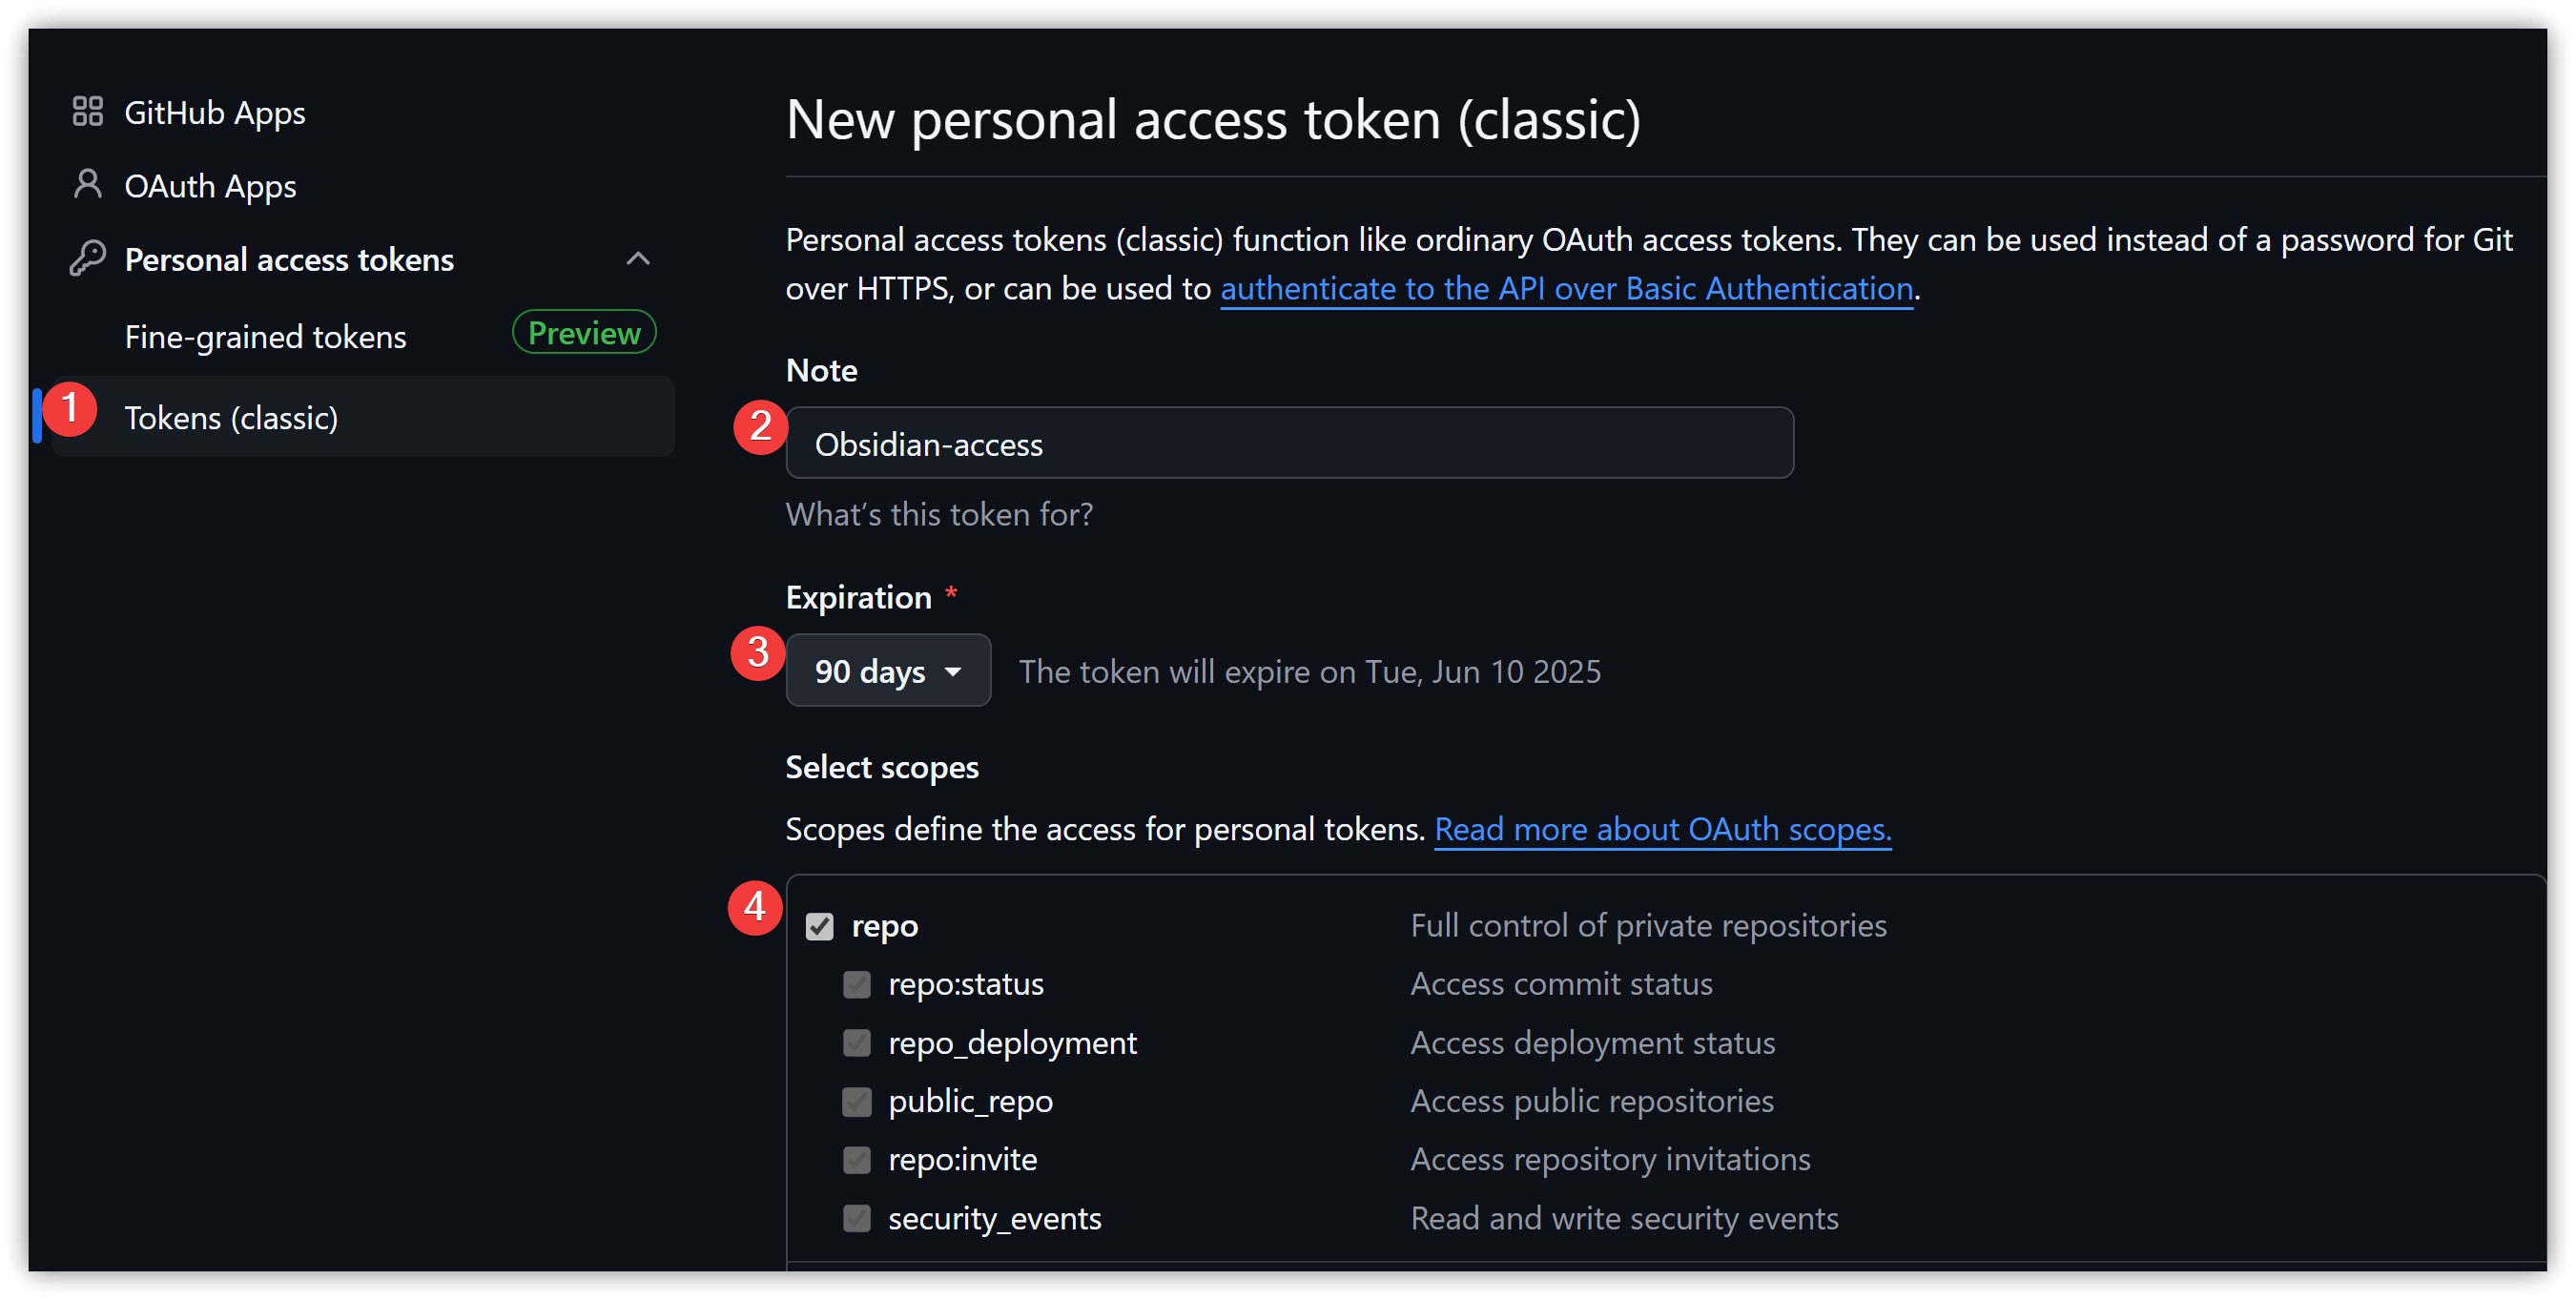
- Click on your avatar → [Settings] → [Developer Settings] (last item on the left) → [Tokens (classic)] → [Generate new token] [Generate new token (classic)]
- Enter data sequentially, check the repo field, click [Generate token] at the bottom
- Expiration: Default is 30 days, can be changed to no expiration
- Copy the generated Access token and save it to a password management tool
▼ When using Fine-grained token, change Contents access to read and write

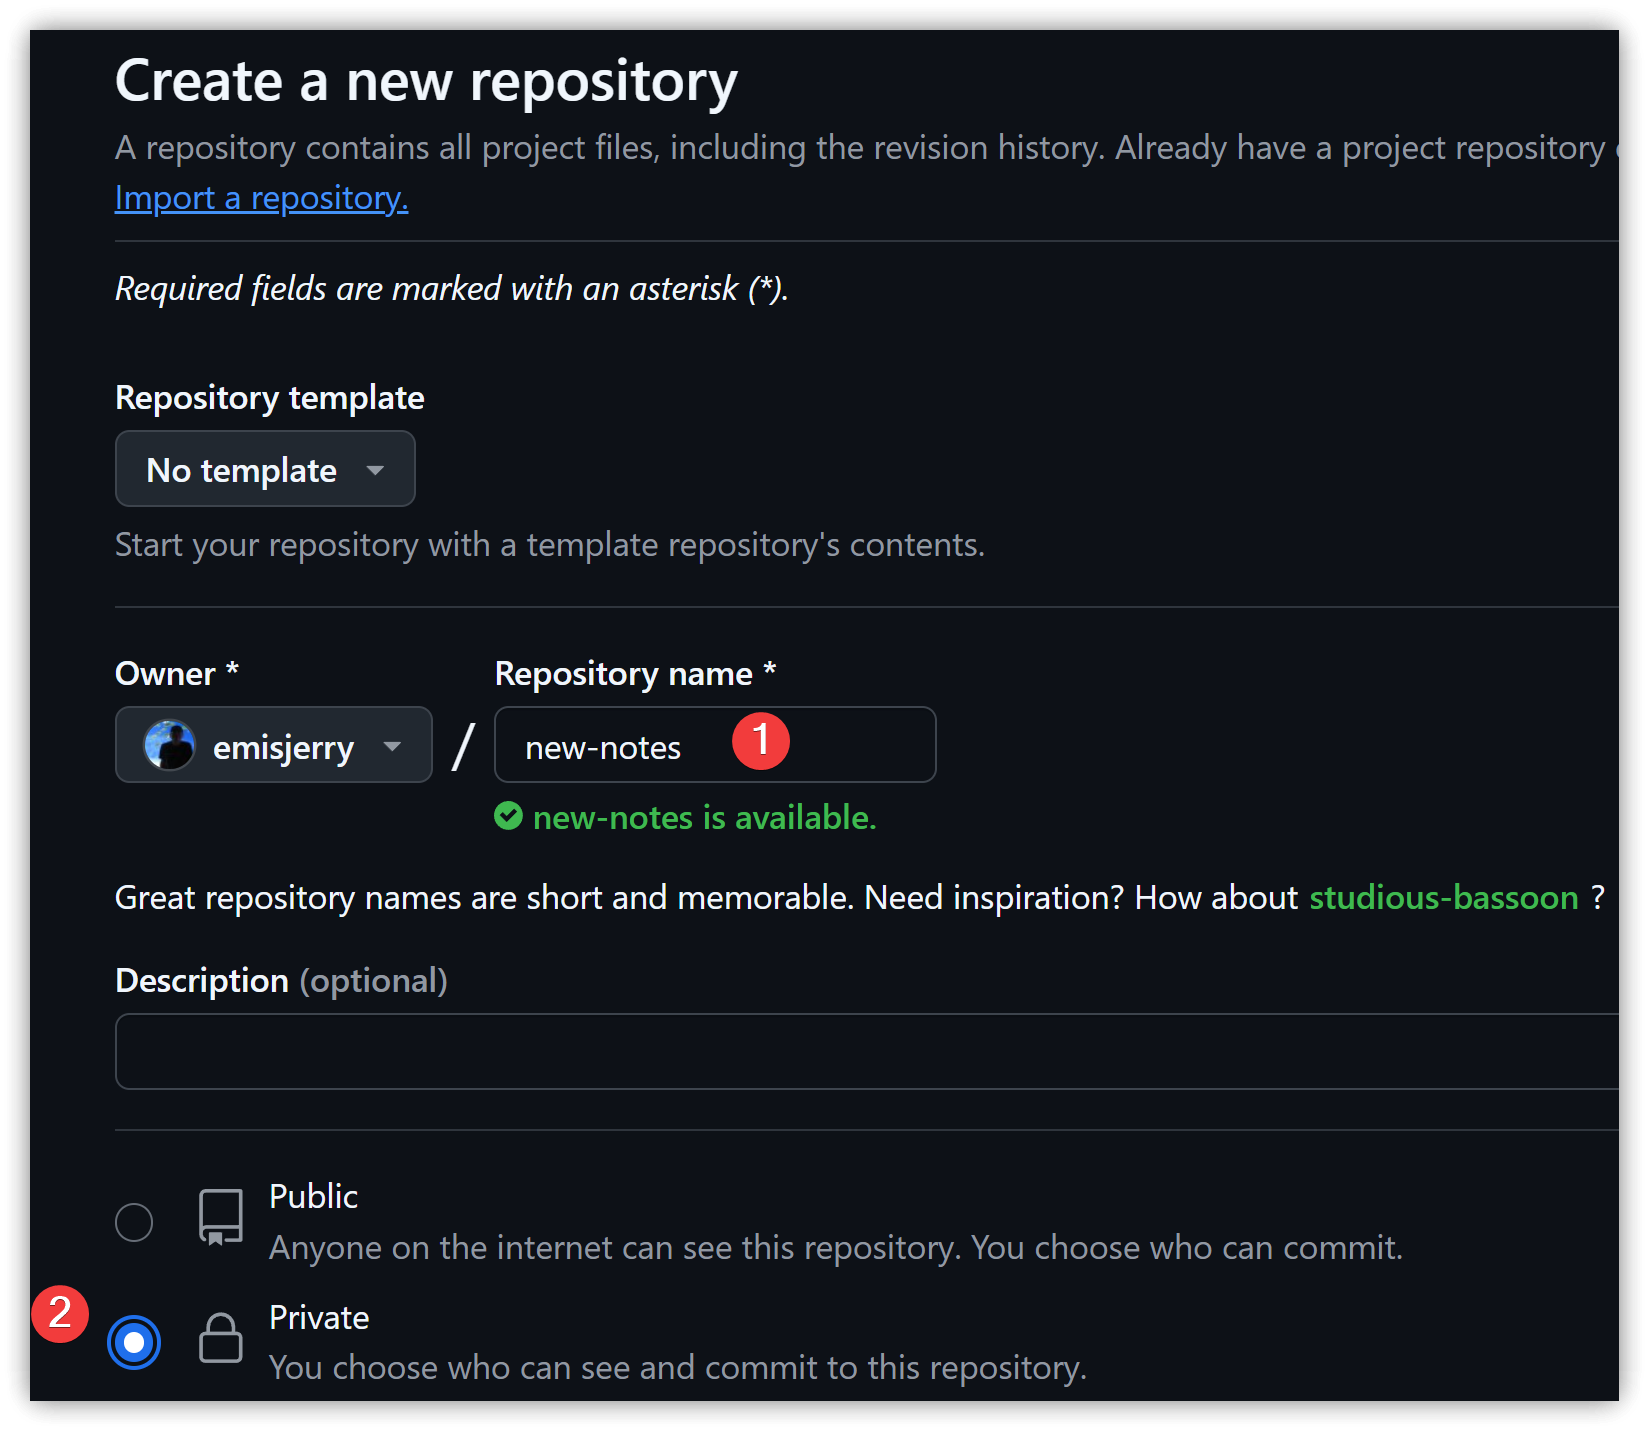
- Click the [+] icon in the upper right corner → Click [New repository] to create a Git repository, name it and check Private → [Create repository]
-
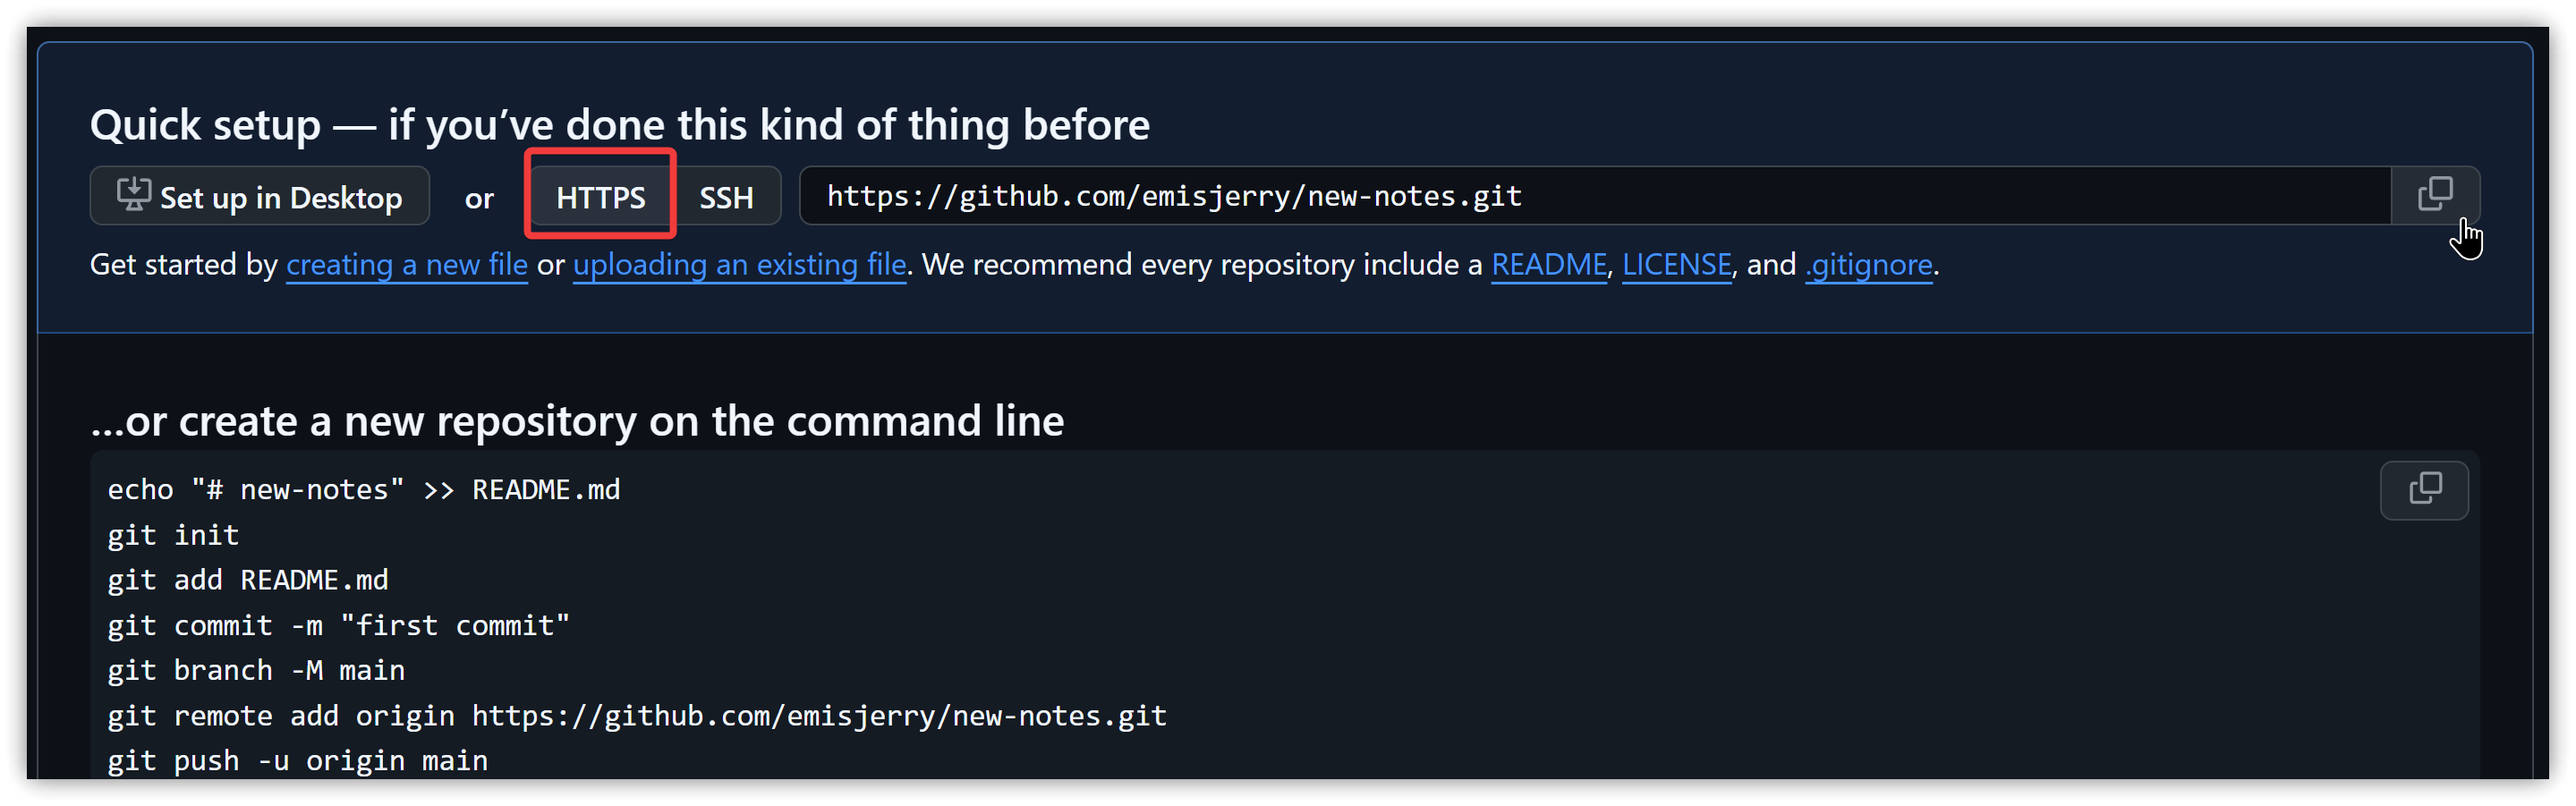
Select HTTPS and copy the URL to the clipboard, the URL format is: https://github.com/account/repo-name.git
-
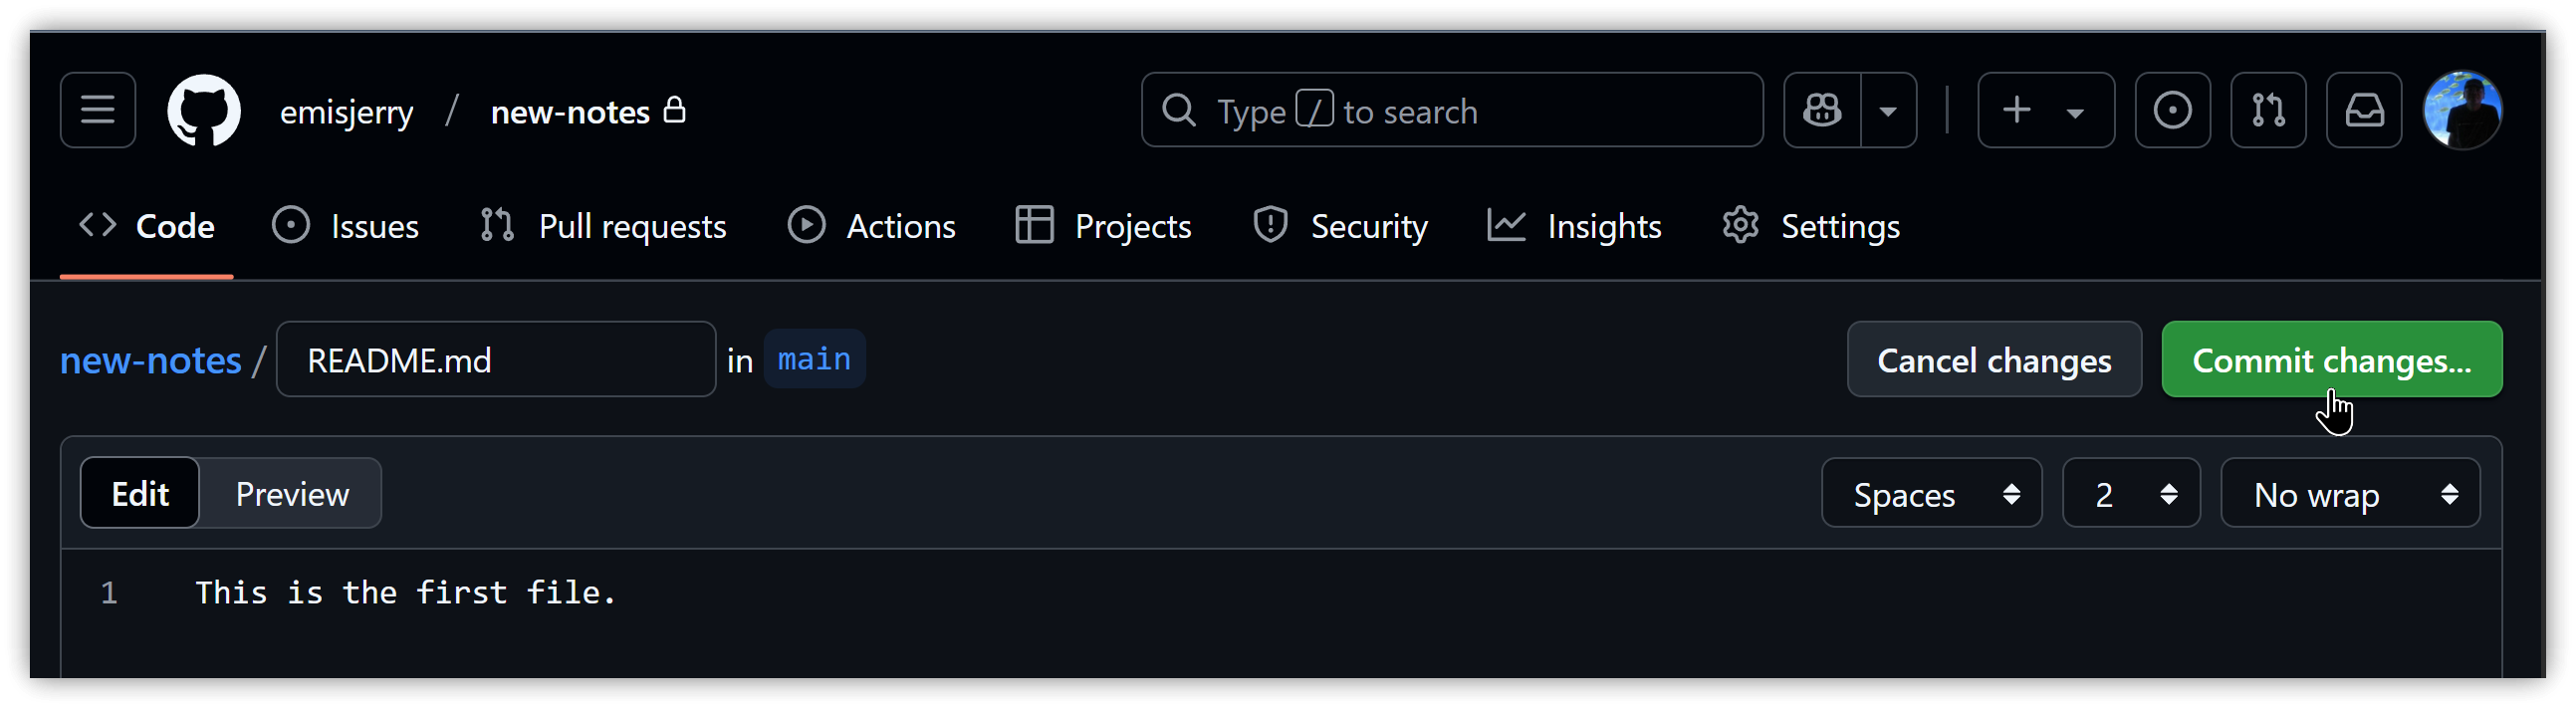
Click "creating a new file" below HTTPS in step 6, enter any content and press [Commit changes...]
1.2. Sandbox Operations
- Windows obsidian-git-tut-windows (step-by-step illustrations)
- macOS: Git on macOS
-
Download and install Git client. On Windows, it's installed in
C:\Program Files\Gitby default, and the path is added to the PATH environment variable. Use default values throughout. -
Download and install Obsidian
-
After launching Obsidian, create an initial repository: Create → Enter
notesfor Vault name, selectC:\for Location, so the repository folder isC:\notes\ -
In Obsidian, click the gear icon [Settings] on the left → [Community plugins] → [Turn on community plugins] → [Browse] → search for Git → find Git and click [Install] → [Enable]
-
Press Ctrl/Cmd+P and type "clone" in the command palette, execute Git: Clone an existing remote repository
-
Paste the GitHub URL copied in step 1.1 and press Enter
-
Enter the repository folder
personal-notesand press Enter. The Git plugin creates a subdirectory in the existing repository folder by default (i.e.,C:\notes\personal-notes\) -
Enter the required repository depth and press Enter
-
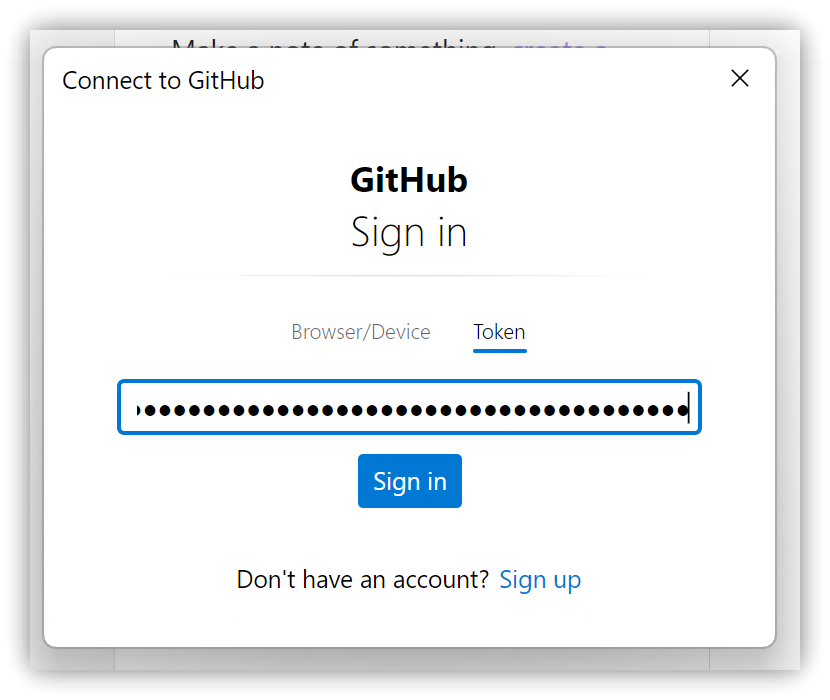
When the GitHub connection dialog pops up, click Token, then paste the Personal Access Token copied in step 1.1 and click [Sign in]
-
Restart Obsidian after successful cloning
-
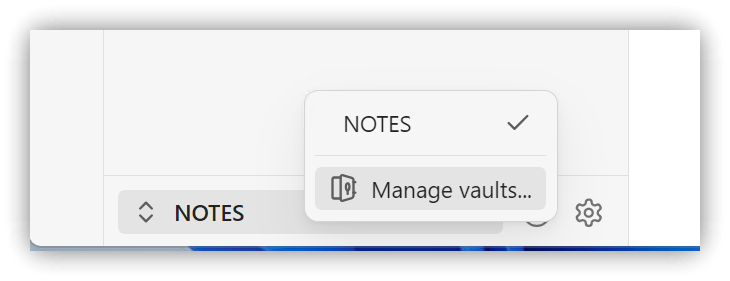
Click the repository list in the lower left corner → [Manage vaults...] → Open, select
C:\notes\personal-notes, the note repository managed by Git
-
Click the gear icon [Settings] on the left → [Community plugins] → [Turn on community plugins] → [Browse] → search for Git → find Git and click [Install] → [Enable] → [Options]
- Auto commit-and-sync interval (minutes): Default is 0, can be changed to desired sync interval in minutes, e.g., 30
- Scroll down to find Author name for commit and Author email for commit, enter your GitHub account name and email
-
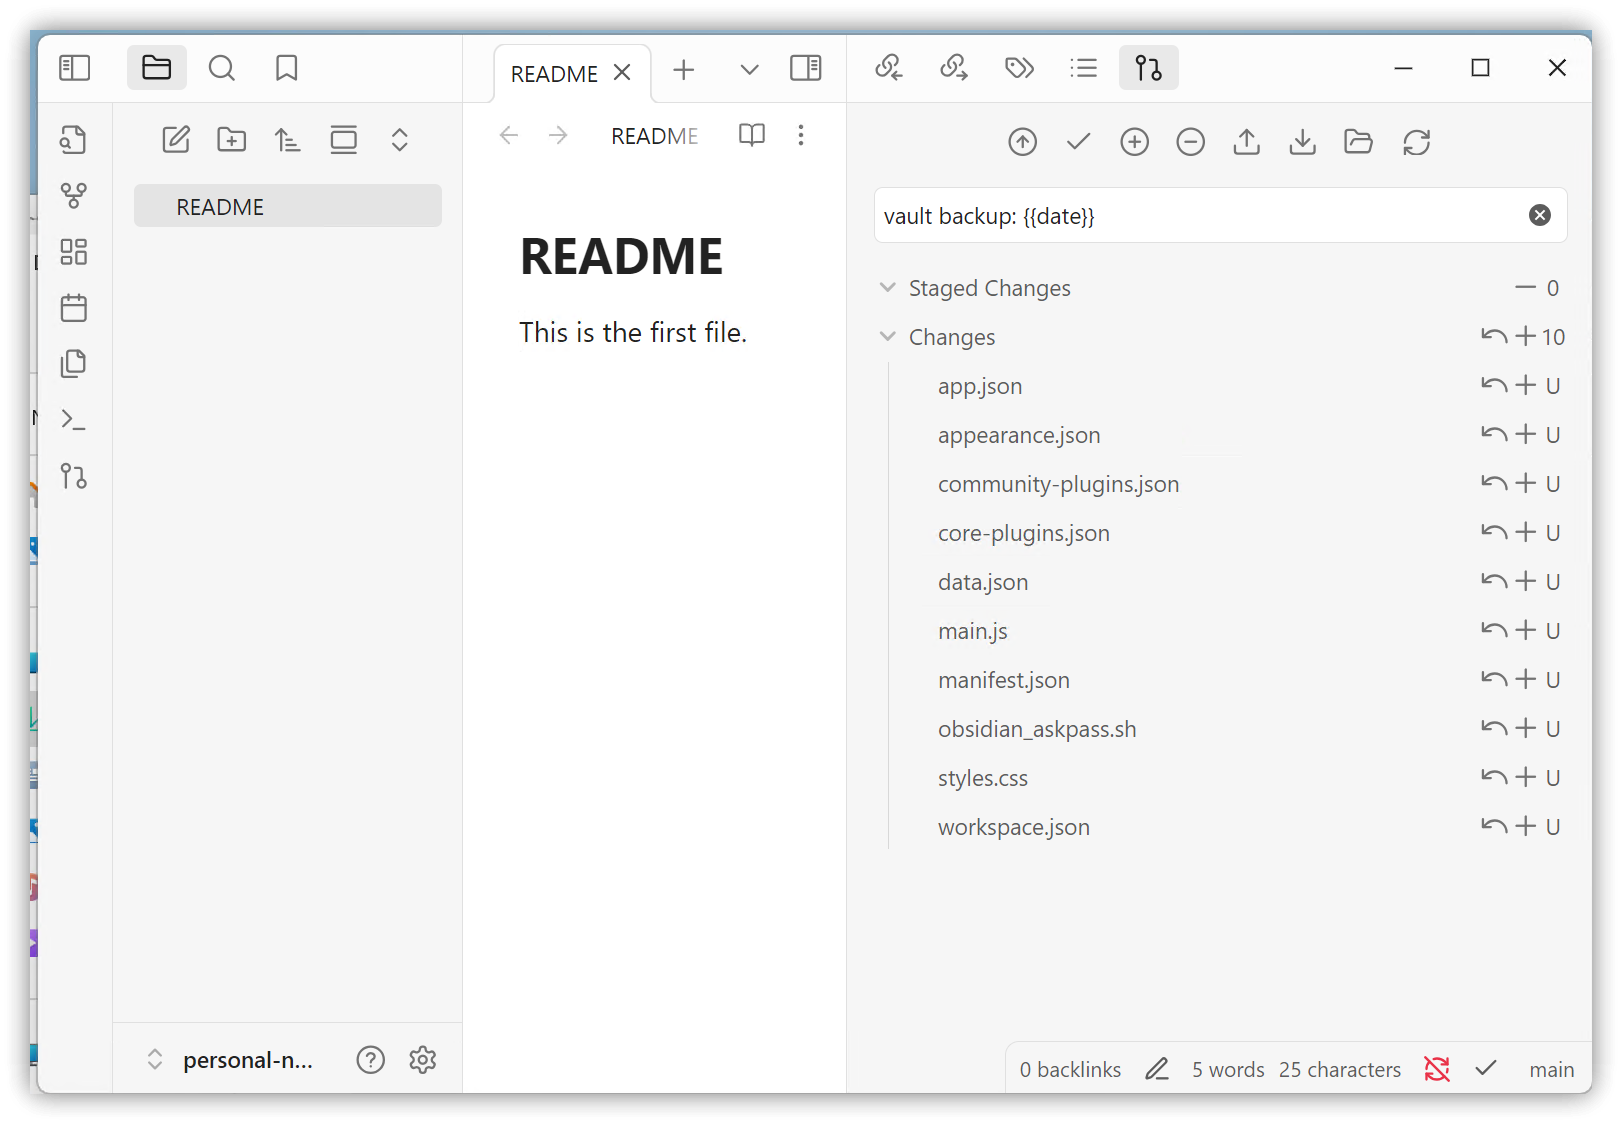
The [Open Git source control] icon will appear in the left toolbar. Clicking it will display the Git information panel on the right sidebar
-
Local modifications will automatically sync within the auto-sync interval, or press pull in the Git panel to fetch files from GitHub, or press push to push local additions or modifications to GitHub
2. Adding Git Control to Existing Repositories
- Restart cmd.exe
- Execute the following commands sequentially in the command prompt or terminal
git init
git add README.md
git commit -m "first commit"
git branch -M main
git remote add origin https://github.com/account/repo-name.git
git push -u origin main
- Launch Obsidian, then follow the steps from point 12 onwards in section 1.2
3. Installing Obsidian on Mobile Devices
- Connect your computer to the mobile device with a USB cable, enable file transfer
- Copy the note repository folder from your computer to the root directory of the mobile device
- Install Obsidian, launch Obsidian, open the repository folder from the previous step
- Open the command palette and execute Git pull to test
4. Potential Issues
4.1. Windows: Obsidian prompts for Username and Password input periodically
Debugging steps:
- Enter the following command to confirm Git Credential Manager is correctly set
git config credential.helper
If it doesn't return "manager", consider reinstalling the latest version of Git client
4.2. Windows: Account access permission issues
Try adding the note repository folder to safe directories:
git config --global --add safe.directory your-repository-folder
5. 💡 Related Links
💡 Explanatory article: https://jdev.tw/blog/8740/
💡 English: https://quaily.com/dashboard/lists/1588/posts/9360
💡 日本語: https://quaily.com/dashboard/lists/1589/posts/9361
✅ obsidian-git GitHub: https://github.com/Vinzent03/obsidian-git
✅ Reference Getting started with Git: https://docs.github.com/en/get-started/learning-to-code/getting-started-with-git
✅ git-changelog GitHub: https://github.com/shumadrid/obsidian-git-changelog
✅ Another Git plugin, no need to install Git client: github-gitless-sync GitHub: https://github.com/silvanocerza/github-gitless-sync