
Obsidian v1.9.0 introduced the Bases core plugin, modeled after Notion’s Database, which provides a way to display collections of data—ideal for collection-based applications such as book, movie, or music collections.
This time, I applied a note management approach termed “note collections” and used Bases to convert index notes originally created with Dataview into Bases syntax, allowing everyone to see the functional differences between the two.
Corresponding to Database, translating it as “library” might be acceptable, but since “library” is used frequently (e.g., Obsidian’s vault, Git’s repository), I prefer “data collection” or “dataset.”
1. Introduction to Using Bases
First, enable the Bases plugin in Settings → Core Plugins. Then press Ctrl/Cmd+P and type “base” in the command palette to find two commands:
- Bases: Create new base – creates a Base note with the .base file extension in plain text. It is recommended to associate .base files with a text editor.
- Bases: Insert new base – inserts
![[Untitled.base]]and automatically creates an Untitled.base file.
Bases also supports code blocks in YAML format. For example:
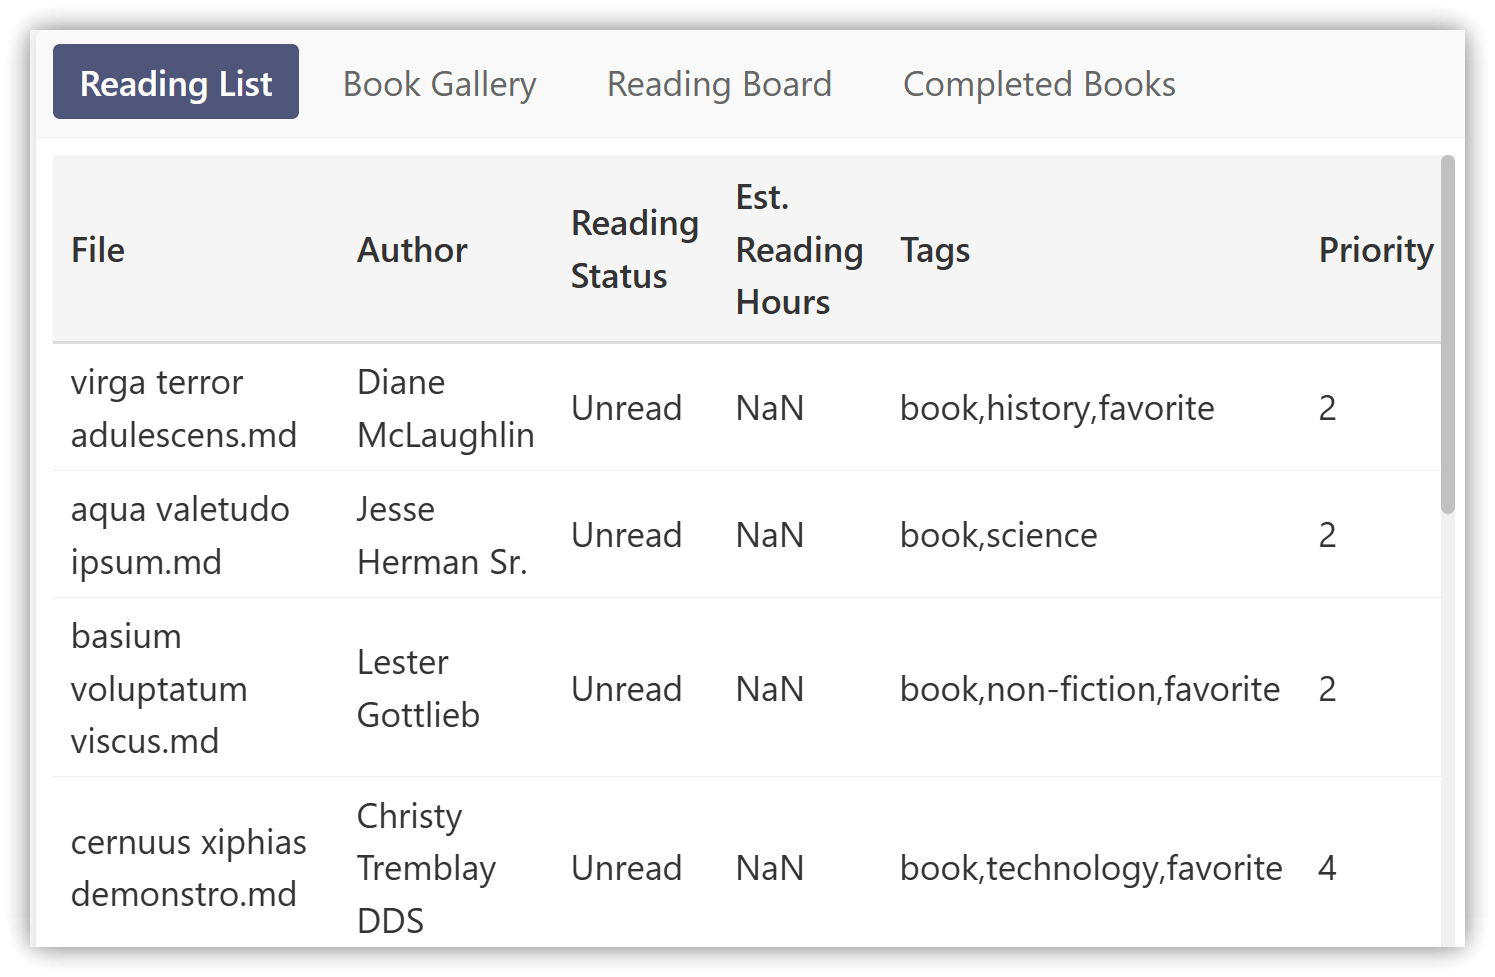
- Source: https://bases-toolbox.vercel.app/#bases-preview Book Library
```base
filters:
  and:
    - taggedWith(file.file, "book")
    - not:
        - taggedWith(file.file, "textbook")
formulas:
  read_status: 'if(status == "Done", "Read", "Unread")'
  reading_time: 'wordCount / 250'
display:
  author: Author
  formula.read_status: "Reading Status"
  formula.reading_time: "Est. Reading Hours"
  tags: Tags
  priority: Priority
views:
  - type: table
    name: "Reading List"
    filters: 'formula.read_status == "Unread"'
    order:
      - file.name
      - author
      - priority
      - formula.reading_time
  - type: gallery
    name: "Book Gallery"
    filters: 'formula.read_status == "Unread"'
    title_field: file.name
    description_field: summary
  - type: board
    name: "Reading Board"
    group_by: "priority"
    title_field: file.name
    description_field: summary
  - type: table
    name: "Completed Books"
    filters: 'formula.read_status == "Read"'
    order:
      - file.name
      - author
      - priority
      - formula.reading_time
```
2. Create New Base
Goal: Create an index note containing notes tagged with
#obsidian
After executing “Bases: Create new base,” an unnamed .base file (Untitled.base) will be created in the specified folder and opened in a new tab.
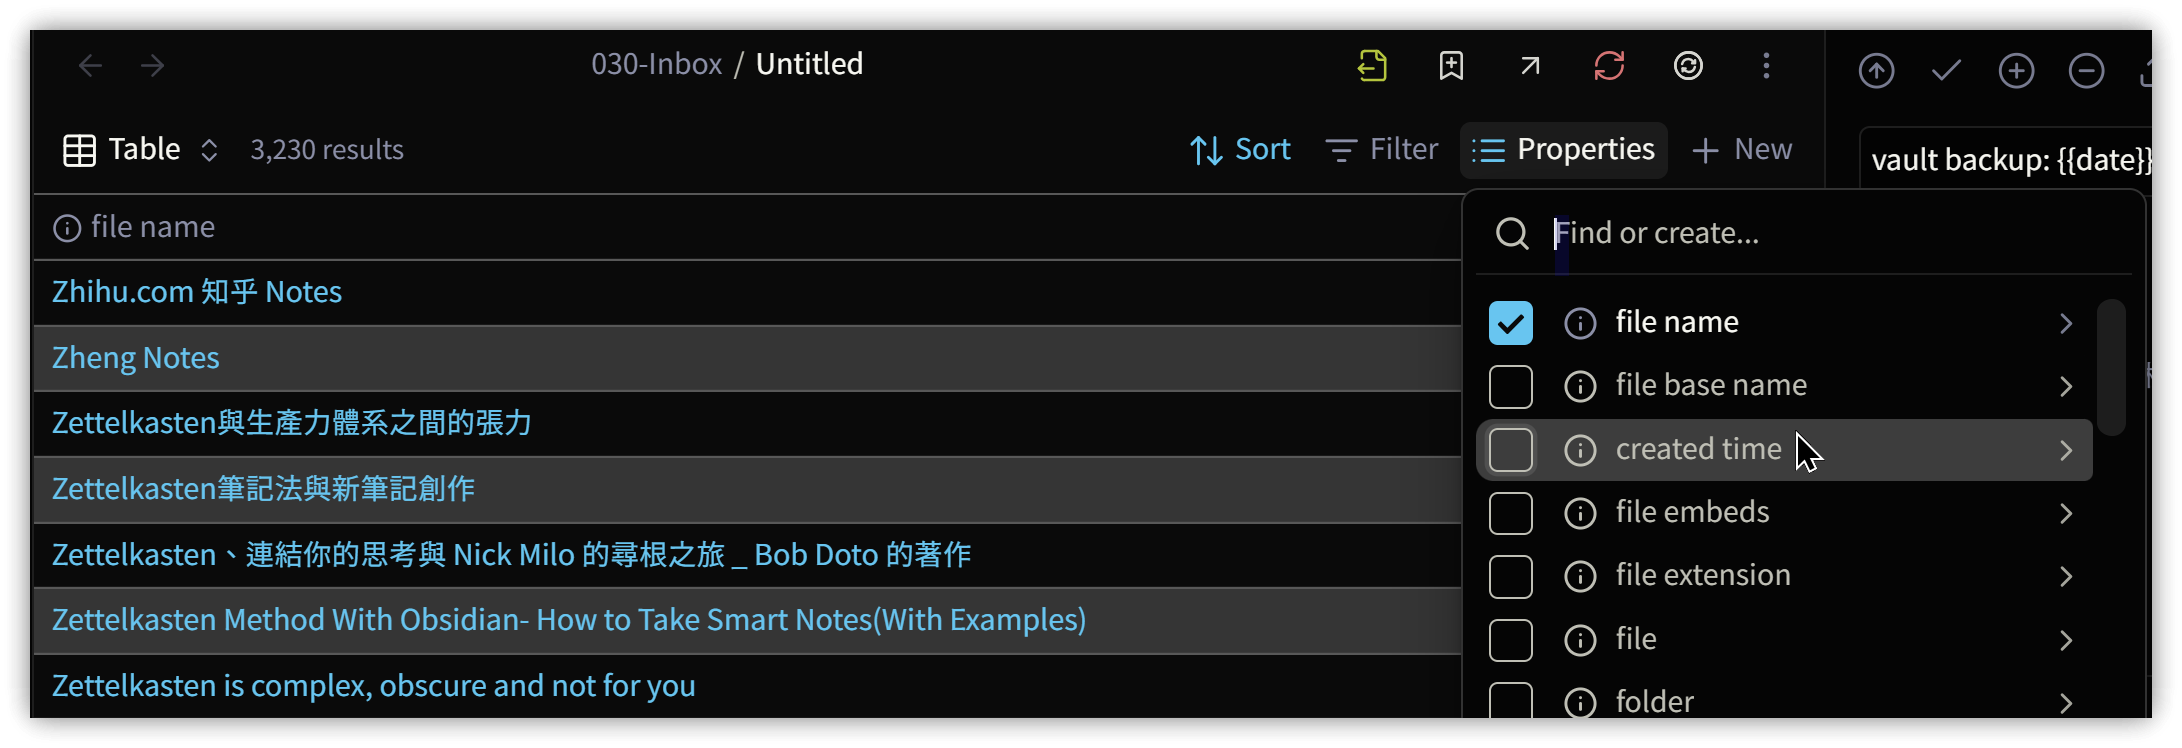
From left to right, you will see options such as view mode (Table), number of results (3,230 results), sorting (Sort), filtering (Filter), and properties (Properties).
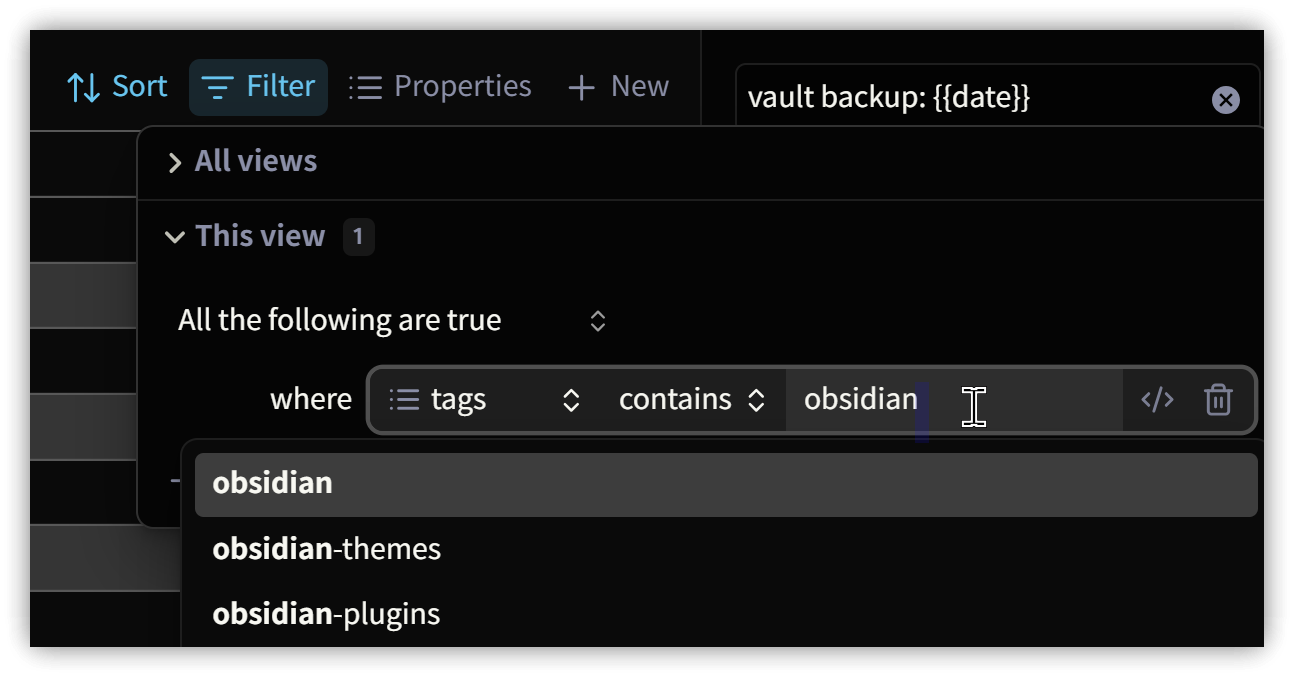
2.1. Filtering Data: Filter
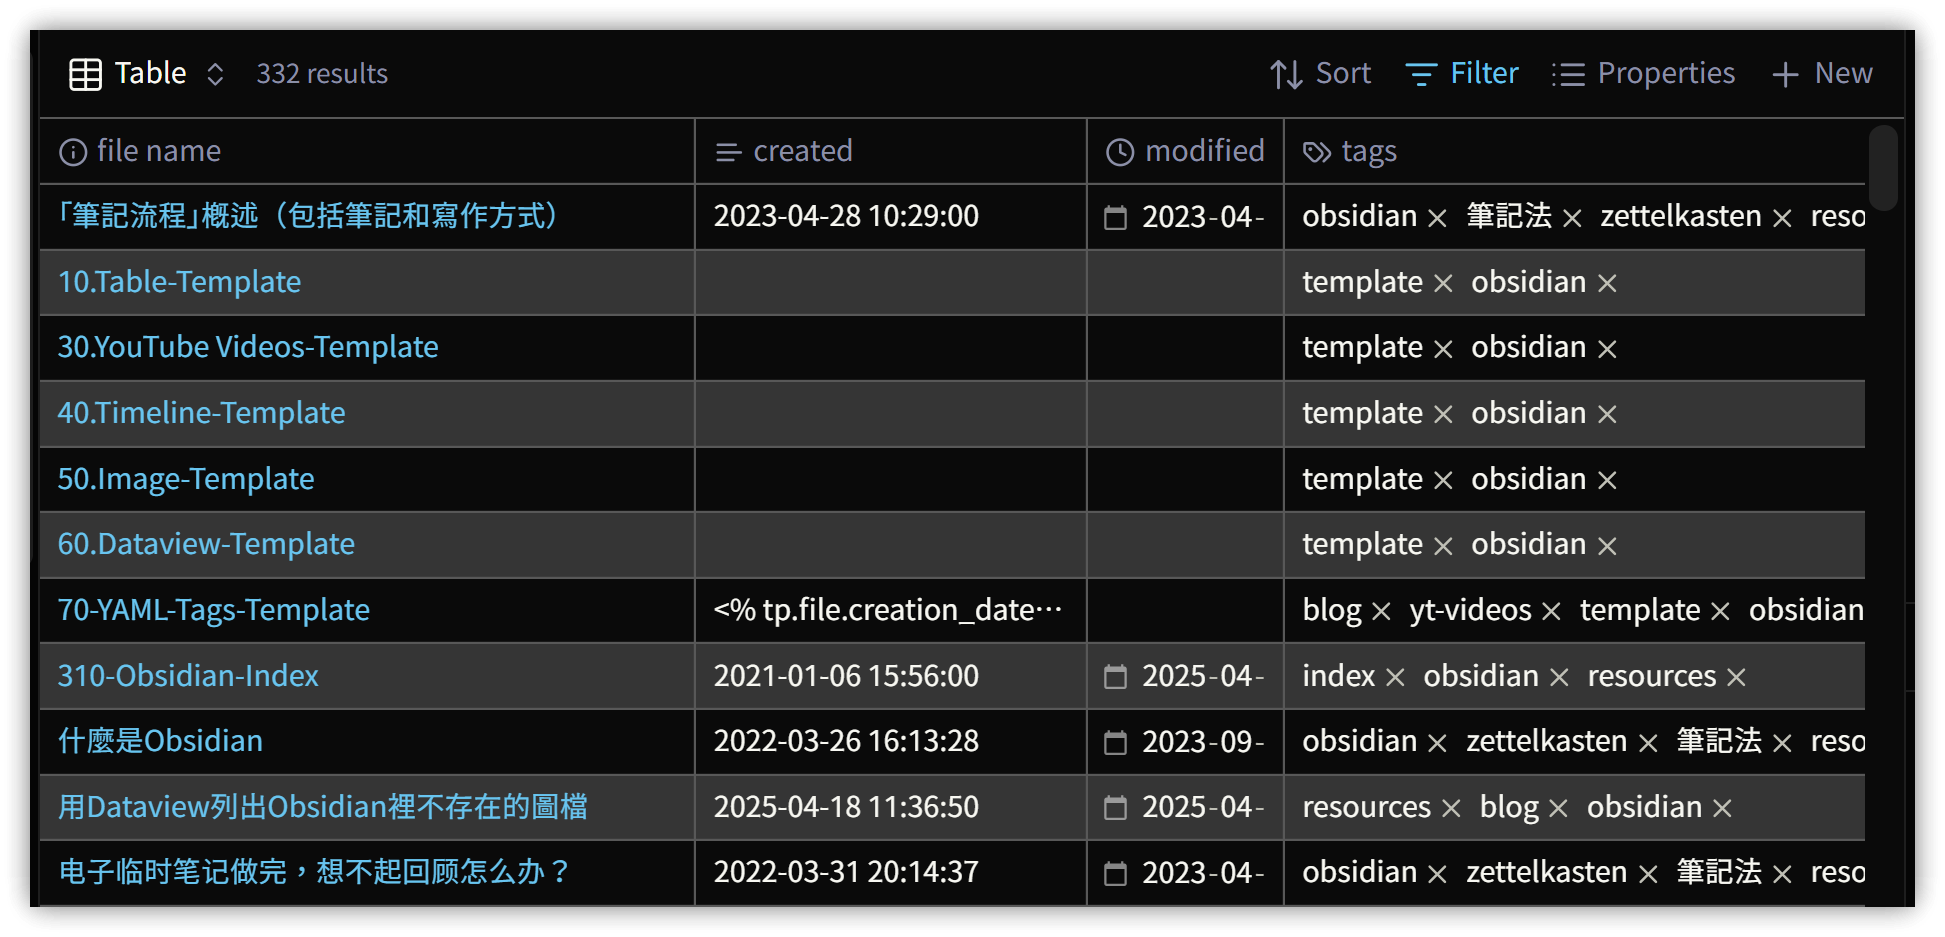
Click on Filter to adjust the filtering conditions and reduce the number of entries. In the image below, setting tags contains obsidian displays only notes tagged with #obsidian, reducing the count from 3,230 to 332.
2.2. Adding Display Columns: Properties
Click on Properties to add display columns by checking the desired fields. For example, you might check properties like created, modified, and tags from the YAML section.
Special fields can be added as formulas. For instance, you can use the formula created.toString().slice(0, 10) to display only the date portion of the created time.
2.3. View Styles: View
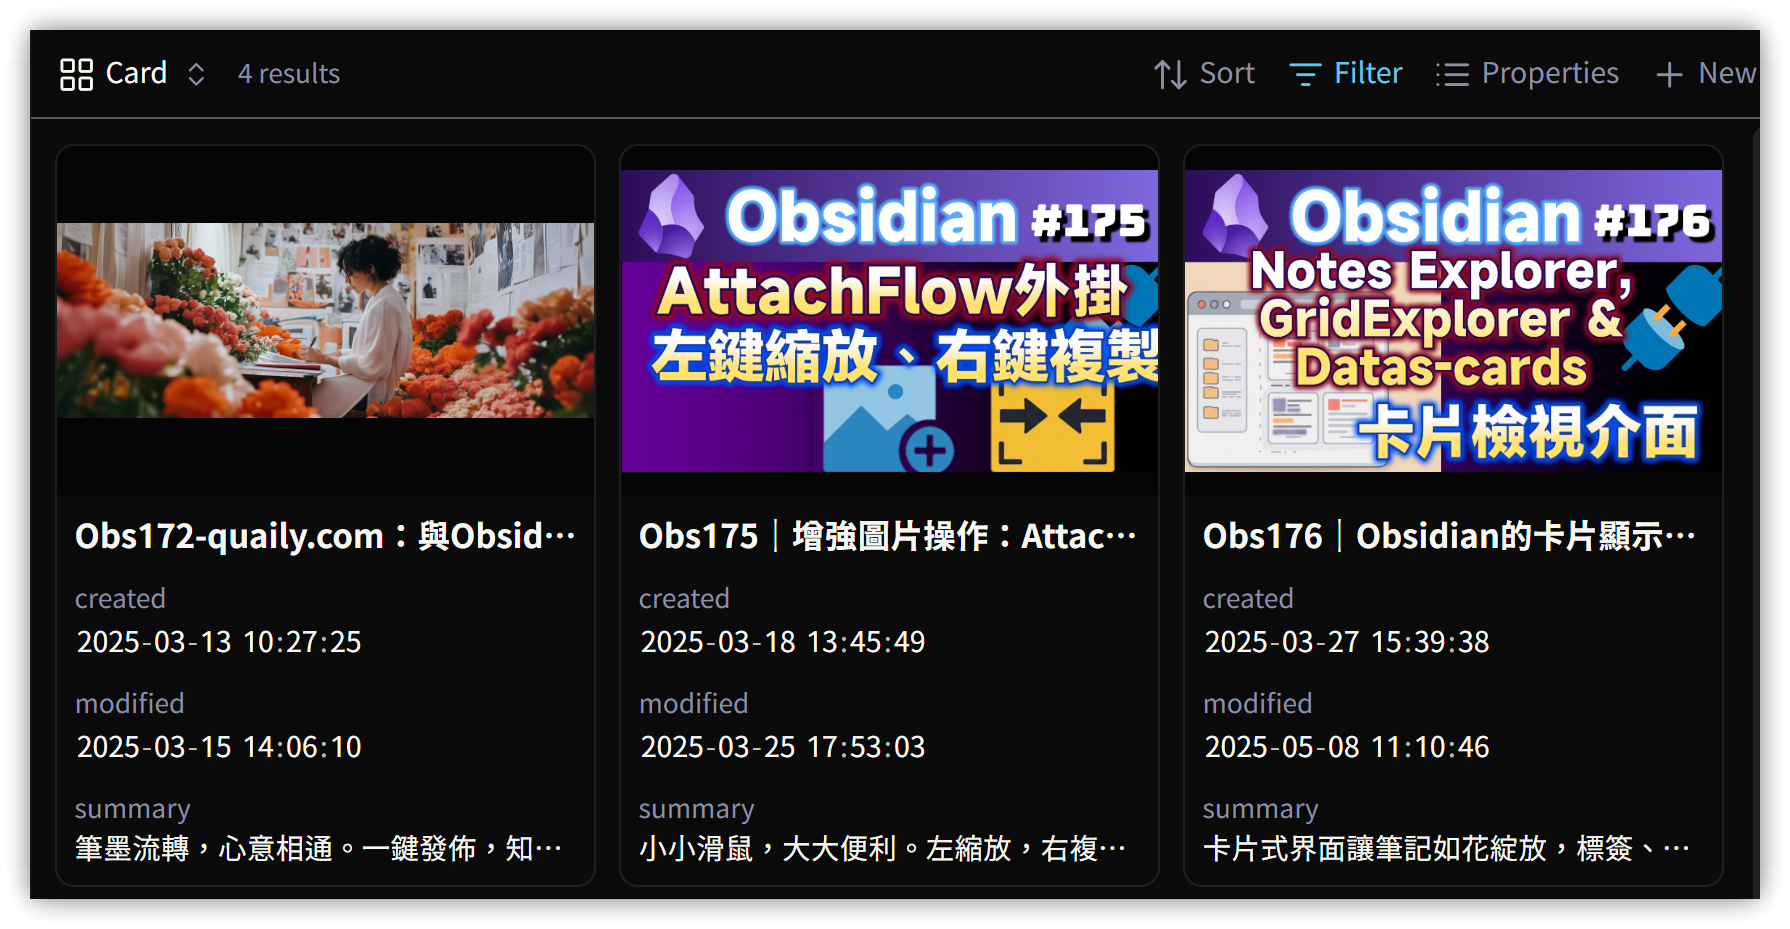
A Base can have multiple view styles, each with its own layout, filters, and columns. Currently, Bases supports two layouts: Table and Cards.
- Table view: You can adjust the row height in the Configure view.
- Cards: You must specify an image attribute for the note; thus, you can add a filter to exclude notes without an image, e.g.,
cover_image_url starts with http.
In Table view, you can directly modify the cell contents, and your changes sync immediately to the note.
2.4. Sorting: Sort
Click on Sort or a header to set the sorting order of the data.
2.5. Exporting Data: results
Click on the results count to limit the displayed entries, or export the data to the clipboard or save it as a .csv file.
3. Insert New Base
This command inserts ![[Untitled.base]] and creates the Untitled.base file.
4. Code Blocks
Unless you are very familiar with Bases’ YAML syntax, it is recommended to first create a .base file using the visual interface. Then open it with a text editor and copy the contents to create a Base code block. The language for the code block is base.
After insertion, you can modify it within Obsidian to suit your needs.
5. Converting Dataview to Base Syntax
Visit the Bases Toolbox, paste your Dataview TABLE statement into the Dataview Converter section, and click "Convert to Bases" to convert it instantly.
5.1. Conversion Issue
I used a Dataview query that displays the first 10 characters of the created date (property: created) to show just the date without the time: substring(created, 0, 10), which caused an error in Bases. The correction is as follows:
created.toString().slice(0, 10)
6. Dataview or Bases?
6.1. Using Bases
- In terms of data display, I find that Bases runs faster.
- If you only use Dataview code blocks and do not incorporate Dataview’s inline field syntax (specifying a property within the content using property name followed by two colons),
If you wish to use Bases while employing Dataview inline fields, consider using the dataview-properties plugin, which syncs inline fields to the YAML section.
6.2. Using Dataview
- Utilize Dataview’s List style.
- Employ dataviewjs for greater control.
6.3. Using Datacore?
I haven’t used it yet, so I cannot evaluate it.
7. 💡 Related Links
💡 解說文章(繁體中文): https://jdev.tw/blog/8832/
💡 Explanation article(English): https://quaily.com/jdevtw-en/p/obs181-farewell-dataview-obsidian-bases-note-collection-practical-application-function-analysis-and-syntax-conversion
💡 解説記事(日本語): https://quaily.com/jdevtw-jp/p/obs181-farewell-dataview-obsidian-bases-note-collection-practical-application-function-analysis-and-syntax-conversion
✅ Dataview to Bases converter: Bases Toolbox
✅ Bases Syntax: Bases syntax - Obsidian Help
✅ obsidian-dataview-properties plugin: https://github.com/Mara-Li/obsidian-dataview-properties
8. Tutorial Video
##