
Obsidian's official Web Clipper is becoming more mature. Today, let's briefly introduce its settings and usage.
After installing it from the corresponding download location and displaying it on the toolbar, you can click the icon at any time to clip web content.
Obsidian Web Clipper offers a template feature. You can set up templates according to your needs, allowing clipped content to be generated in the template's style. The default template 'Default' is already sufficient for general use, but if you have different requirements, you can create a new template using 【New template】 in the extension's options.
1. Installation
Go to the official clipper page Obsidian Web Clipper to find download links for different browsers. After installing it, display it on your toolbar to start using it.
Before starting to use it formally, let's configure its templates.
2. Template Settings
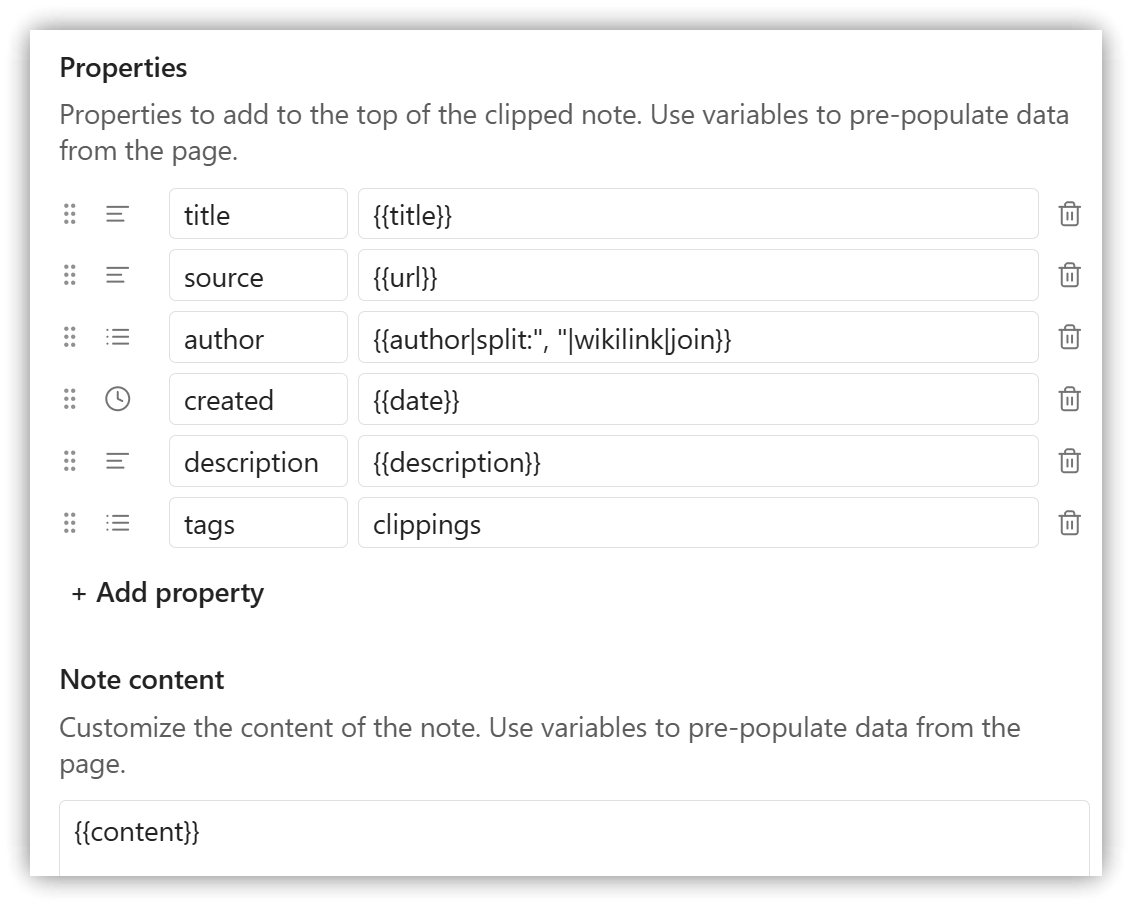
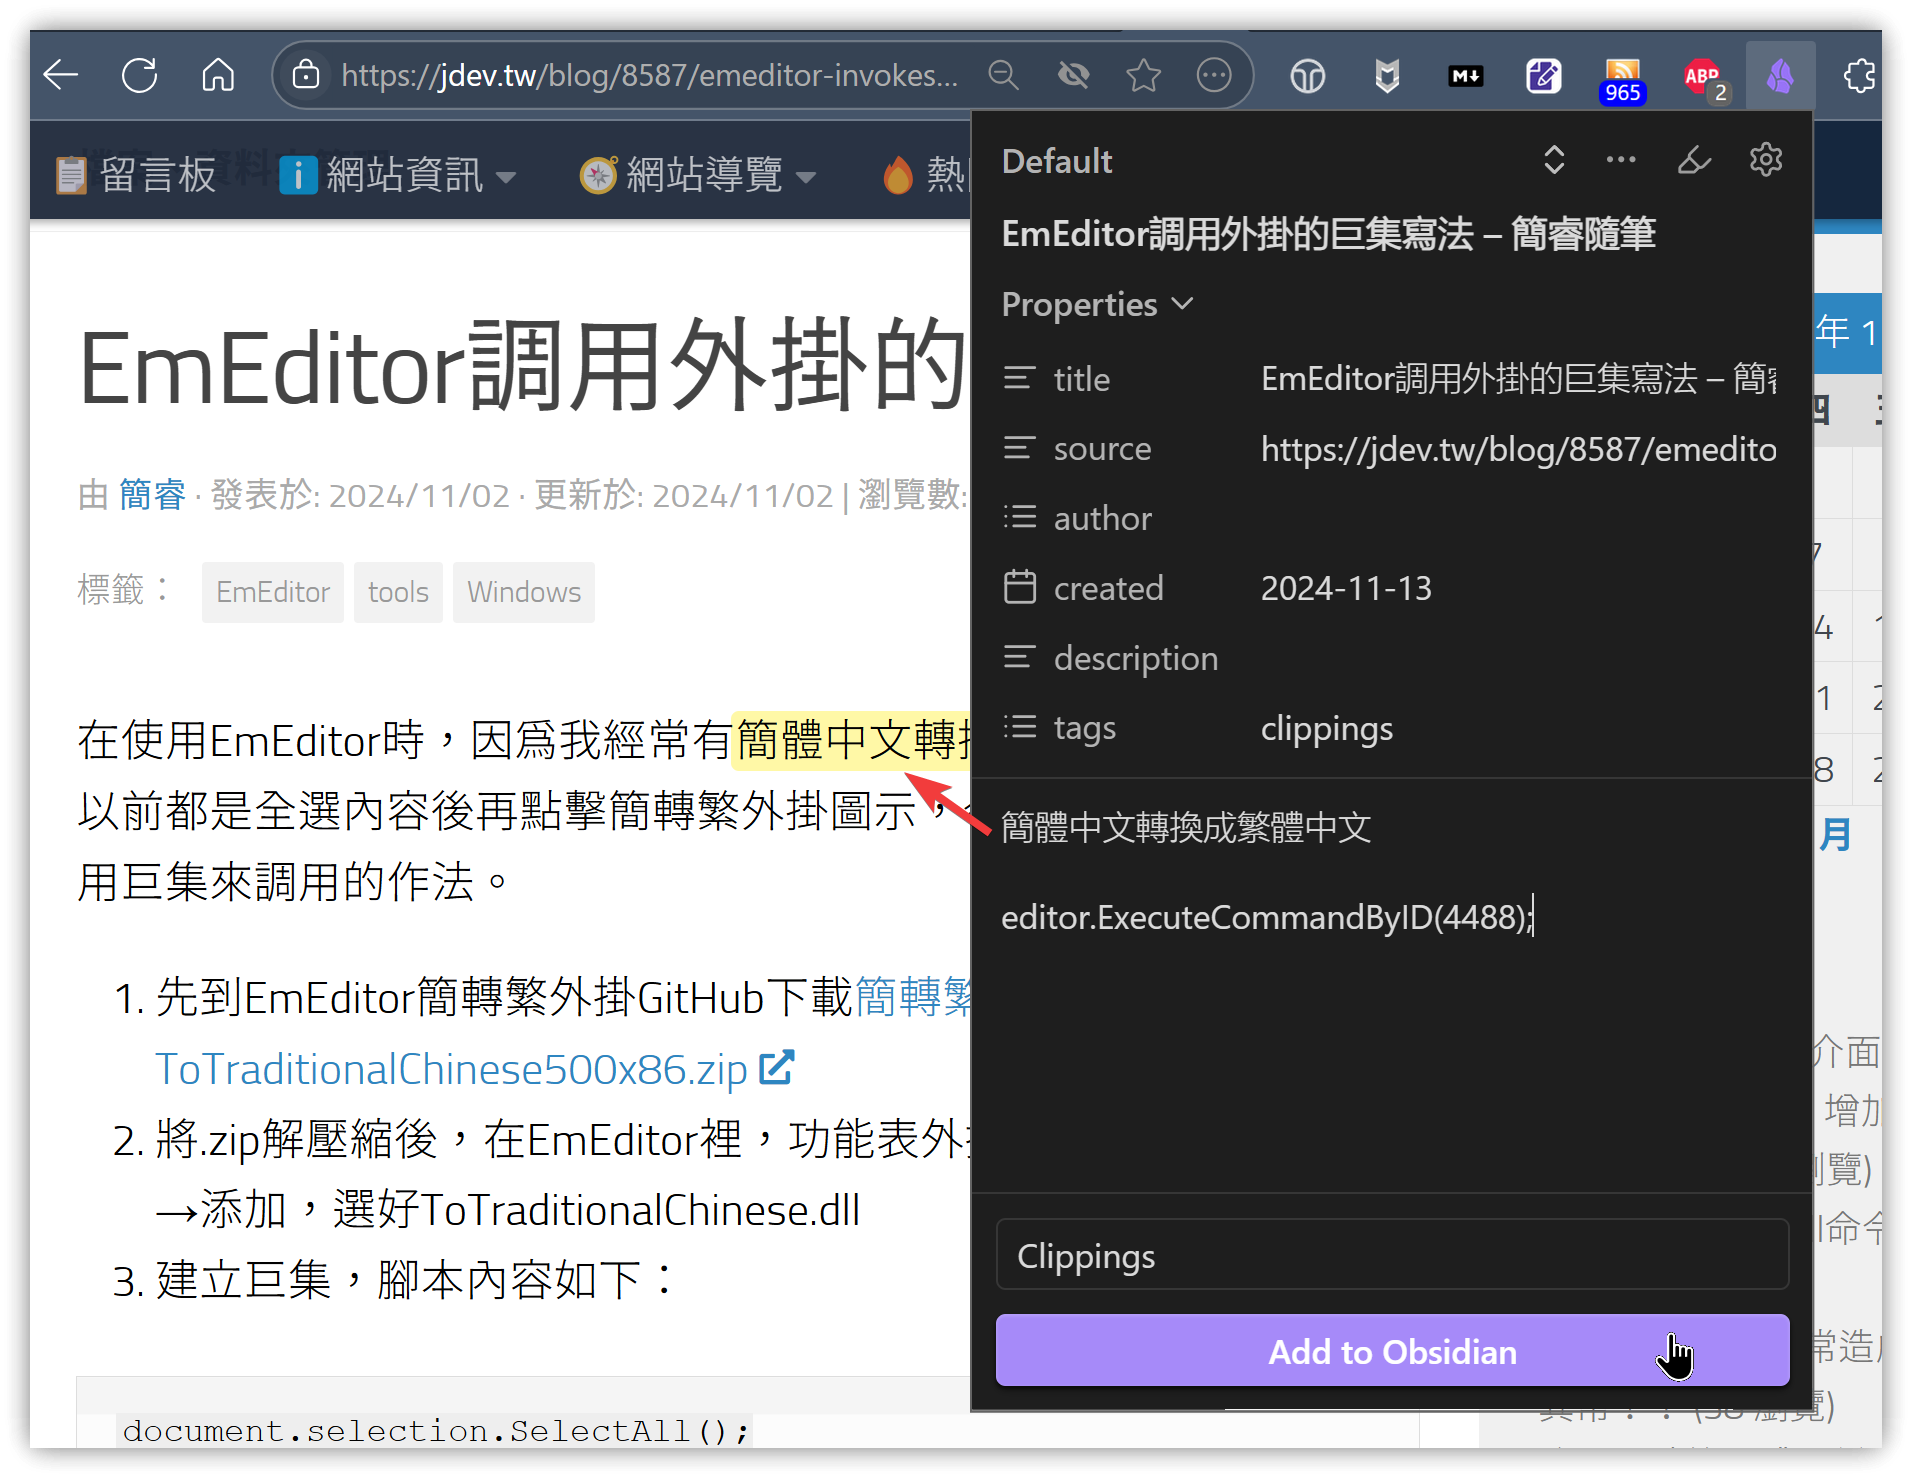
You can specify which template to apply to the clipped content. The default 'Default' template primarily sets 6 Properties, and the Note content is {{content}}.
The note storage location is set in the template's 【Note location】 field.
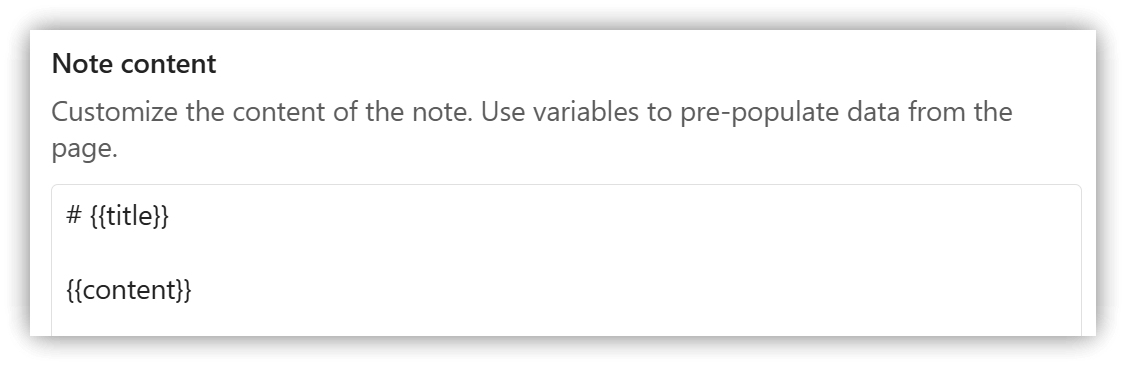
Since I use Heading 1 for both the title and filename in my notes, I customized a new template and modified the Note content:
3. Template Variables
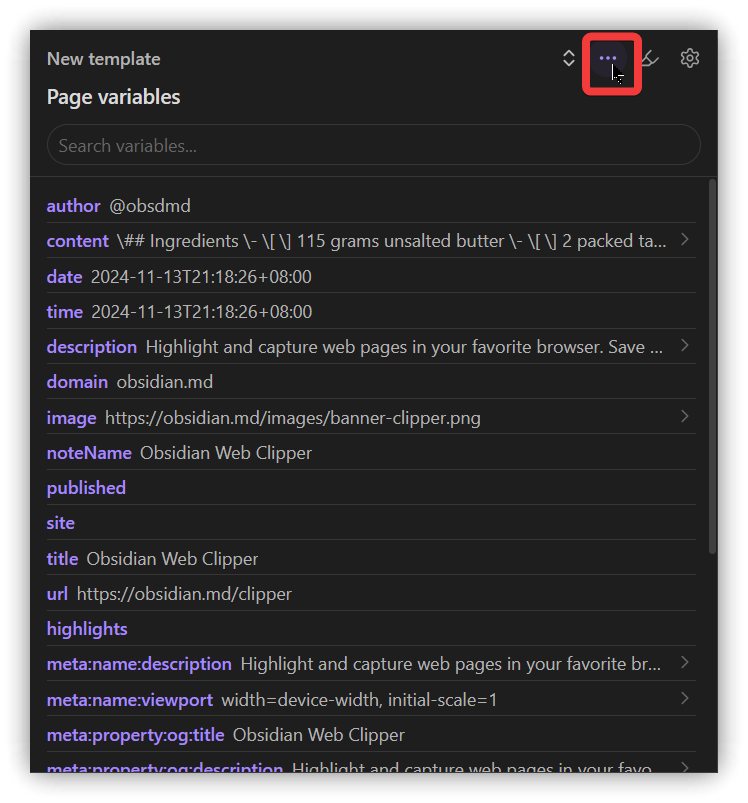
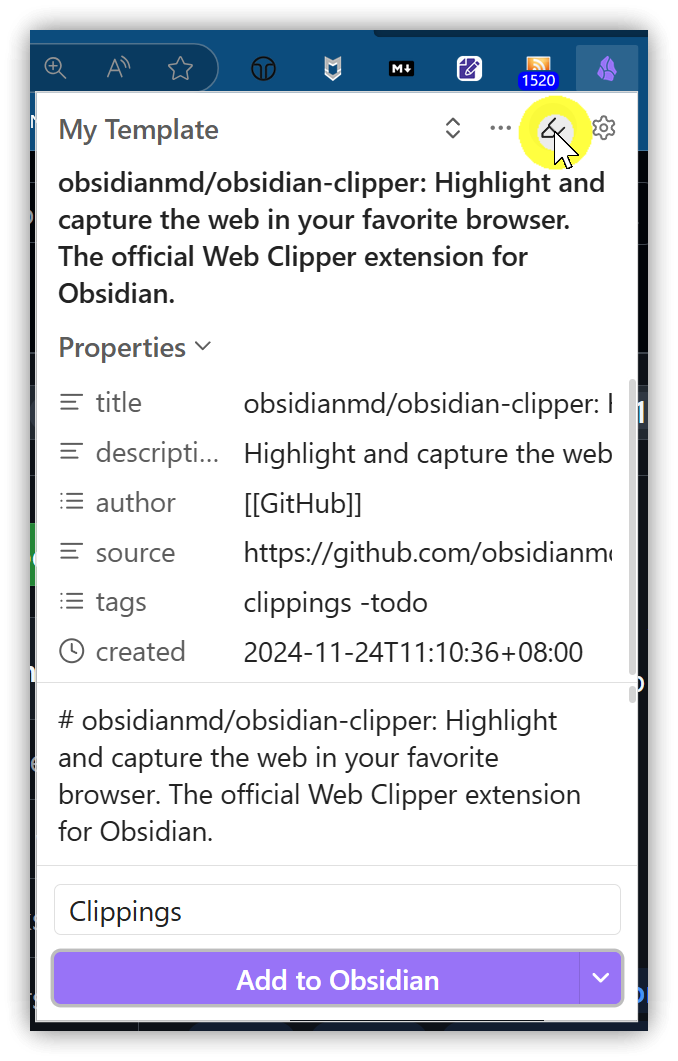
Click the 【•••】 icon in the top-right corner of the extension to view all template variables. These variables can be used in YAML properties and the note body content.
author: Web page authorcontent: Web page contentcontentHtml: Web page content (HTML format)fullHtml: Unprocessed web page content (HTML format)date: Clipping datetime: Clipping date + timedescription: Web page descriptiondomain: Web page domainimage: Image URL for sharingpublished: Publication date, likely used by the Obsidian Publish servicesite: Site name (seems to be the value oftitle)title: Web page titleurl: Web page URLhighlights: Content marked as highlighted on the web pagemeta...: Metadata within the web page'sheadsection- For others, please refer to web-clipper variables
Filters can be used within variables, using the format {{variable|filter}}. Please refer to web-clipper filters.
4. Highlighter Feature
Besides clipping the entire page, you can also enable the highlighter feature. When enabled, the selected text you clip becomes the Note content. Clicking 'Add to Obsidian' will save only the highlighted parts. When you revisit this webpage later, the highlighted sections will automatically be displayed.
5. 💡 Related Links
💡 Explanation Article: https://jdev.tw/blog/8611/
✅ GitHub: https://github.com/obsidianmd/obsidian-clipper
✅ Obsidian Web Clipper: https://obsidian.md/clipper
✅ Chrome Web Store Obsidian Web Clipper: https://chromewebstore.google.com/detail/obsidian-web-clipper/cnjifjpddelmedmihgijeibhnjfabmlf (for Chrome, Brave, Edge, Arc, Orion, and other Chromium-based browsers)
✅ Firefox Addons: https://addons.mozilla.org/en-US/firefox/addon/web-clipper-obsidian/ (for Firefox, Firefox Mobile)
✅ Safari Extensions: https://apps.apple.com/us/app/obsidian-web-clipper/id6720708363 (for macOS, iOS, and iPad)