
1. Introduction
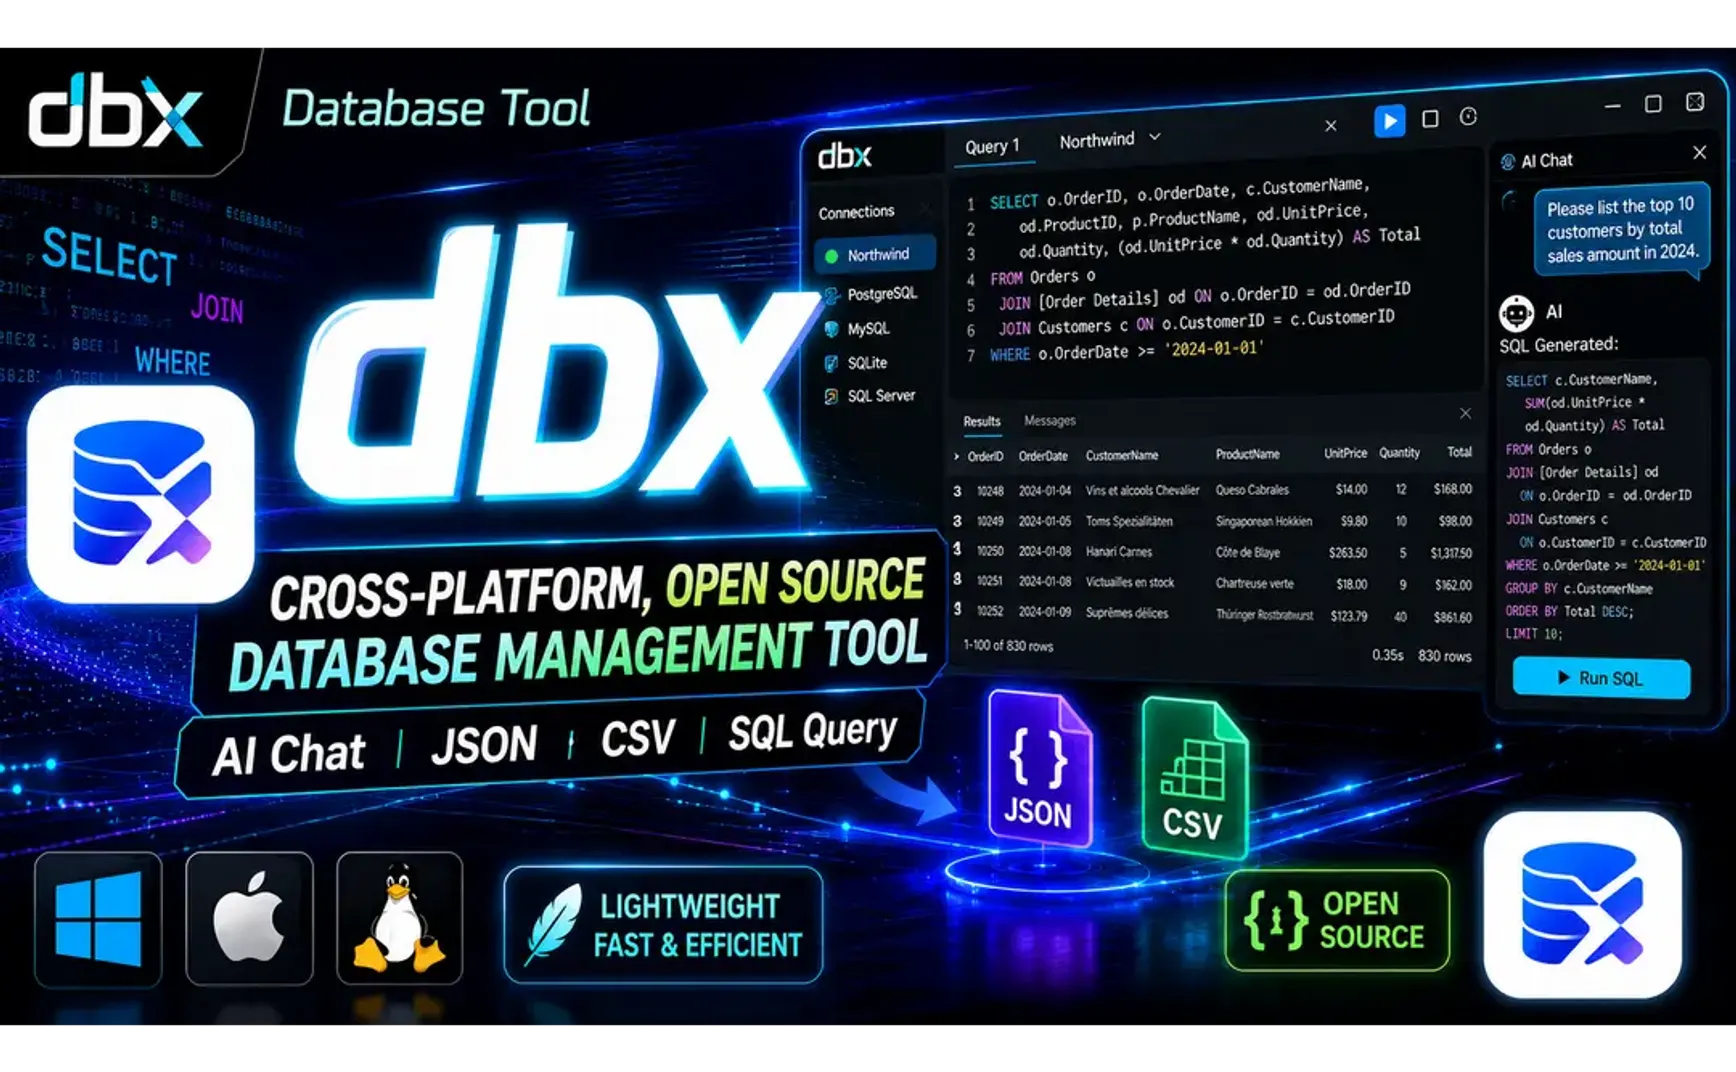
dbx is a database client tool that is open-sourced on GitHub and free to use. Developed in Rust, it runs with high execution efficiency. Unlike dBeaver, DataGrip, and Aqua Data Studio, which all require the Java Runtime, dbx only needs a single executable file to run. Its convenience of use is unmatched. Those who frequently work with databases are highly encouraged to give it a try.
dbx has built-in AI Chat integration. Once configured, you can directly use the current connection information as context to converse with a configured AI Provider, effectively generating the SQL statements you need.
If a portable.dbx file exists in the same folder as the dbx executable, it will automatically enter portable mode, creating a dbx.db file in the data subdirectory to store connection settings and other configuration data.
This time, I will first walk through the steps to establish a connection, then demonstrate how to use dbx to query and maintain .json files and .csv files—querying text file contents directly with SQL statements. The examples use Northwind data, and the test data can be found and downloaded by searching on GitHub.
2. UI Layout
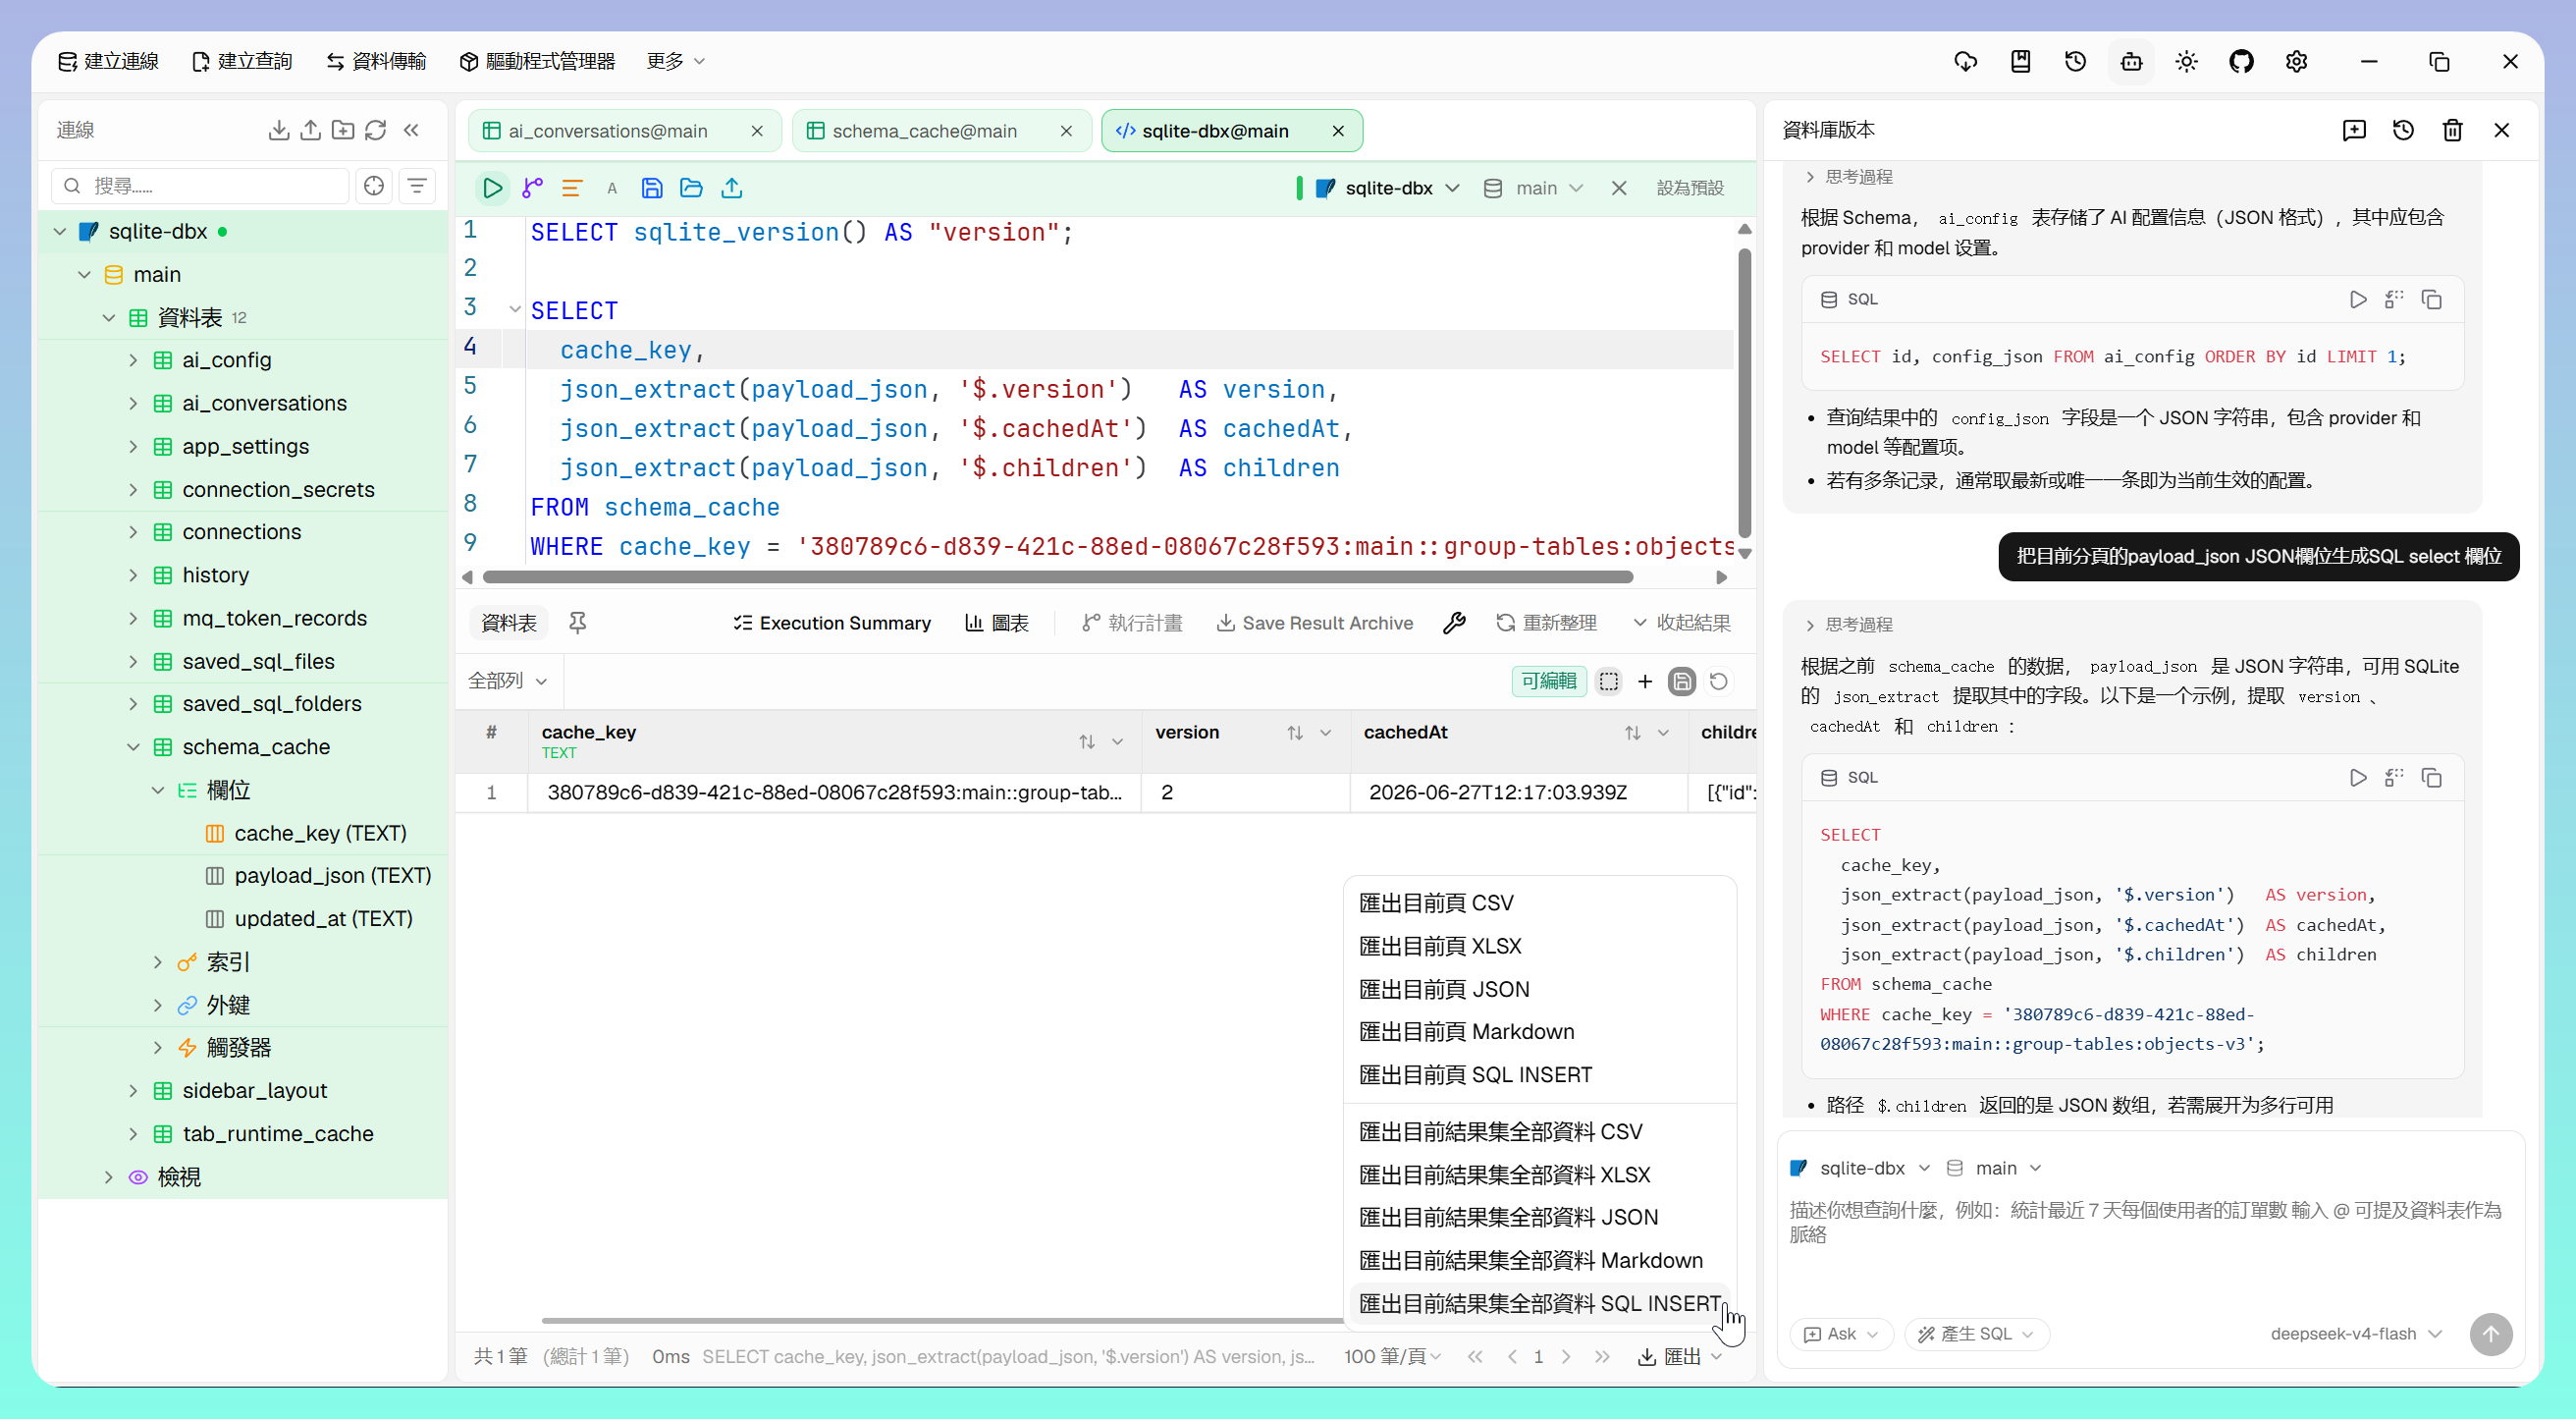
- The top area is the toolbar
- The left side is the connection navigation panel
- The center is the query editor and data Grid
- The right side contains various property panels, including the AI chat area
- Most functions are driven by right-click context menus
3. AI Settings
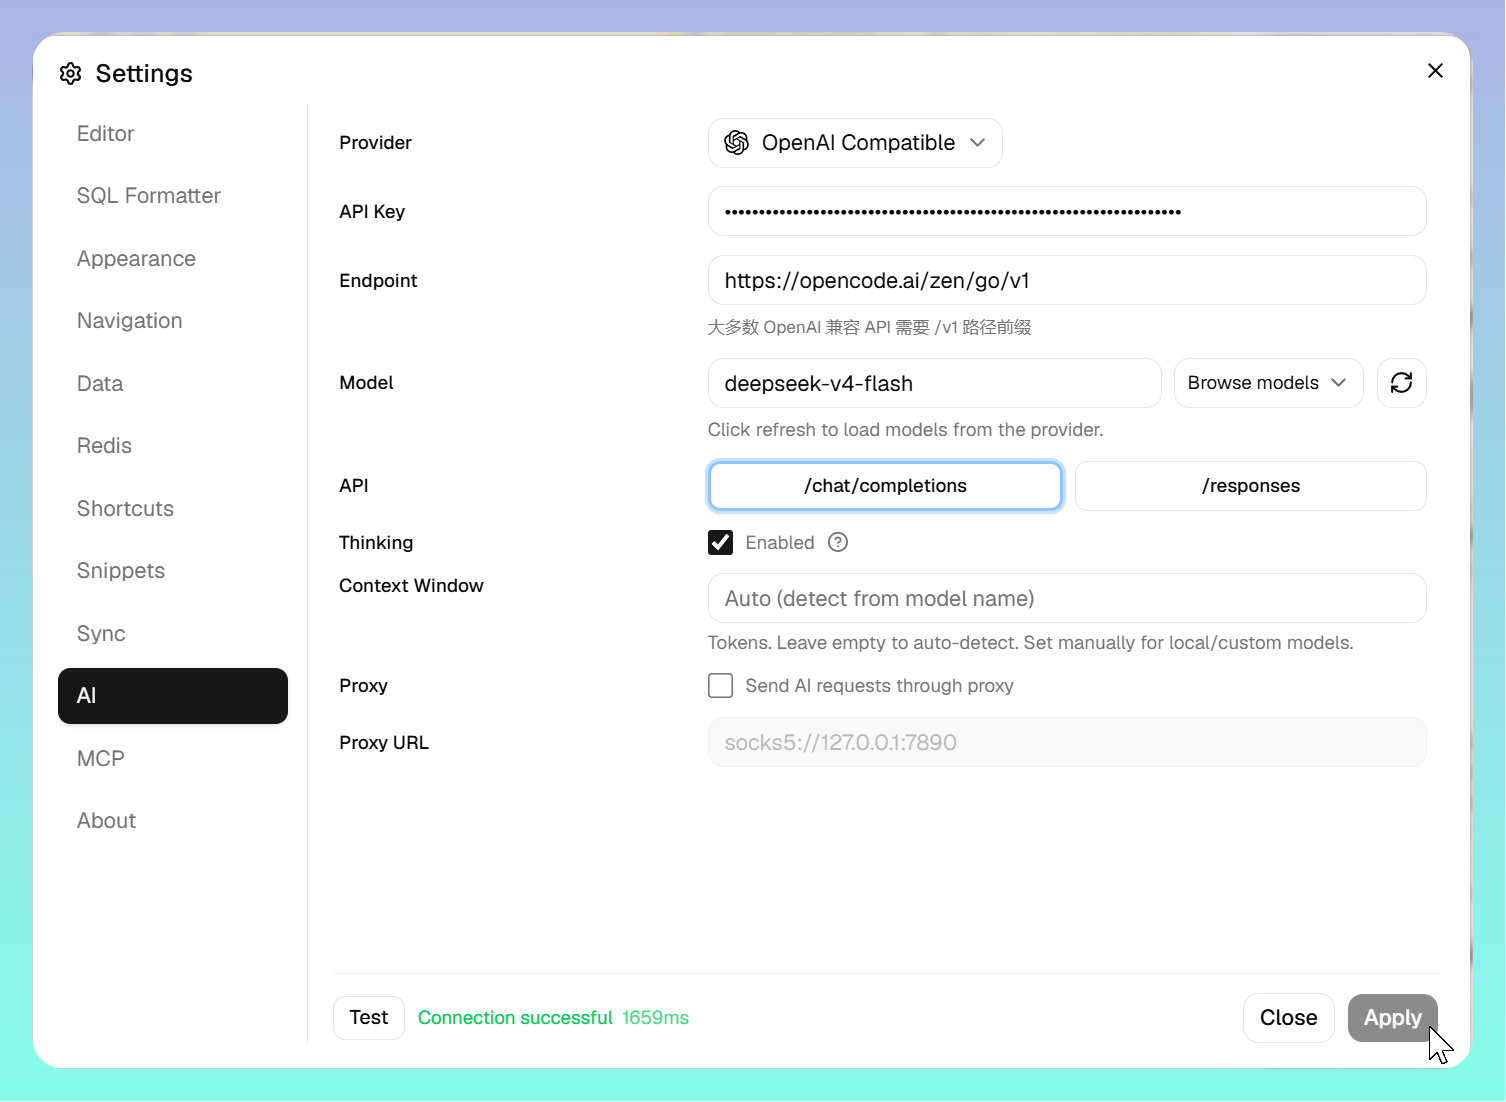
Using OpenCode as an example:
- Provider: Select OpenAI Compatible
- API Key: Paste in your API Key
- Endpoint:
https://opencode.ai/zen/go/v1 - Model: First click Refresh on the right side, then select a model
- Click Test at the bottom to verify the connection is working
dbx has a built-in MCP Server. AI Agents can perform SQL operations on connections through dbx's MCP API.
4. Establishing a Connection
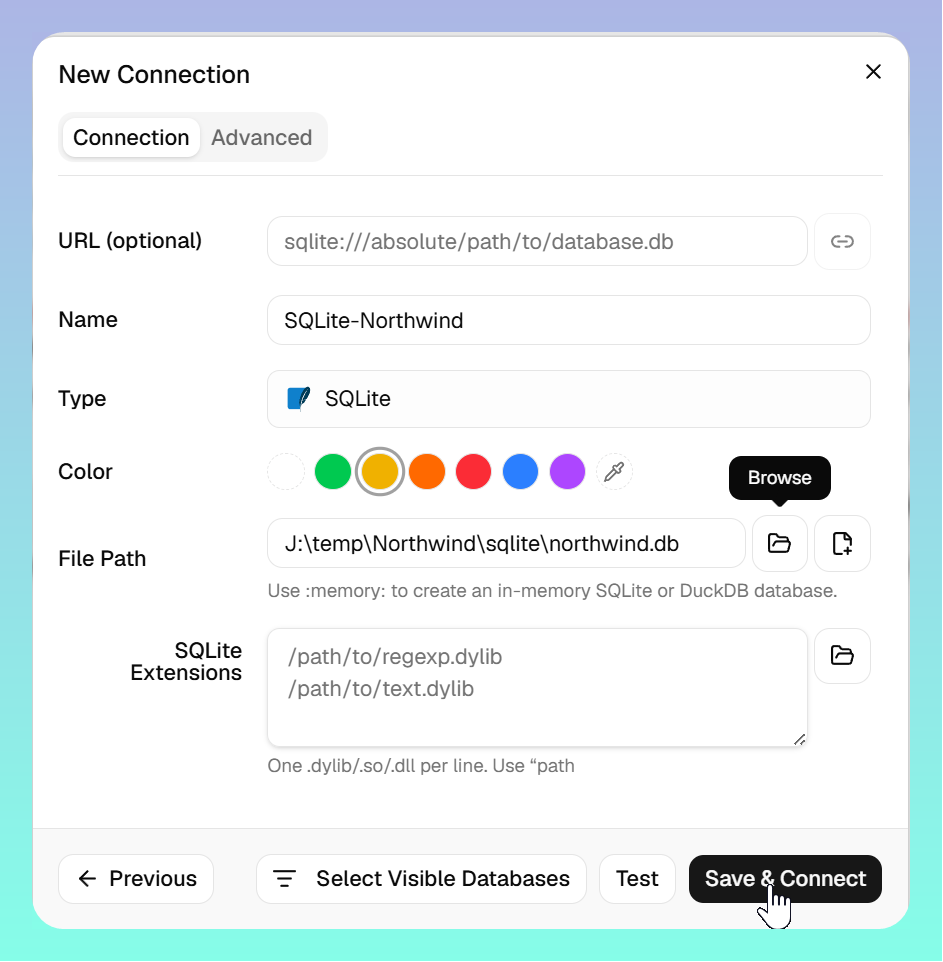
Using SQLite's Northwind.db as an example.
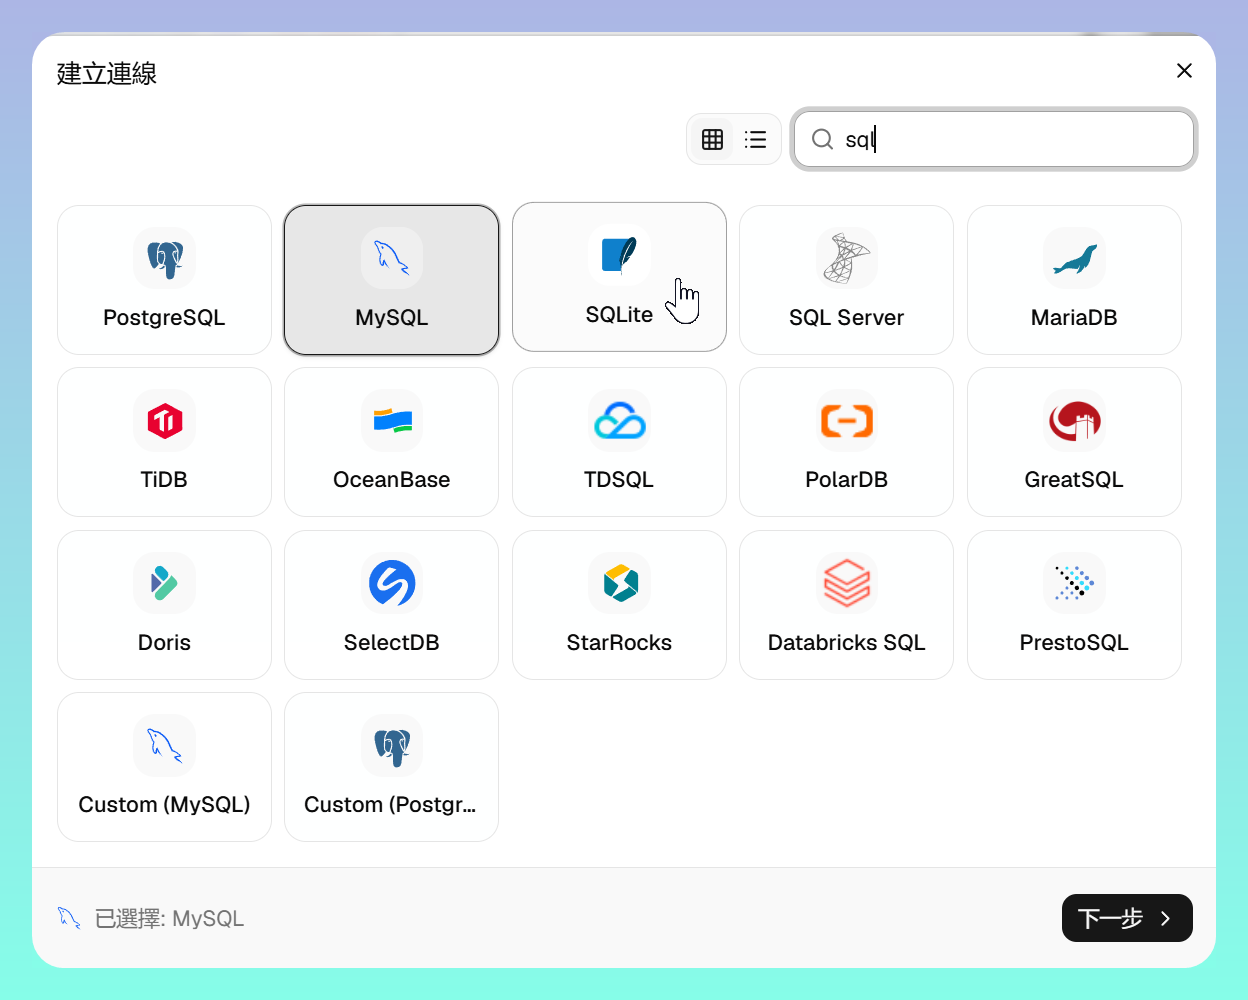
- Click New Connection in the upper-left corner
- Choose the database type you want to use, select SQLite, then click Next > in the lower-right corner
- Enter a name and specify the file, then click Save & Connect
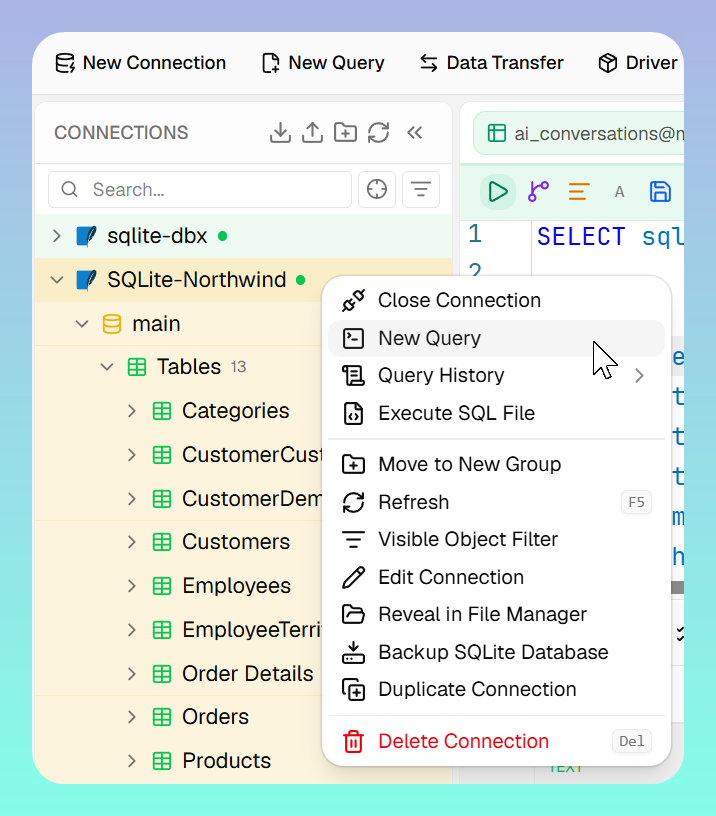
- Right-click the connection → New Query to create a new query tab
- You can also click a table to open the data browser tab
5. Creating a Connection with .csv Files
Using multiple Northwind .csv files as an example.
The DuckDB database can directly read and write .csv and .json files.
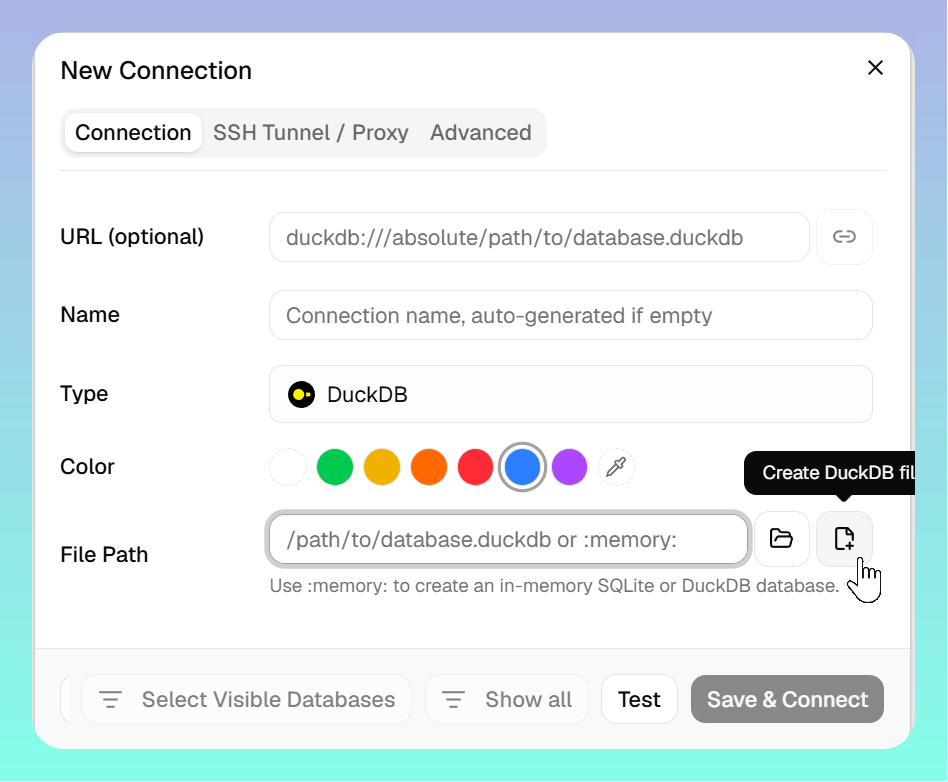
- Click New Connection in the upper-left corner
- Choose the database type you want to use, select DuckDB, then click Next > in the lower-right corner
- Name: Give it a name. Color: Choose an identifying color
- File Path: Click Create DuckDB File on the right to create a file in a specific folder (custom name; the default is database.duckdb)
- You can also enter
:memory:to create an in-memory temporary database
- You can also enter
- Click Save & Connect
5.1. Single Table
-- List all file names
SELECT * FROM glob('j:/temp/Northwind/csv/*.csv');

-- Query file data
select * from 'j:\temp\Northwind\csv\Customers.csv';
5.2. Creating Tables with AI
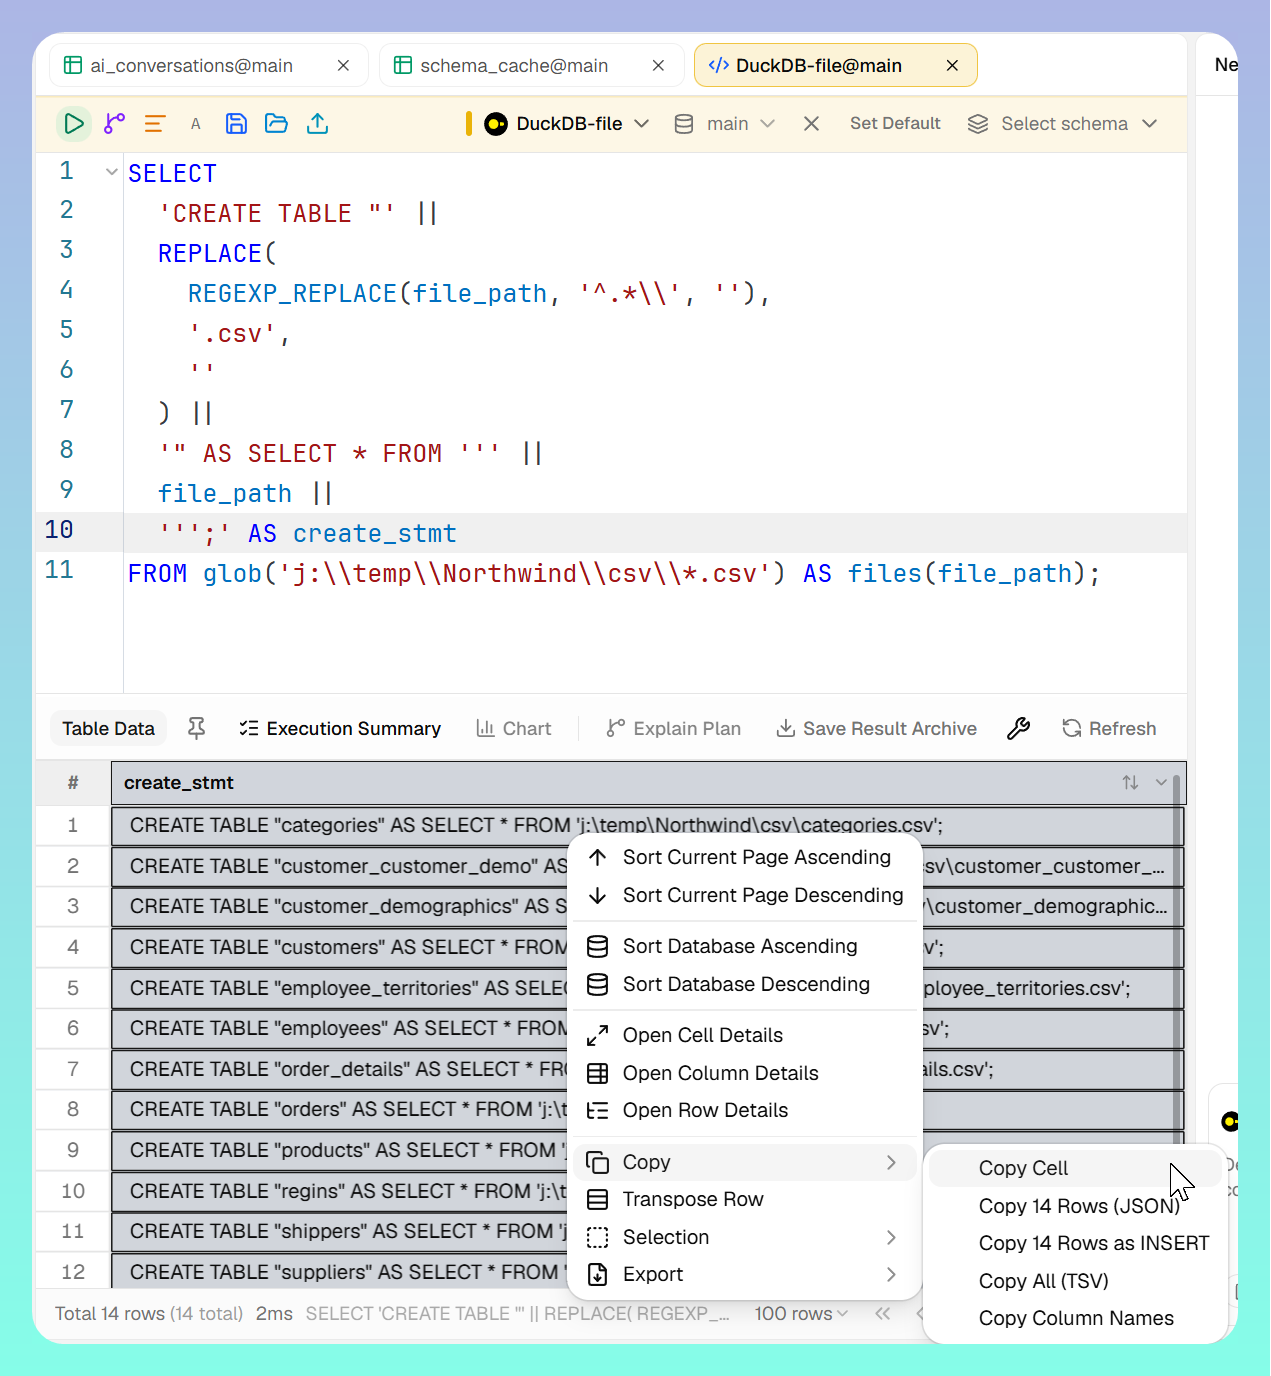
- Click AI in the upper-right corner and enter the following prompt to generate SQL statements that create tables from .csv files
- If execution fails, use Fix with AI to repeatedly correct until successful, or switch to a different model
Read j:\temp\Northwind\csv\*.csv and generate a SQL statement for each .csv file in the format: create table filename as select * from 'full file path';
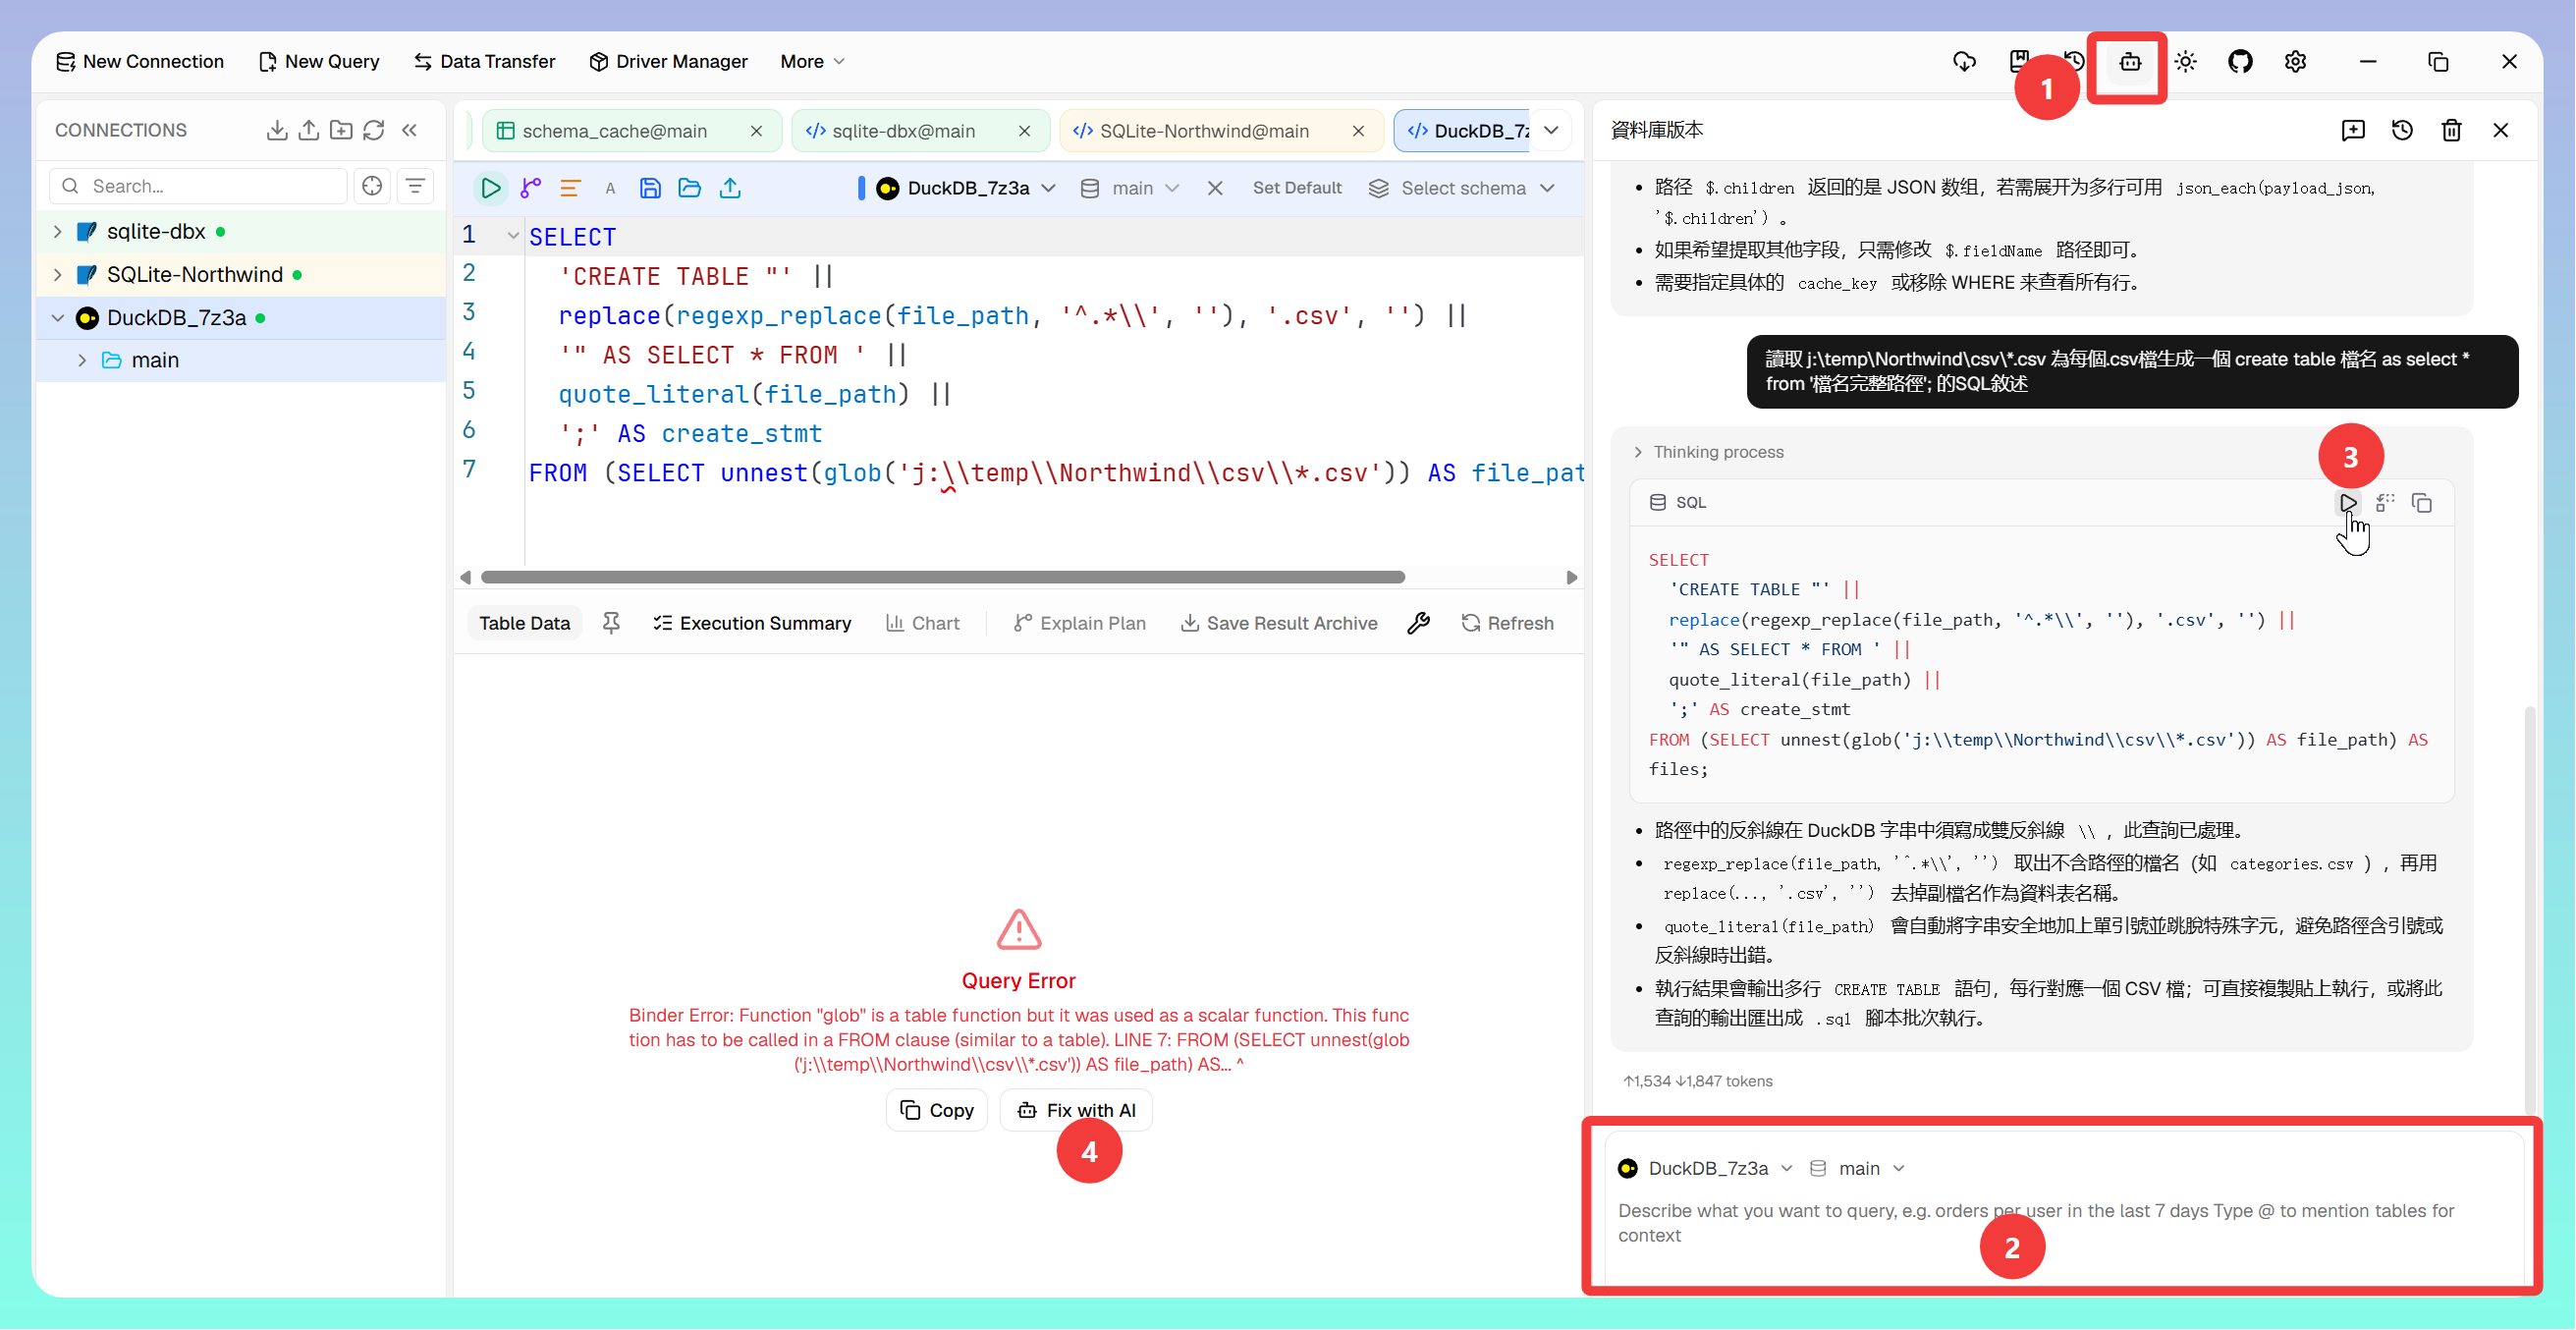
- After the SQL statements execute successfully, right-click → Copy → Copy All (TSV) (or press Ctrl+C)
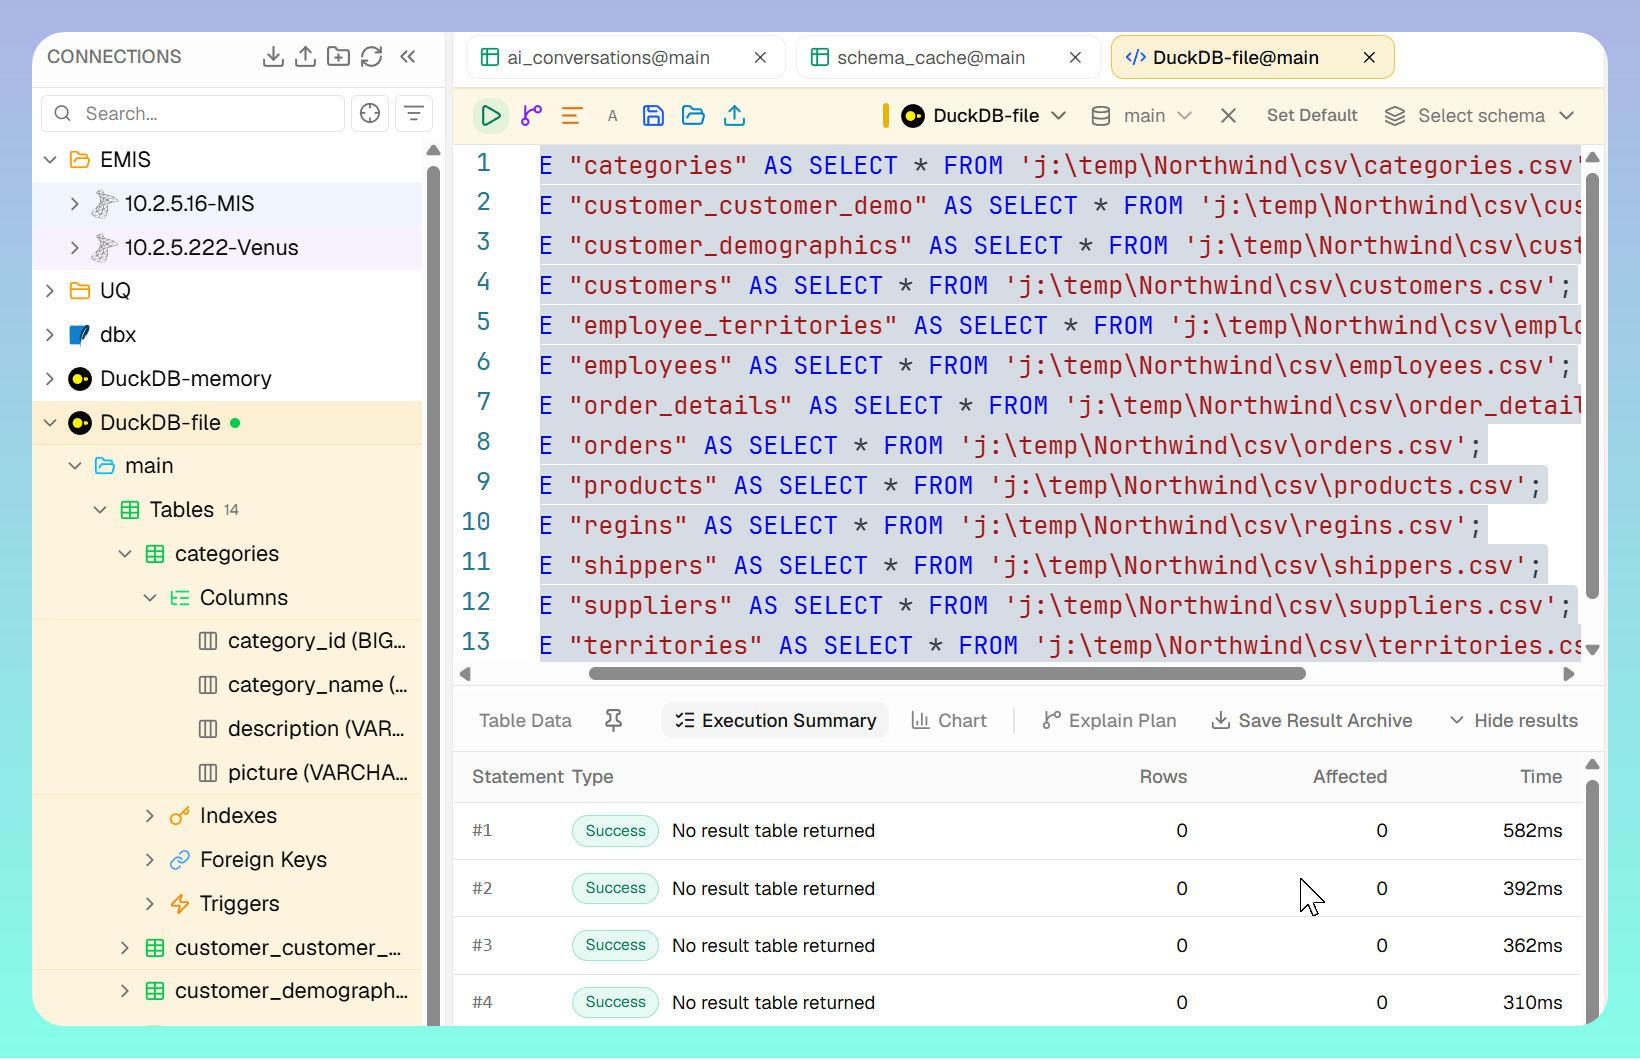
- Paste the clipboard contents into the editor, make corrections, select all, and execute
6. Creating a Connection with .json Files
Using multiple Northwind .json files as an example.
Follow the same approach as with .csv, just using .json files instead.
7. 💡 Related Links
✅ Explanation article (Traditional Chinese): https://jdev.tw/blog/9228/
✅ Explanation article (English)
✅ Explanation article (Japanese)
✅ GitHub: https://github.com/t8y2/dbx