
Obsidian is a knowledge base that stores everything locally, so painless syncing across different devices is an urgent need that must be addressed.
Initially, I used Dropbox cloud storage, but the free version of Dropbox only allows syncing across three devices. When I needed to sync more than three devices, I switched to Git. Besides having no device limit, it also fully preserves the revision history of notes.
In Obs177|A New Choice for Obsidian Note Backup: A Complete Guide to Git Version Control and Mobile Sync, I introduced how to sync Obsidian vaults across different devices using Git version control within Obsidian. If you've never used Git or the concept of version control, the learning curve was probably quite painful.
The Agentic Git Sync plugin I'm introducing today is a streamlined, lightweight version of Git sync functionality. It leverages Git's sync capabilities without requiring you to understand Git's concepts and technical details—just use it!
- Agentic Git Sync currently only uses GitHub as the remote service and does not yet support other Git servers.
- Mobile is not yet supported. Android users can still use the GitSync App for syncing.
1. Preparation
Before installing this plugin, it's best to have the following information ready:
-
GitHub repository URL: Copy the remote URL for local syncing, i.e., https://github.com/your-account/your-repository.git
-
GitHub Personal Access Token
- After logging into GitHub, click your avatar in the top-right corner → 【⚙️ Settings】→ 【❮ ❯ Developer Settings】 at the bottom of the left sidebar
- Click Personal access tokens →
- Fine-grained tokens: Generate new token, Contents: read & write on the repos

- Tokens (classic): repo scope
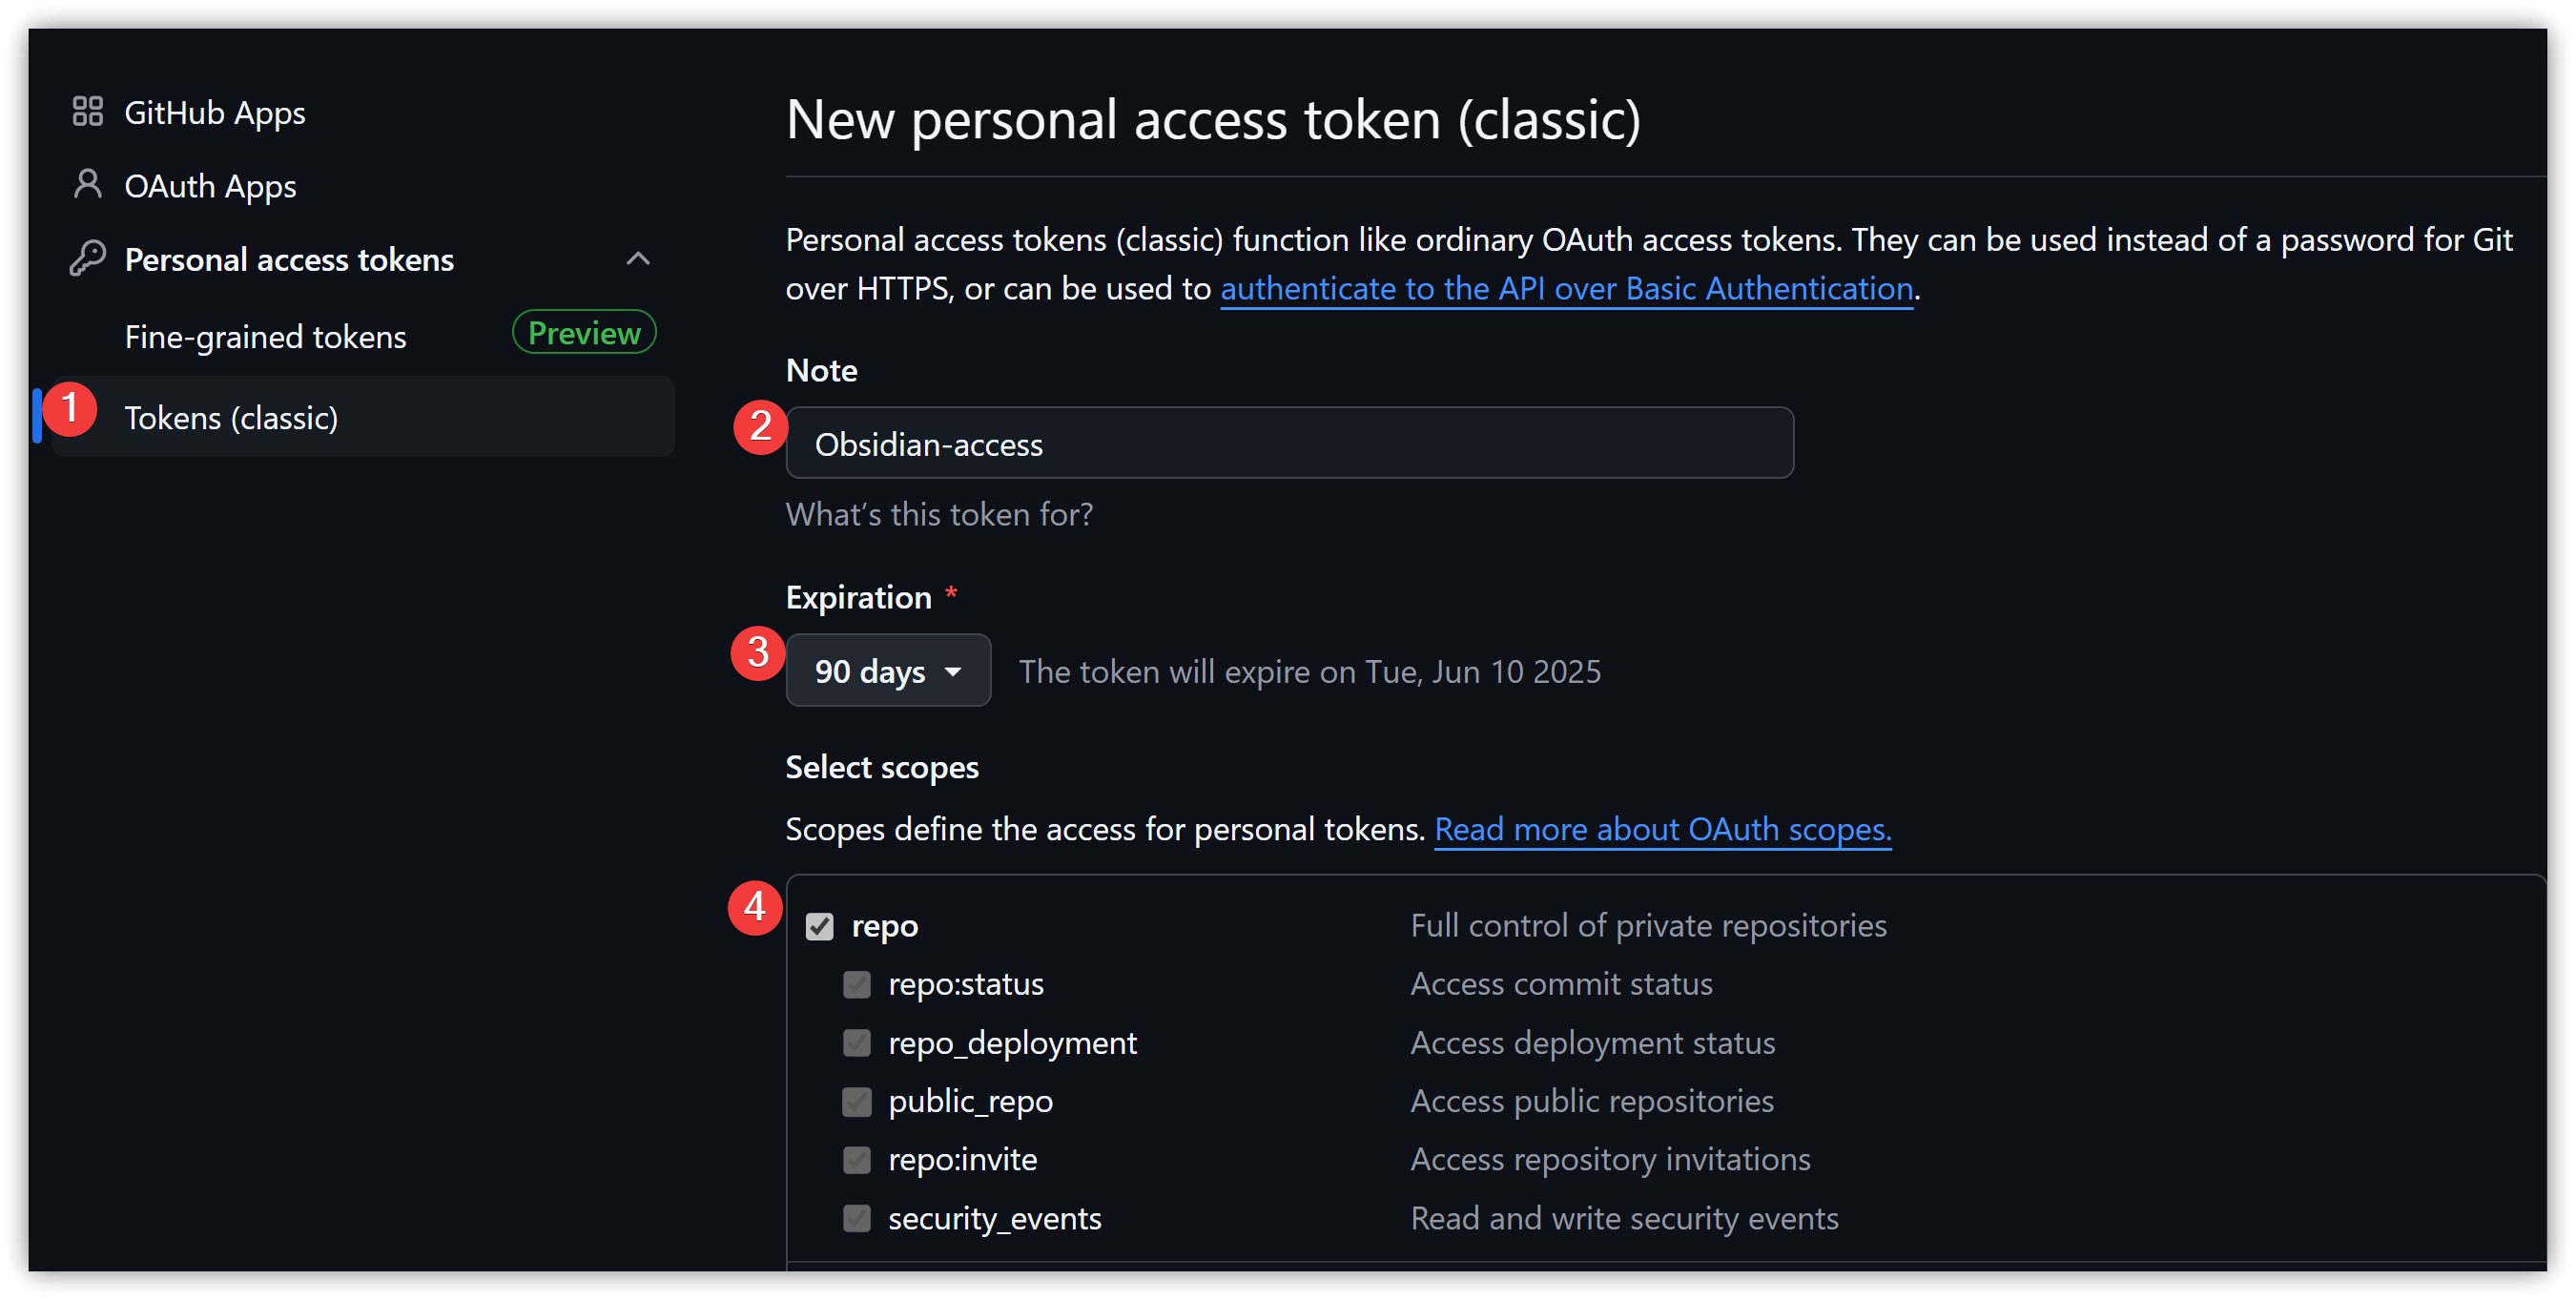
- Fine-grained tokens: Generate new token, Contents: read & write on the repos
2. Installation and Configuration
- Launch Obsidian. It's recommended to create a new Vault or open a folder not yet managed by Git.
- Search for Agentic Git Sync in the third-party community plugins, then install and enable it.
- Go to Settings → search for Agentic Git Sync → Options. You can click 【Run setup wizard】 for initial configuration.
- Fill in the remote URL and Personal Access Token as needed.
- Click 【Save & sync】 to perform the first sync.
3. Usage
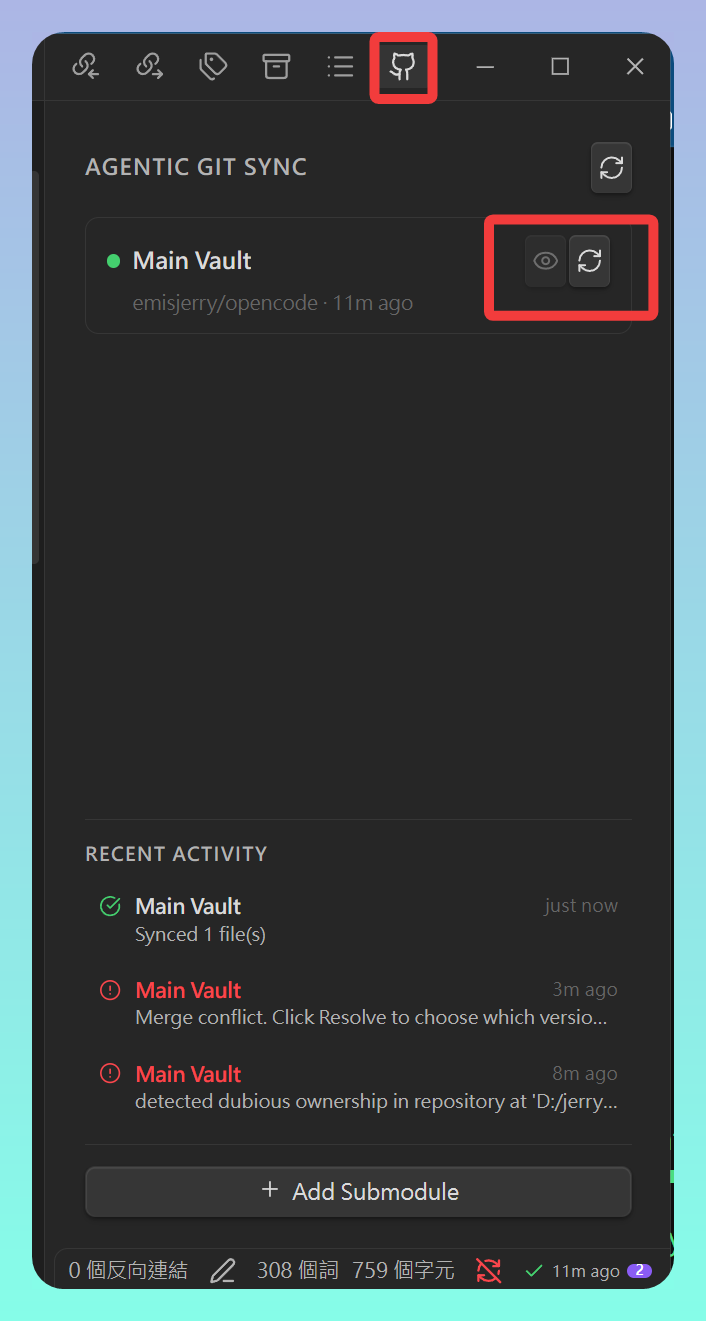
- After installation, the sync status will be displayed in the bottom-right status bar. A GitHub logo will appear in the right sidebar; clicking it shows the sync status.
- If you need to use submodules, click 【Add submodule】 in the sync status panel.
4. Conflict Resolution
The Agentic Git Sync plugin provides AI to resolve sync conflicts between devices. Currently, it supports Deepseek and Gemini; support for other large models may come later.
If AI cannot resolve the conflict, you can also choose manual resolution in the conflict resolution interface to decide how to handle it.
5. 💡 Related Links
✅ Explanation article (Traditional Chinese): https://jdev.tw/blog/9214/
✅ Explanation article (English)
✅ 解説記事 (日本語)
✅ GitHub: https://github.com/leweii/agentic-git-sync/